If you missed the first two articles in this series, you can find them here: new selections and new Smart Extrusion.
The newly added Bitmap Random Tiling OSL map is perfect for those situations where you need to cover large areas with a single material, like roads, terrains, building facades, and as soon as you apply the texture there’s an ugly, and not very realistic, tiling on the geometry. Let’s see how it works.
You can find it under Maps → OSL → Bitmap Random Tiling
There is a long list of parameters, but we’ll focus on the Randomize by UV position and Transform settings, that are used to “remove” the tiling effect.

First, let’s see how to use those parameters.
Features and Parameters overview:
- Randomization → Randomize by UV position
- Block Scale → scale the UV grid used to randomize the bitmap
- Wiggle Scale → scale of the wiggle along the borders of the bitmap
- Edge Fuzz → amount of crossfade along the edges of the bitmap, values too high can create excessive noise in same cases, depending on the texture
- Wiggliness → amount of wiggle along the edges of the bitmap
- Randomization → Transform
- Rotation → range to randomize the rotation of each single tile of the grid
- Scale → range to scale each tile of the grid
- Offset → range to translate each tile of the grid
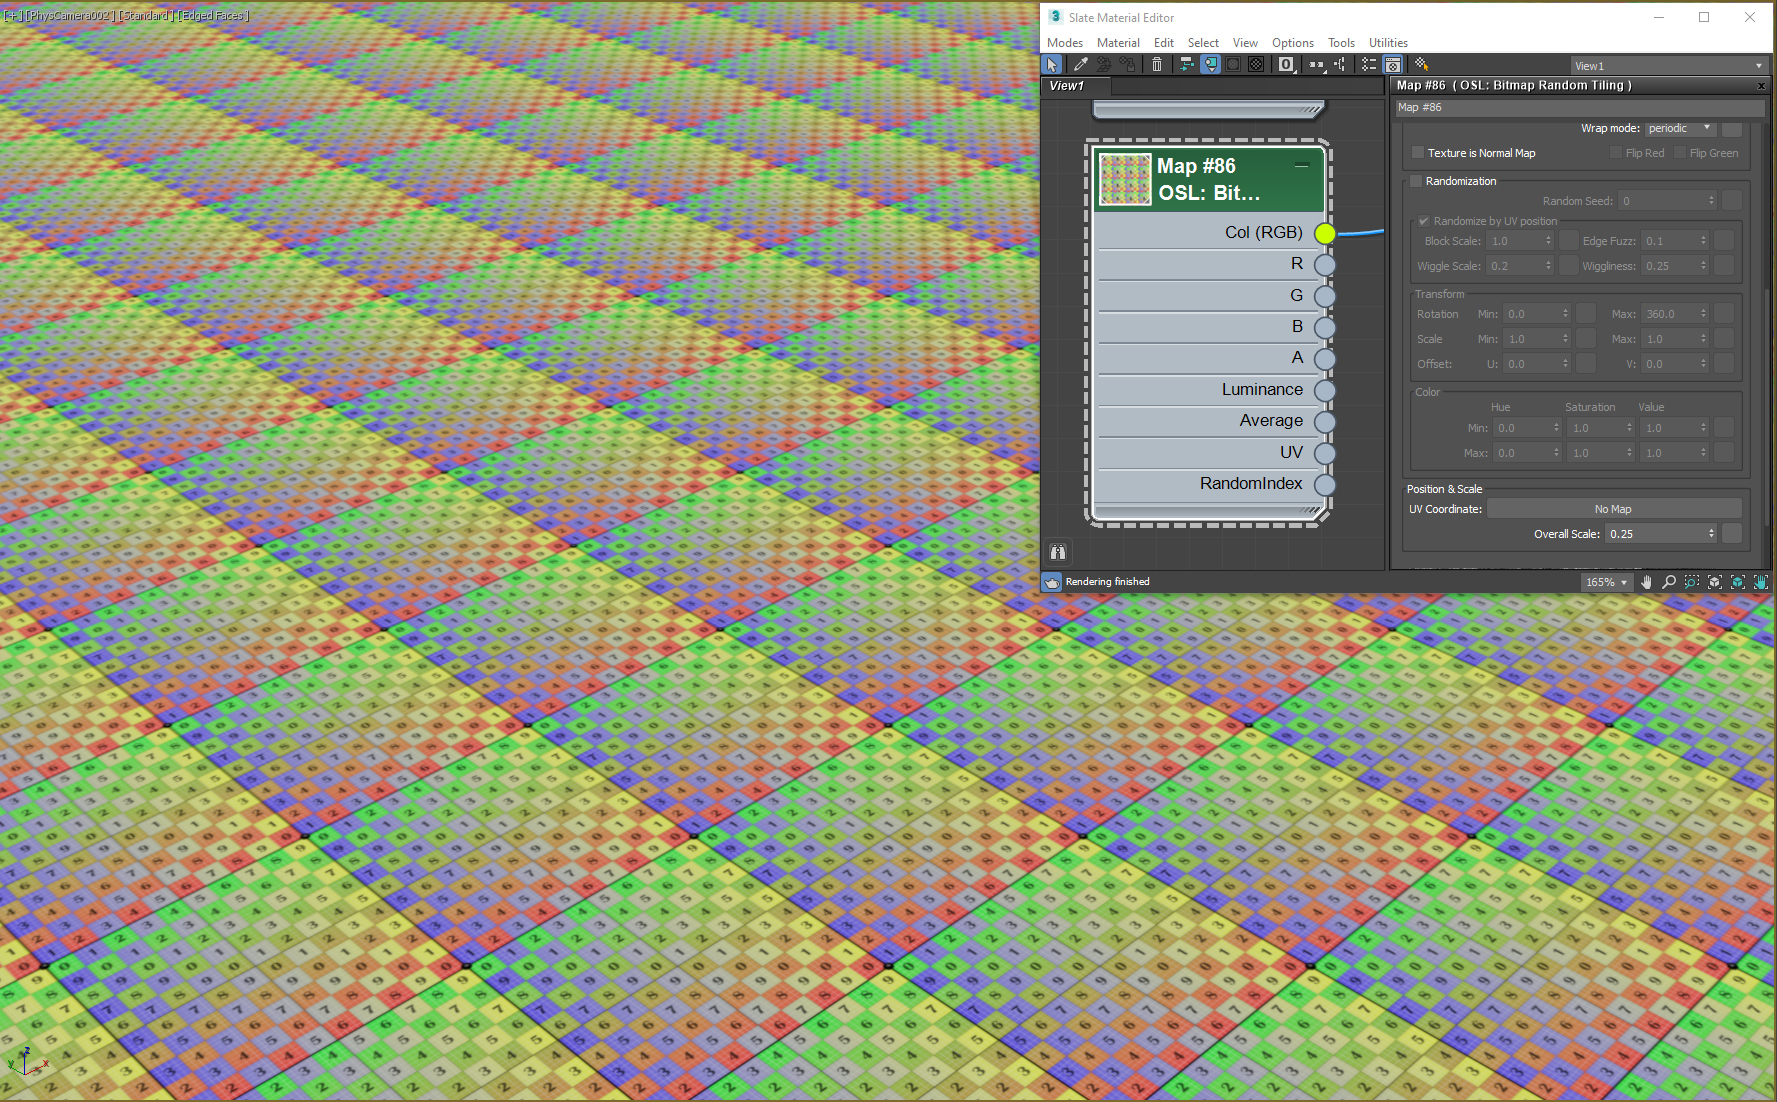
When the randomization option is off the Bitmap Random Tiling map behaves like a normal Bitmap, as you can see from the image below:

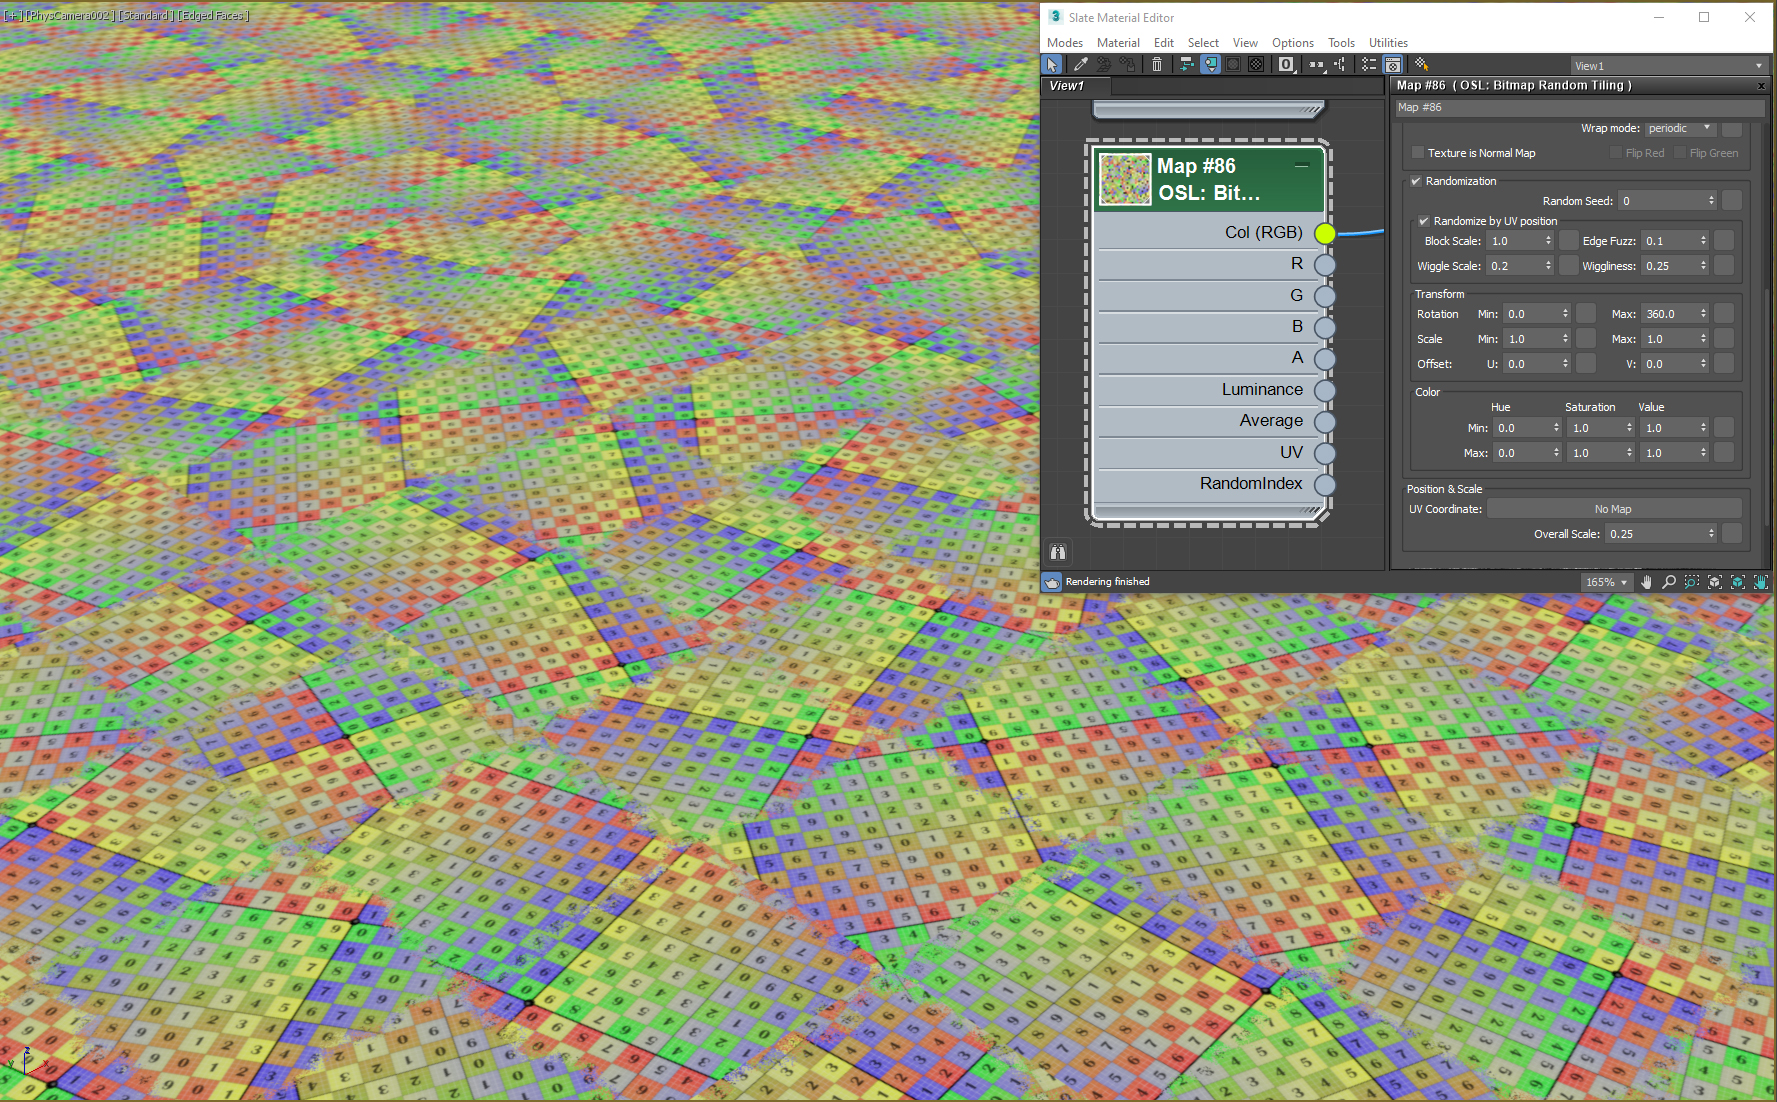
Once we enable the checkbox Randomization, as well as Randomize by UV Position, 3ds Max will apply the mapping to the texture. Remember that the four parameters Block Scale, Edge Fuzz, Wiggle Scale and Wiggliness control only how to deal with the “seams” generated from the randomization. In order to actually change the tiling we need to work with the values in the Transform section: Rotation, Scale and Offset.

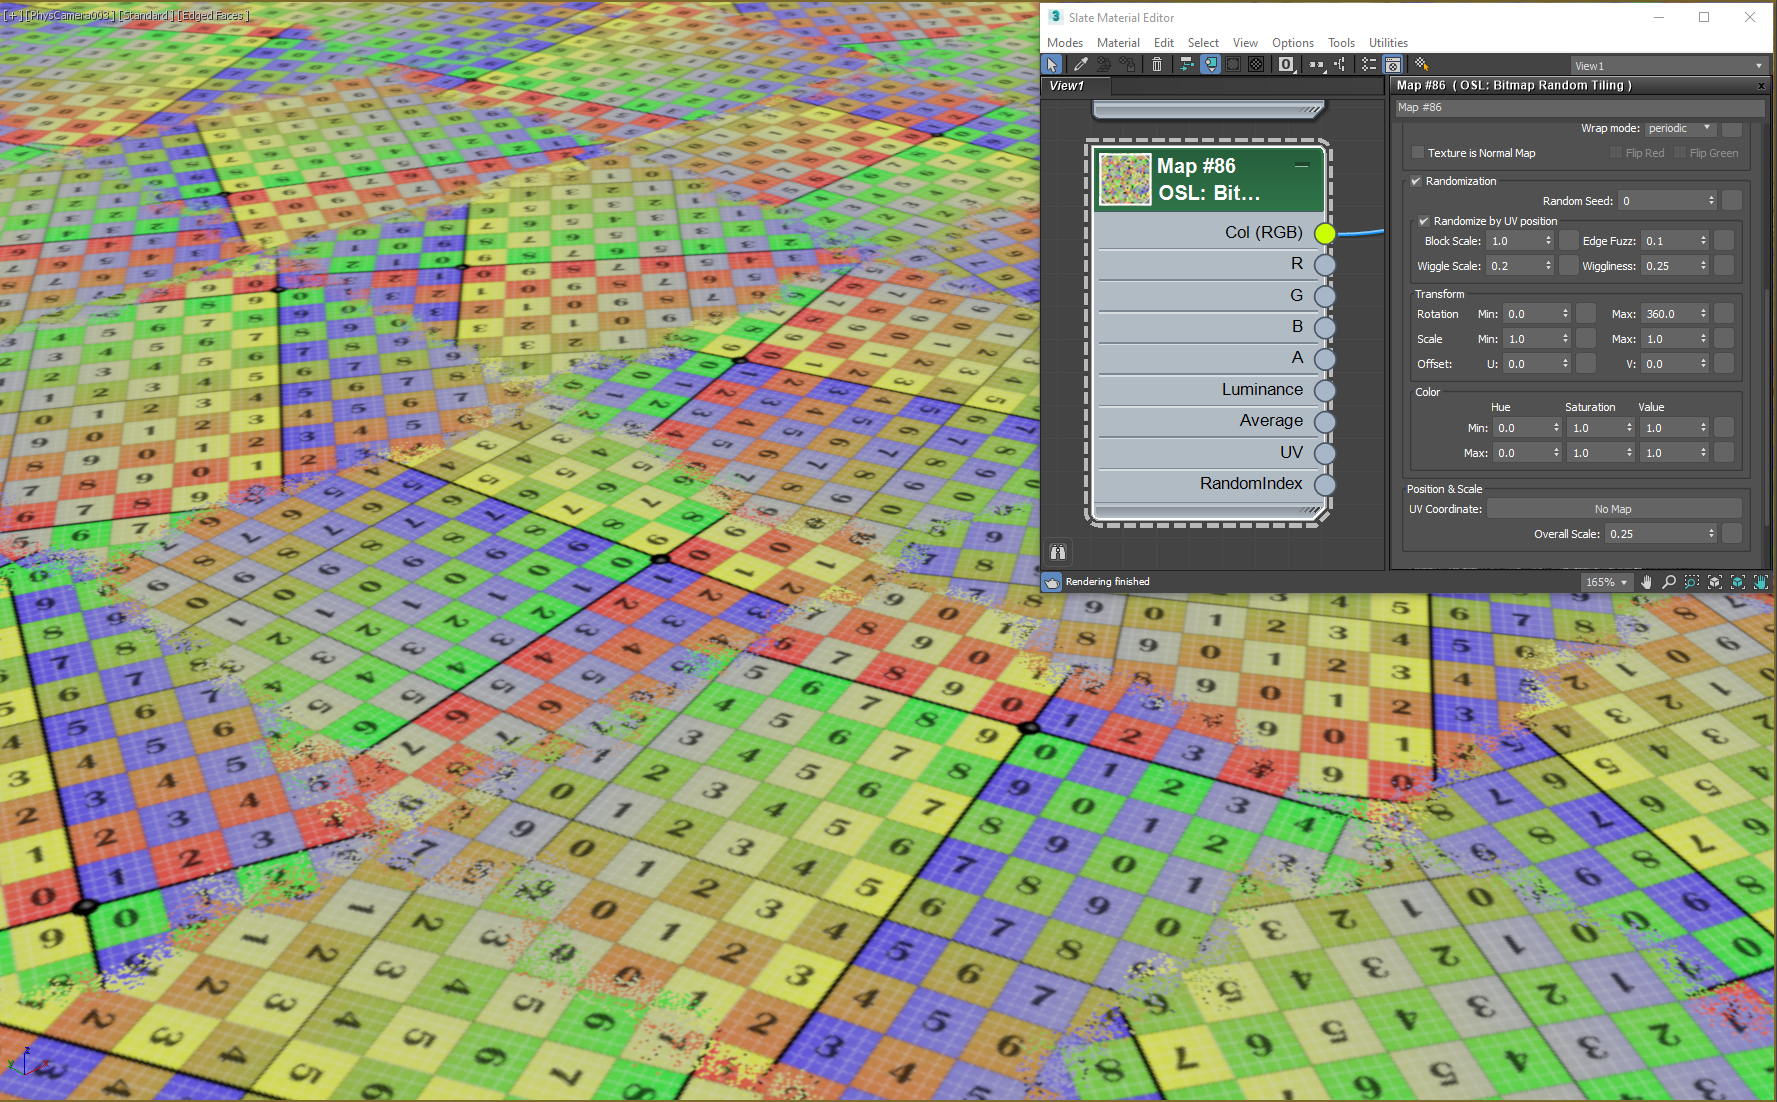
and here a zoomed view to better understand what is happening where the texture is overlapped.

Here you can see in the video on how the edges and the randomization of the bitmap behaves while changing the different parameters.
Below you can see an example with a concrete texture from Megascans, the difference is pretty visible.
 RANDOMIZATION OFF
 RANDOMIZATION ON
As you probably already know, this feature is the same as the new maps available in V-Ray 5, VRayUVWRandomizer, and Corona Renderer 6, CoronaUvwRandomizer. One point in favor of the 3ds Max implementation is that by being an OSL map, it’s compatible with all render engines that support OSL, while the V-Ray and Corona alternatives are only compatible with their respective engines.
- Pros:
- Removes visible texture tiling on large surfaces
- Visible in the viewport, no need to launch an IPR to see the result (not possible with VRayUVWRandomizer and CoronaUVWRandomizer)
- Compatible with all render engines with OSL support
- Cons:
- Not usable for textures with repeating patterns (like bricks or tiles) → it breaks the seams.
- Visible texture tiling along the border of the UVW gizmo in some cases.
All right, it’s time for the R&D Sneak Peek!
Following the awesome tool made by Roberto for Unreal Engine, we decided to make it available for other software as well. We started with 3ds Max, by taking advantage of the new OSL implementation. It will work with all the render engines in 3ds Max that support OSL, for this preview we used VRay 5 CPU. Take a look at the video below to understand what you can expect from this map.
Please download here this OSL map and the endless texture.

