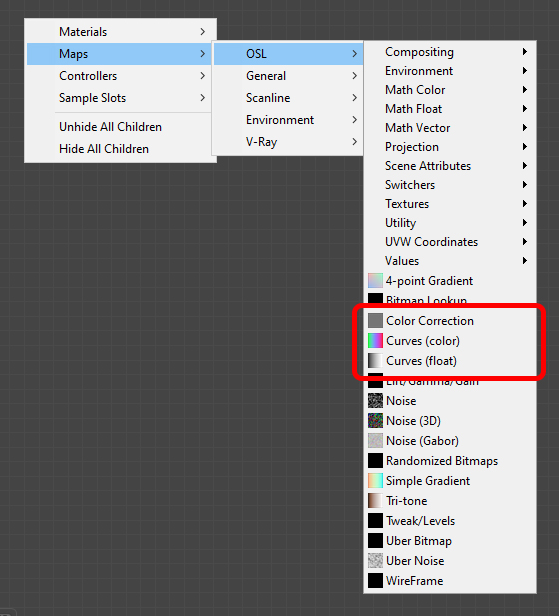
As always, first we create the nodes, from the Material Editor under Maps – OSL:
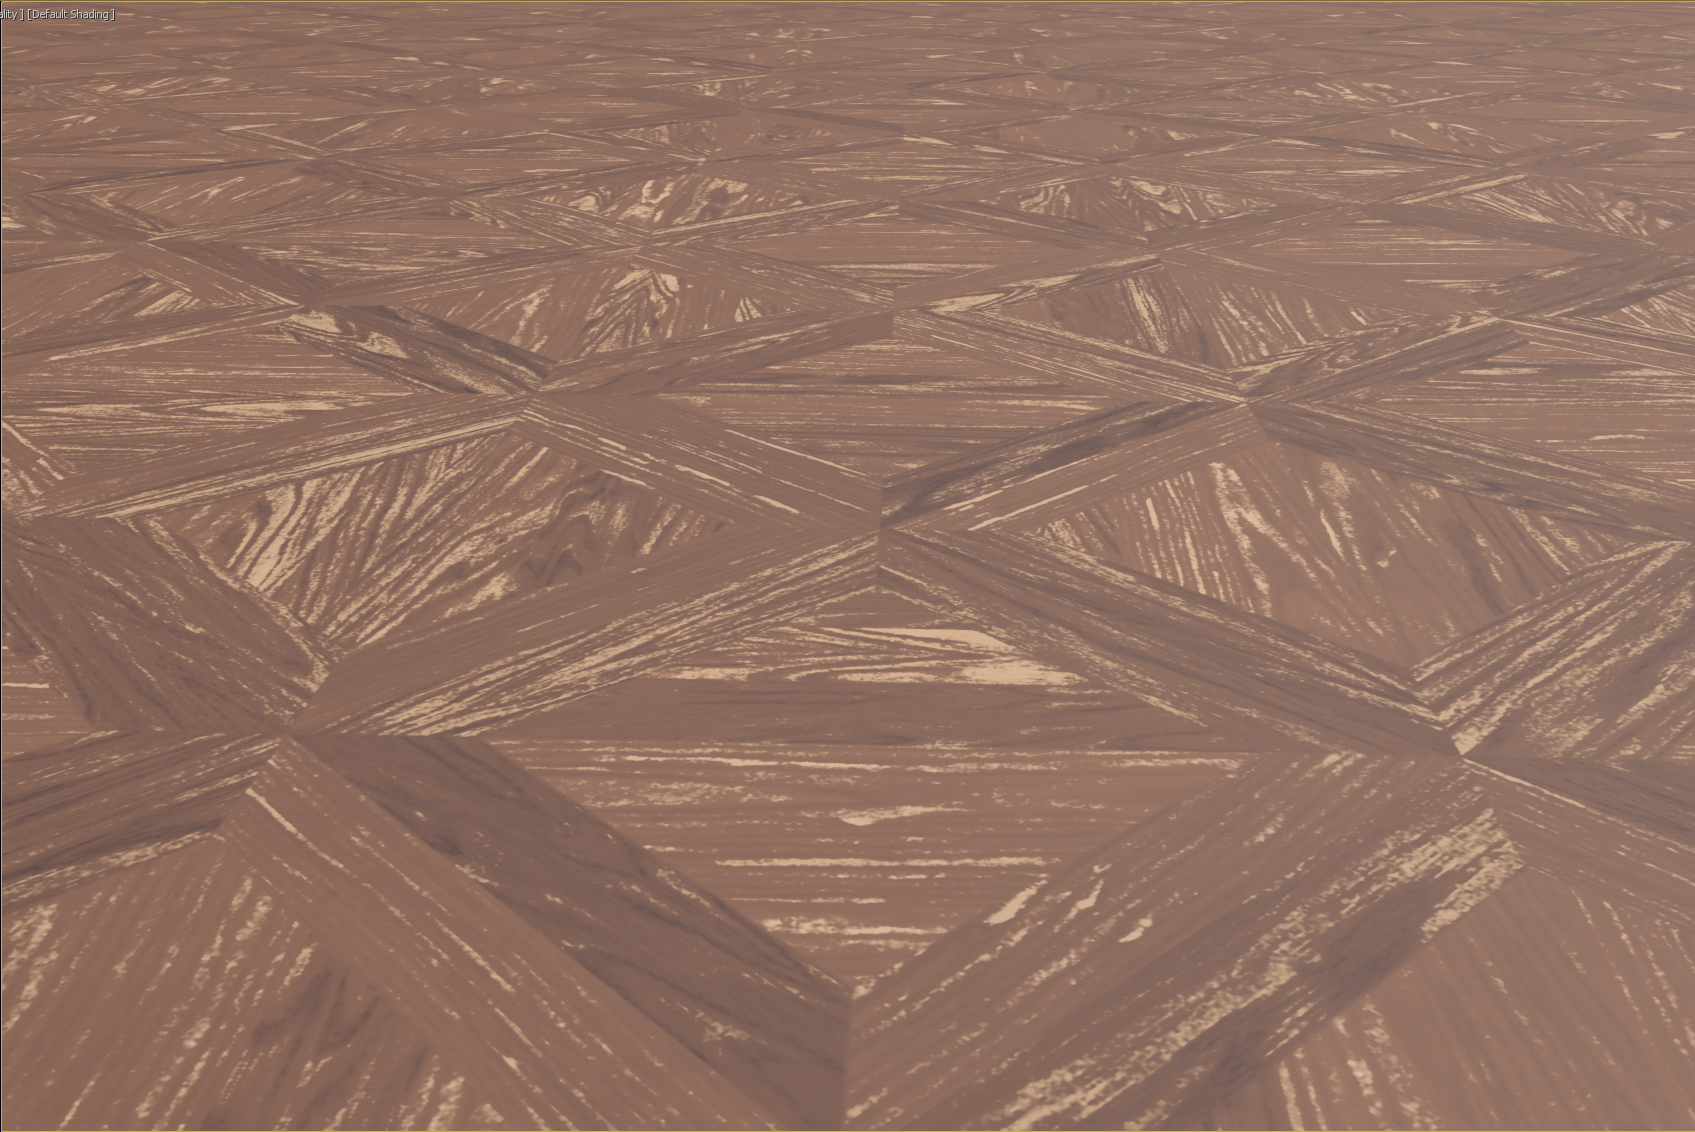
These nodes are particularly useful to apply corrections to a texture directly in 3ds max. To test the maps we set up a small scene with a parquet material from Megascans:
First we’ll use only the Albedo/Diffuse map and apply some color corrections on it by using the OSL Color Correction and OSL Curves (color) nodes. Let’s start with the first one:
In order to apply the texture to the plane in the scene, we used the new PBR Material (Spec/Gloss), below the current setup:
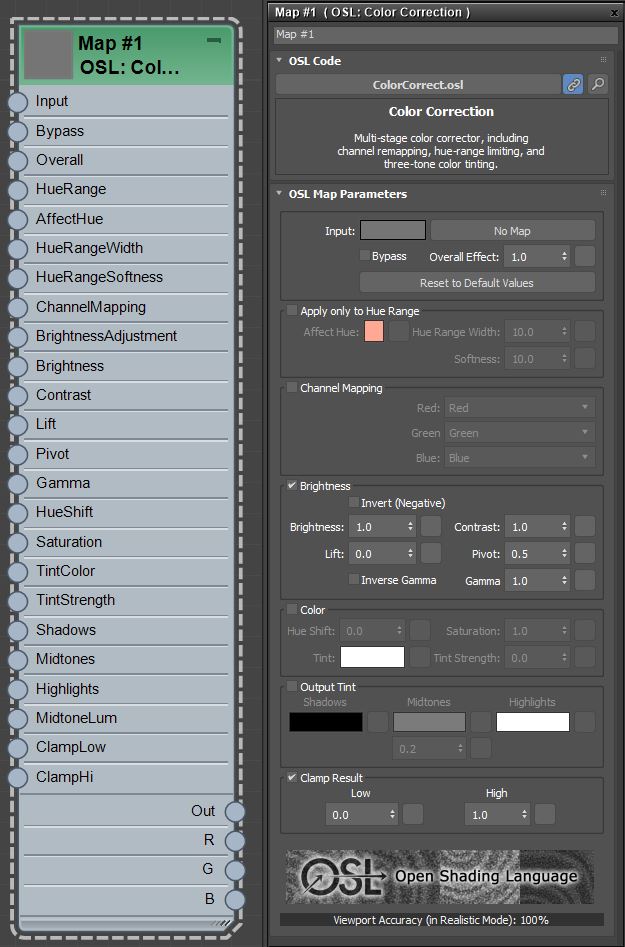
As you can see there is nothing complicated, later we are going to add the other textures to reach the final result. For now let’s focus on the OSL Color Correction node. At the top of the parameters list, besides the input for the texture, we have three very useful settings:
Bypass → allows to ignore the current map without the need to unlink it from the material, and quickly check the result with and without the correction
Overall Effects → similar to the Opacity Parameter in Photoshop, it can be either a number or a black and white texture
Reset to Default Values → a quick way to reset the node without the need to create a new one.
Then we get few settings that allow to apply the corrections only on a specific range of colors:
Affect Hue → select the base Hue with the Color Selector
Hue Range Width → specify the range (in degrees on the color wheel) where the correction will be applied, the center of the range is the color selected in Affect Hue
Softness → applies a soft falloff to the ends of the range
As an example we reduce the Brightness of the wood texture only for the darker values selected with the Affect Hue:
In the next section we get the parameters to easily remap the color channels, in case we need to invert them for example.
Now we get to the parameters where we can actually apply a color correction:
Brightness → brightness-related adjustments like Contrast, Brightness, Gamma
Color → Hue, Saturation and overall Tint adjustments
Output Tint → Tint adjustments with specific control over Shadows, Midtones and Highlights, plus a float value that defines what luminance is used for the “medium gray
After changing few settings we have completely changed the final output, see the comparison below:
COLOR CORRECTED
ORIGINAL
COLOR CORRECTED
ORIGINAL
Now let’s take a look at the new OSL Curves node:
OSL Curves (color) → it can be use to create gradients or as a color correction tool
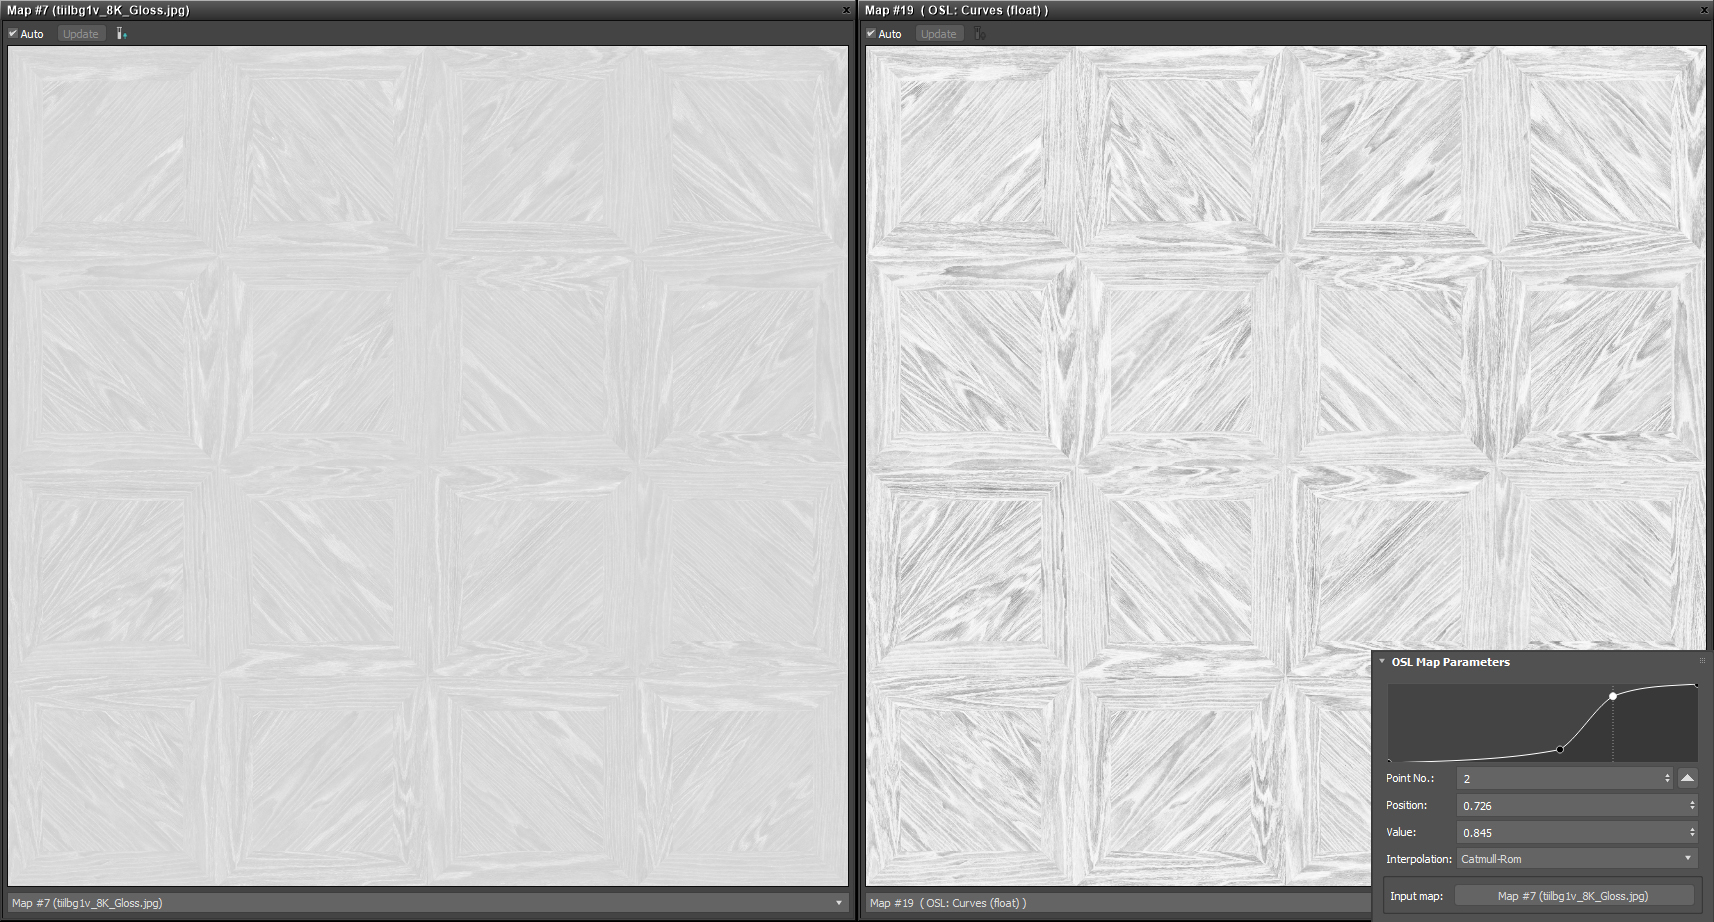
OSL Curves (float) → it can transform the input map/value using a single curve, useful to remap for example black and white textures
Both nodes have similar parameters:
Point No. → point index on the curve. To create a new point click on the curve
Position → point coordinate on the X axis
Value → point coordinate on the Y axis. Notice that in the Curves (color) node we have separate value for R (Red), G (Green), B (Blue)
Interpolation → specifies the tangent of the point between Constant, Linear, Catmull-Rom (smooth),Cubic
Below an example of color correction, applied to the Albedo map of the parquet, by using the OSL Curves (color) node:
and an example of a remapping, applied to the Glossiness map, by using the OSL Curves (float):
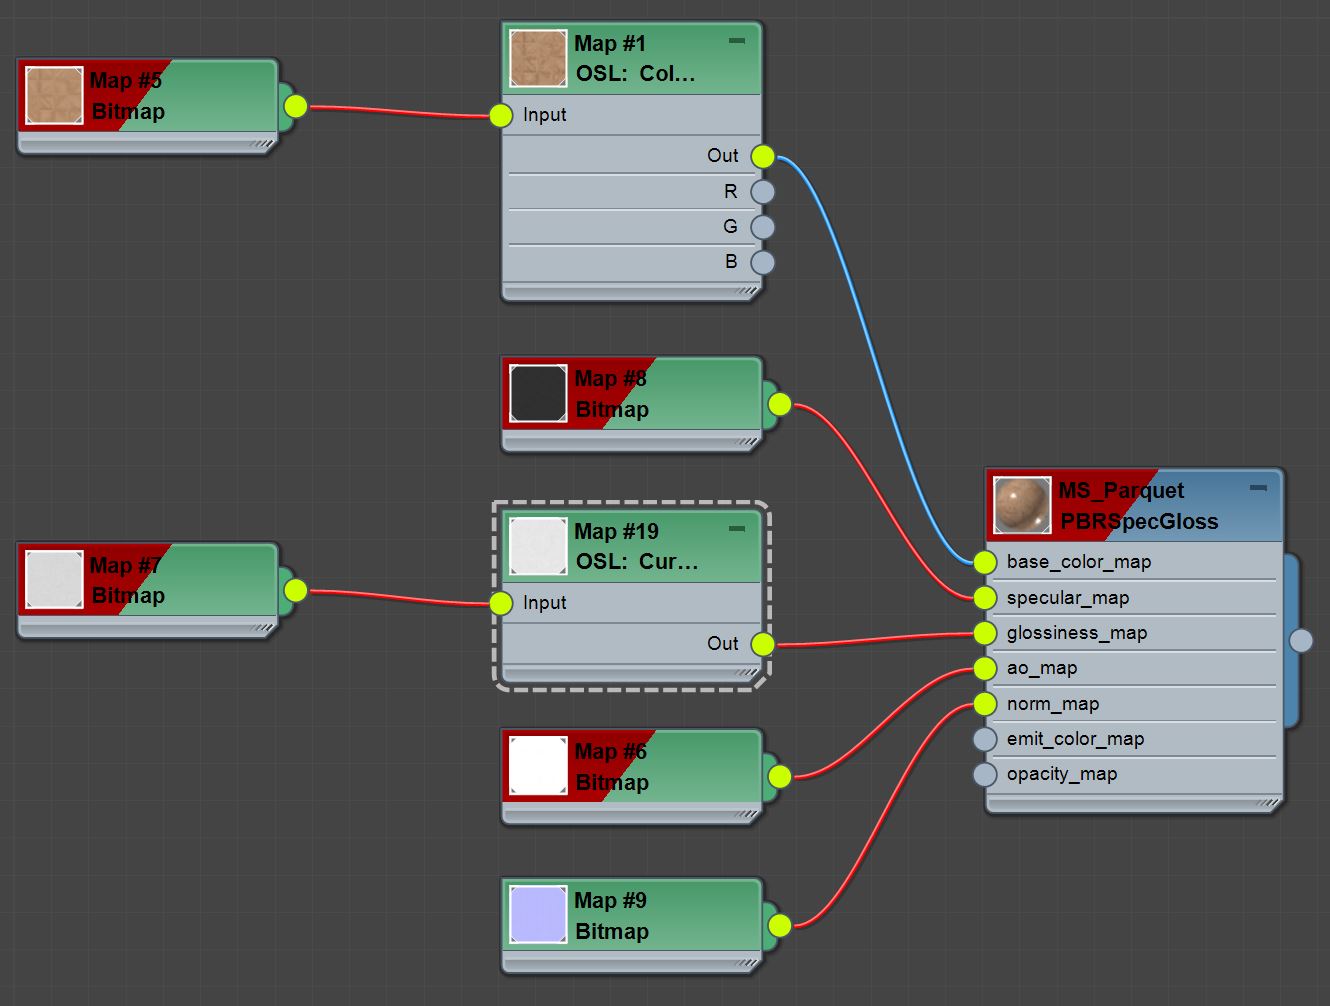
Now we apply all the remaining texture, AO, Specular, Gloss, Normal,to the PBR Material (we’ll cover this node in a future article), below you can see how the material graph looks like:
As you may have noticed until now we’ve only worked in the viewport. Thanks to the new improved OSL shading and “viewport rendering” in 3ds Max 2021 we can get a really good image without the need to start a render.
Like in the previous articles below there is a comparison between the result in the viewport and with the render (NOTE: in this case we used Arnold as render engine beacuse V-Ray wasn’t working correctly with the OSL maps):
ARNOLD RENDER
3DS MAX
To light up this scene we used an OSL HDRI Environment map, which we saw in the first article of this series, and if you need a more custom lighting setup, you can refer to the OSL HDRI Lights, which we talked about in the second article of the series.
The next feature we’re going to focus on the OSL Uber Noise map, which combines many noise functions in one single node.


 COLOR CORRECTED
 ORIGINAL
 COLOR CORRECTED
 ORIGINAL


 ARNOLD RENDER
 3DS MAX