In this quick tutorial, you can learn one method to match the colors of two photos using Photoshop. This five-minute video is part of Rob’s 50+ hours online course now available on SOA Academy’s website.
Now available the first 3 chapters with an introduction to Photoshop, an artistic approach on postproduction and an overview on postproduction in ArchViz. Soon available a full chapter on Digital painting and another on on Matte painting.
Jump onboard and start learning with us. Get ready for the live webinars with SOA teachers from November 3 to 5, 2021.
The video in short
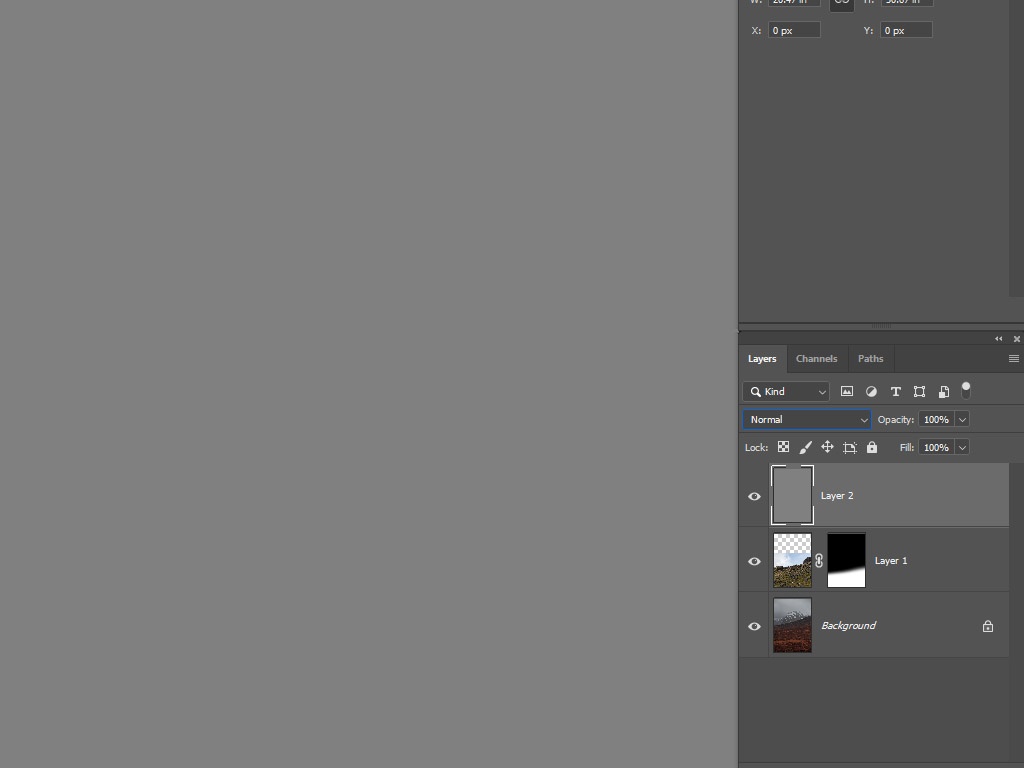
We start with 2 photos on different layers. To reveal the one at the bottom, let’s create a mask and paint it black on the top area. You can improve this mask any moment.
Quick tips: Photoshop color match
We add a new layer on top. Press Shift+F5 to fill it and select 50% gray from the drop-down menu.
Quick tips: Photoshop color match
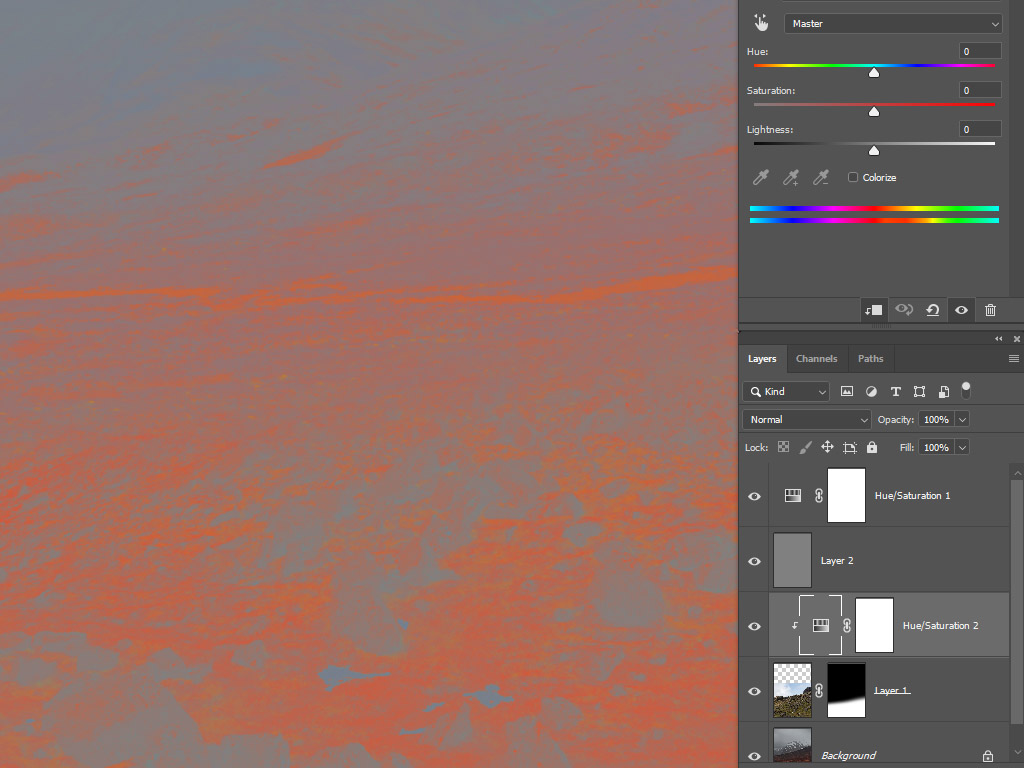
We change the blending mode of this mid-gray layer to “luminosity”. In this way we flatten every value to reveal only hue and saturation from the layers below.
Quick tips: Photoshop color match
To understand colors better, we add a Hue-Saturation adjustment on top, and we increase saturation by 50. In this way, we can clearly see the difference.
Quick tips: Photoshop color match
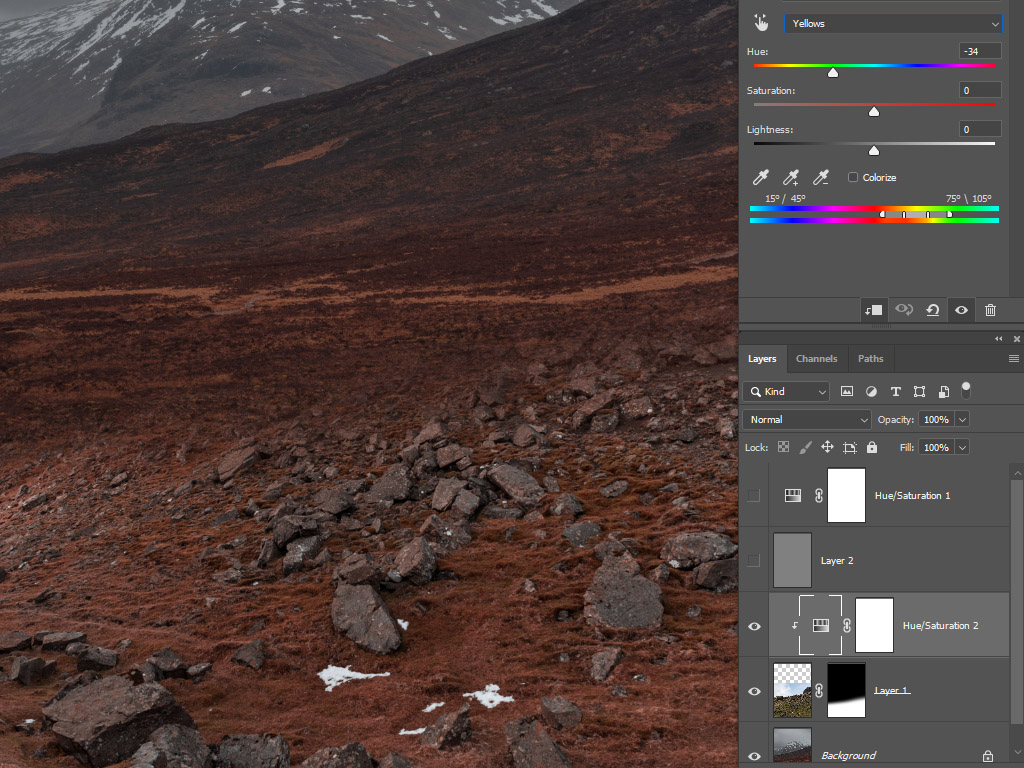
Let’s select the green photo, and then add a new Hue-saturation adjustment. From The “Master” drop-down menu we go to “Yellow” and we shift the hue to the left in order to match the color. Don’t worry about the saturation, for now.
Pay attention, the adjustment has to be linked to the green photo, in order to modify just that layer. You can do that by pressing ALT + left mouse button in between the layer and the adjustment.
Quick tips: Photoshop color match
Hide both layers on top to reveal the result and check if you’re doing it right.
Quick tips: Photoshop color match
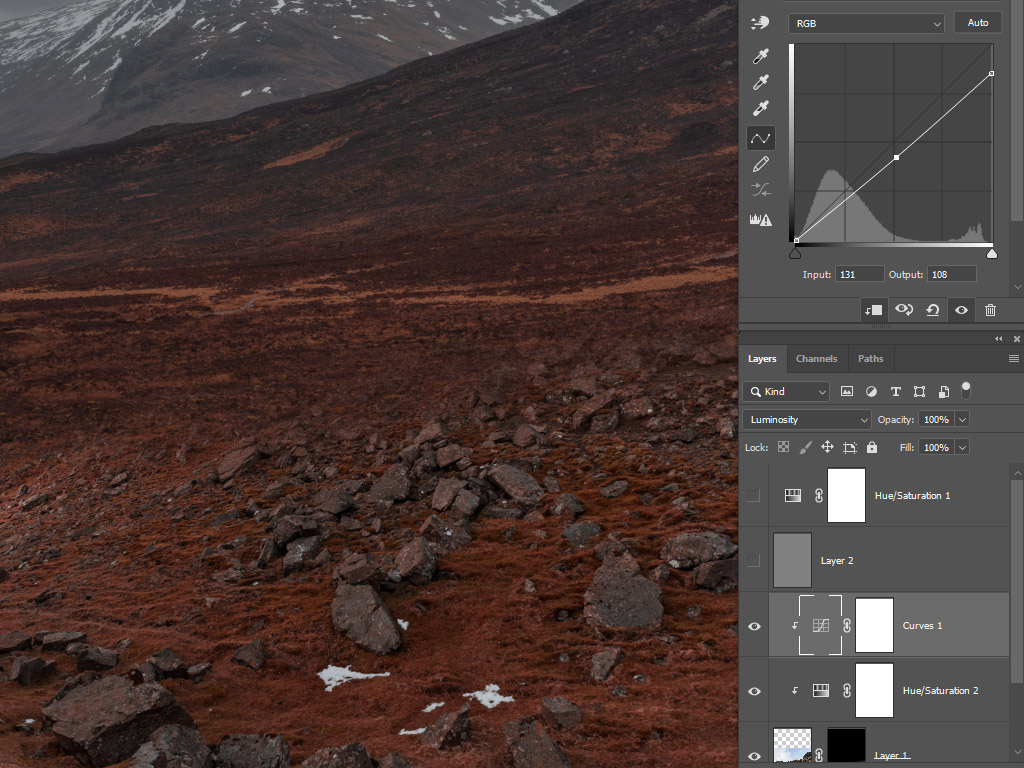
We fix brightness now, adding a “curve” adjustment on top of the Hue-Saturation linked to the photo. The “curve” adjstument blending mode should be “luminosity”, so you don’t affect saturation.
Quick tips: Photoshop color match
Let’s go back to the Hue-Saturation now, if you need to fix saturation. In this case we went down a little with it.
Quick tips: Photoshop color match
Continue like this with more “curves”, if you need to fix small bright/dark areas, painting on the mask.
Quick tips: Photoshop color match
You can already purchase the online postproduction course and get instant access to the first 3 chapters. You will also grant a seat in the first webinar session scheduled from November 3 to 5, 2021.