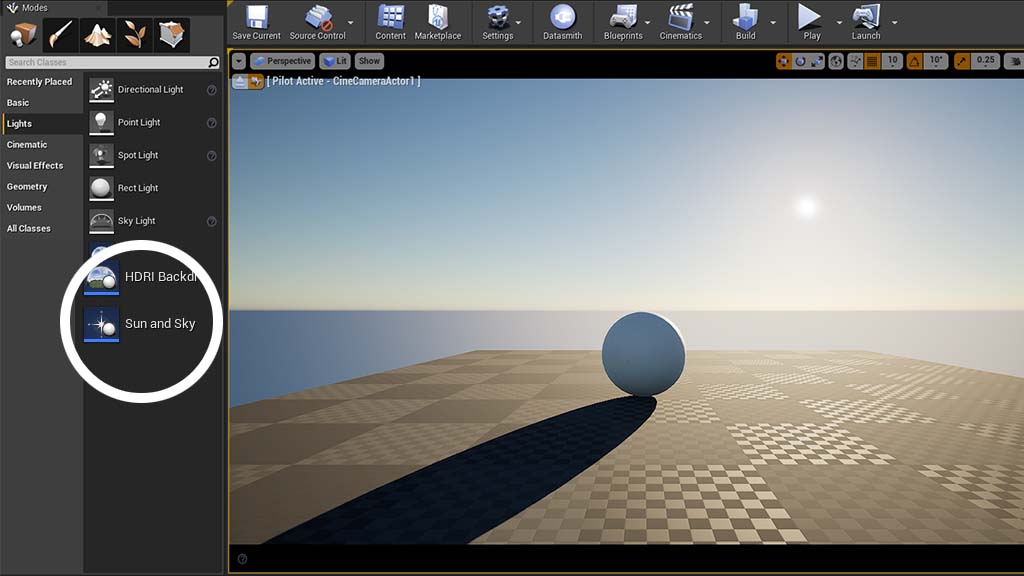
If you want to create a more believable daylight system, you can now place in the scene the “Sun and Sky” Blueprint from the Lights panel.
First go to the Plugin panel and activate the “Sun Position Calculator” and the “HDRI backdrop”.
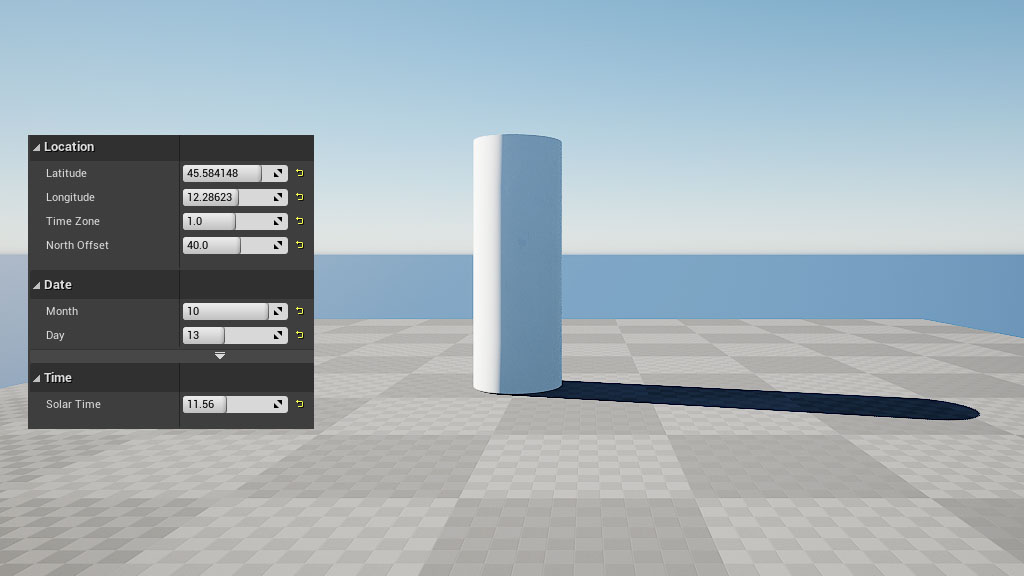
Like every blueprint, the “Sun and Sky” will show you some editable variables in the Detail panel, like latitude, longitude or Solar time. These settings are what you need to reproduce realistic lighting, which coincides with the one of a real place in the world. Said so, there’re still a bunch of settings under the hood that maybe you want to modify to get an even better result.
Side note: You still have to place the ExponentialHeightFog manually if you want to get a lower hemisphere / fog effect in your scene.
Base settings…
Location
Latitude, longitude and Time zone are details you can google easily. For example, Venice (in Italy) is:
– Latitude: 45.438759
– Longitude: 12.327145
– Time zone: GMT +1
The North Offset is just a way to rotate the entire Sun and Sky system, so feel free to change it to match the north of the project.
Date
You can pick the exact day of the year trough Month and Day. Pretty obvious, I would say.
Time
With Solar Time, you can choose the hour you want to reproduce. I would say this is the variable you want to animate in the Sequencer to simulate a timelapse of the day. BE CAREFUL! The Sun and Sky blueprint can only simulate the natural lighting during the day; if you go too far before dawn or after dusk, the top hemisphere will turn black and the lower one will give you a weird bright-gray glow.

…and “hidden” settings
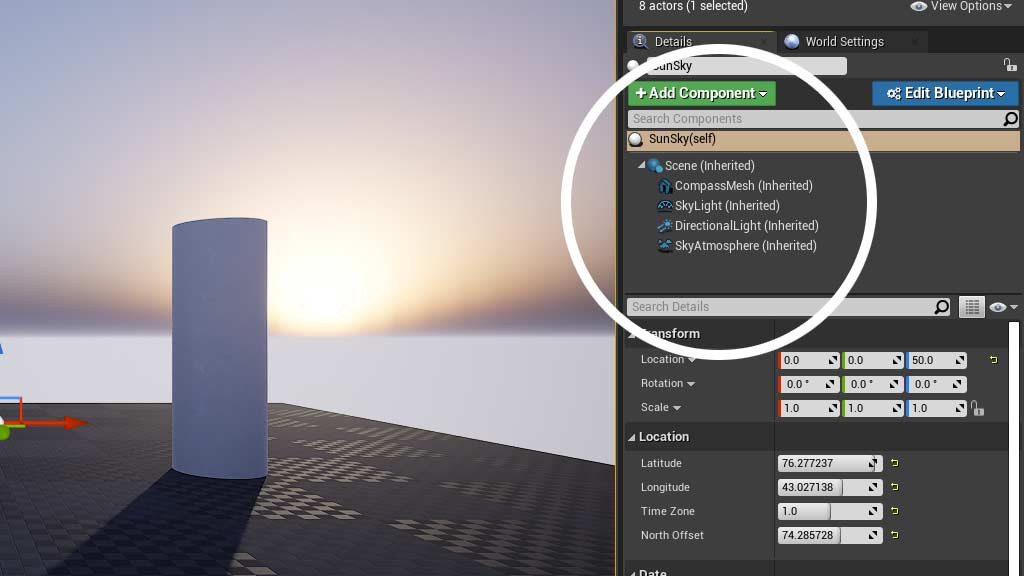
If you’re familiar with UE4 and blueprints, these settings are not that hidden. I’m talking about the variables of each Component. A component is a blueprint’s sub-element and you can find them in the Details panel, just under the “+Add Component” button.
Components list
The Sun and Sky blueprint’s components are:
– CompassMesh: as the name says, the compass-like mesh. We don’t care about this one.
– Skylight: The diffuse-light simulating the sky. Remember that this alone will not show you any blue sky, but project the light from a cube map or the atmospheric fog.
– DirectionalLight: this is the sunlight. We’re going to modify something in here.
– SkyAtmosphere: this is NEW! It replaces the former “Atmospheric Fog” component with a more realistic scattering of the light.
Light Mobility
I don’t want to talk too much about light mobility in this blog post. Just remember you can modify it if you select the Skylight and the DirectionalLight. If I want to bake, I usually set the DirectionalLight to Stationary, to get better speculars and the ability to blur shadows in real-time with the Distance Field Shadows. The Skylight can be static. Otherwise, we can just set everything to movable, enable the Raytracing and use those RTX graphic cards we paid for.
Sun (DirectionalLight)
You’ll notice that if you change the base settings, the shadows will not blur in a realistic way (my two cents) when the sun gets closer to the horizon. We can fix this with the Source Angle, increasing the value from 0.5 to a higher value. Notice that with the Source Angle, the sun size increases too (it also happens in Corona or V-Ray).

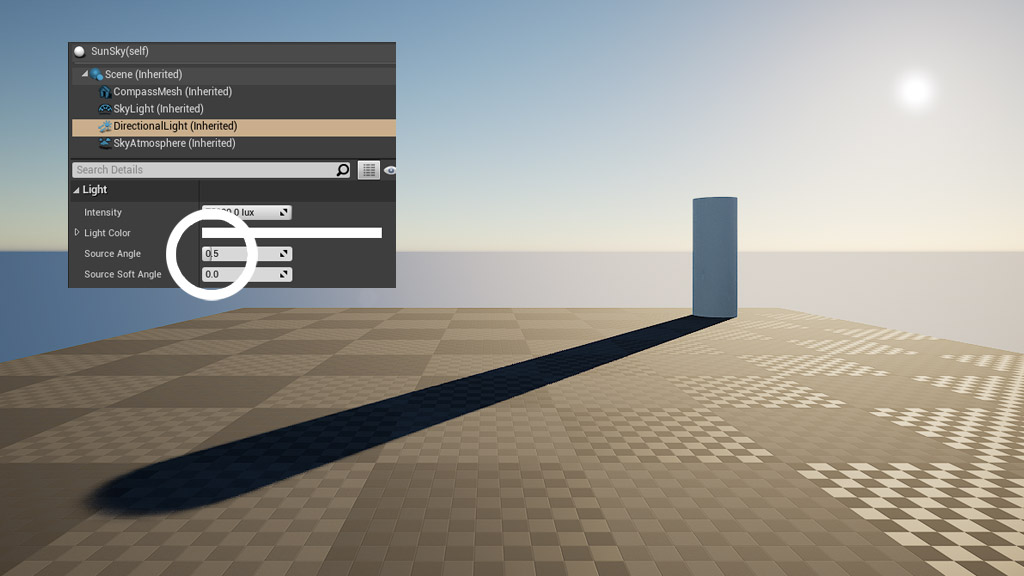
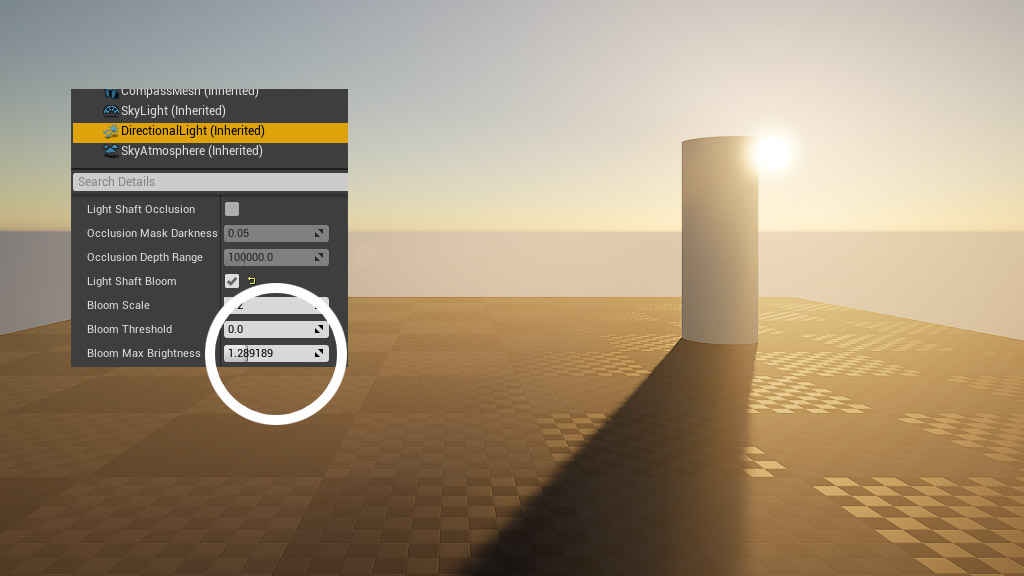
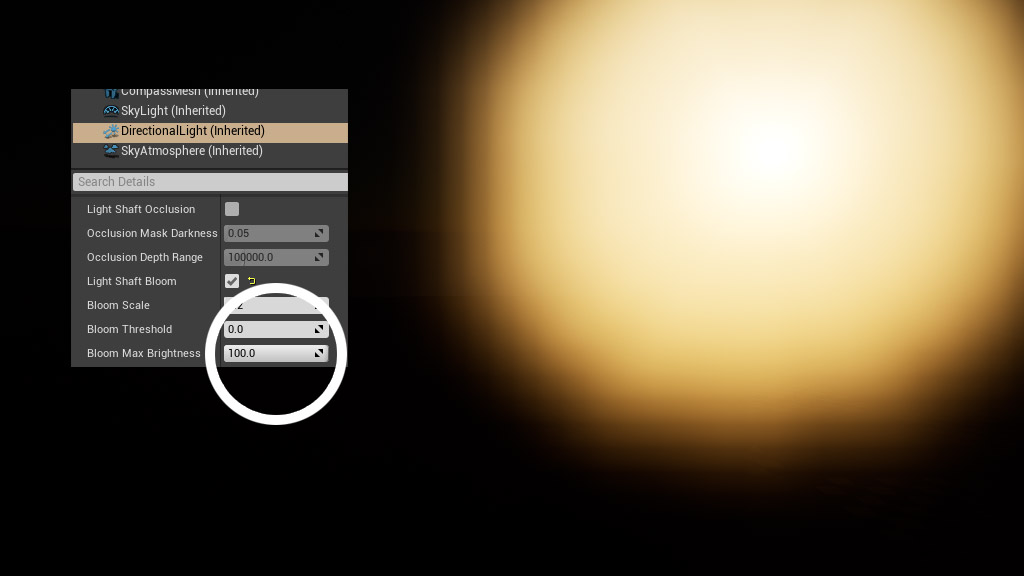
If you want to turn on the Light Shaft Bloom, remember to lower the Bloom Max Brightness to avoid unwanted results.
Atmosphere (SkyAtmosphere)
And now, the cool part.
Something you can’t notice from the ground is what the SkyAtmosphere really is. What we’re playing with is a realistic simulation of an air layer that surrounds the playable world.
Planet
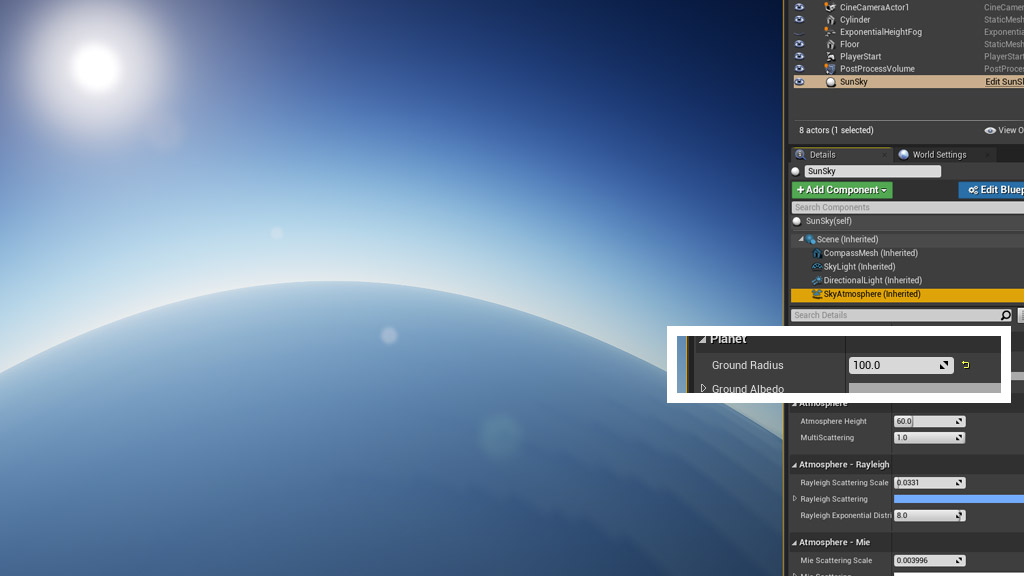
This means that we can create something like a planet-view from the space. Just set the Ground Radius to 100 (which means 100 km – you have to enter the value writing it otherwise you cannot go under 6000 using the slider) and then set the camera speed to 8 and fly far away up in the sky. Turn off any ExponentialHeightFog, if you have it.
After you stop acting like Superman, from this point of view, it is easier to understand the other settings.
Atmosphere
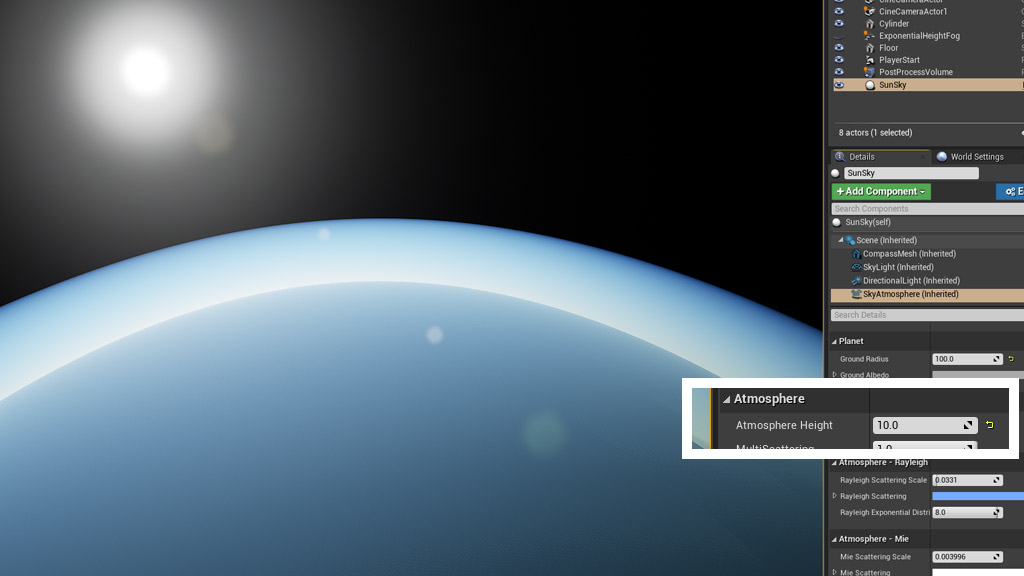
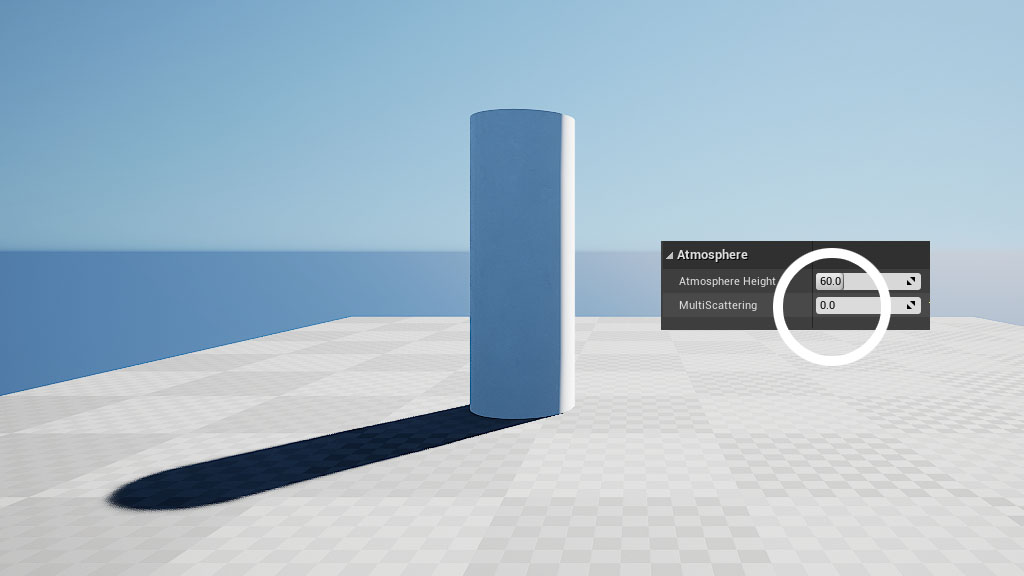
Atmosphere Height: It’s the thickness of the atmosphere (the tooltip in UE4 is wrong) measured in Km.
Multiscattering: it simulates light bouncing multiple times in the atmosphere. [0] will turn it off. [1] will turn it on and typically get you a more realistic and brighter sky / darker ground.

Atmosphere – Rayleigh
The Rayleigh scattering refers to the behavior of the light passing through a turbid medium like gases or liquids. The Rayleigh scattering lets us see a realistic sky color.
Rayleigh Scattering Scale: It’s the density of the atmosphere because of the Rayleigh scattering. At high values, it may show a broader range of colors (blue to orange).
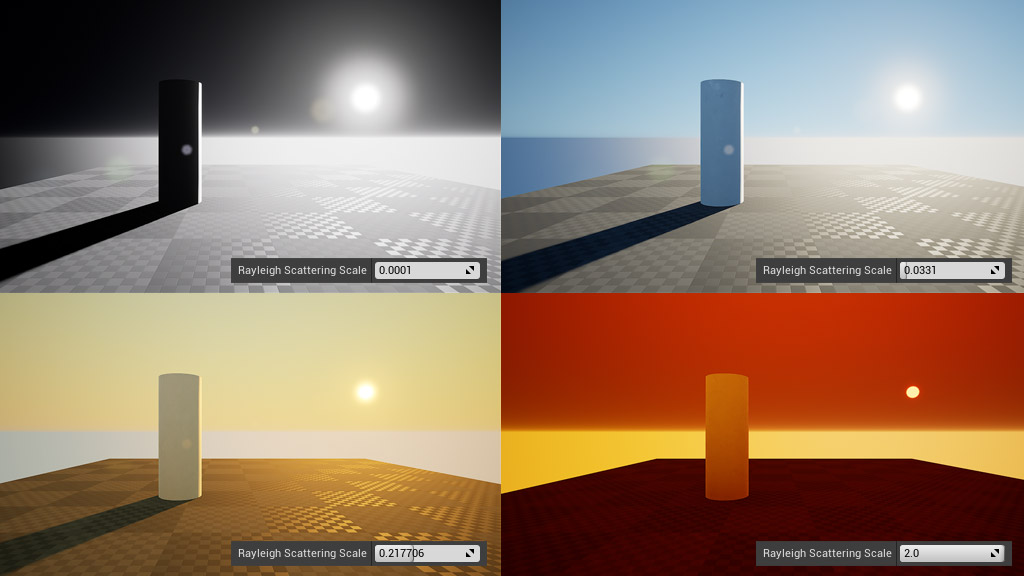
Rayleigh Scattering: It’s the color of the atmosphere because of the Rayleigh scattering. It will shift each color hue.
Rayleigh Exponential Distribution: It’s the value to control the position of the Rayleigh scattering falloff. The lower, the darker the sky. At high values, you can get new colors in the sky too.


Atmosphere – Mie
The Mie Scattering refers to the behavior of the light bouncing on a sphere or a cylinder. In our case, the Earth.
Mie Scattering Scale: It’s the density of the atmosphere because of the Mie scattering. It will look thinner and closer to the world than the Rayleigh atmosphere. From the ground, it will be visible close to the sun and on the horizon.
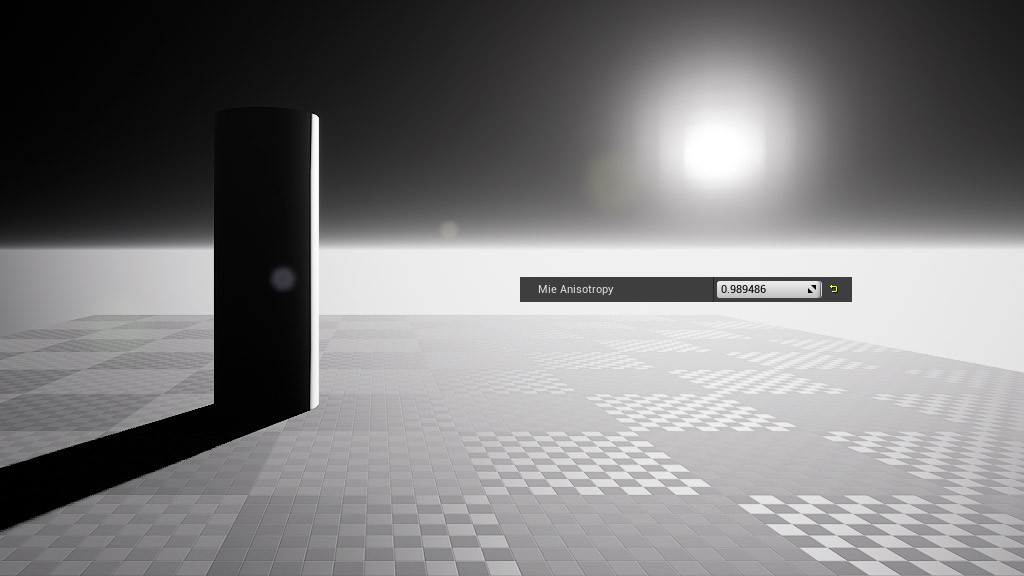
NOTE: THE FOLLOWING IMAGES HAVE NO RAYLEIGH SCATTERING, JUST MIE SCATTERING ON.
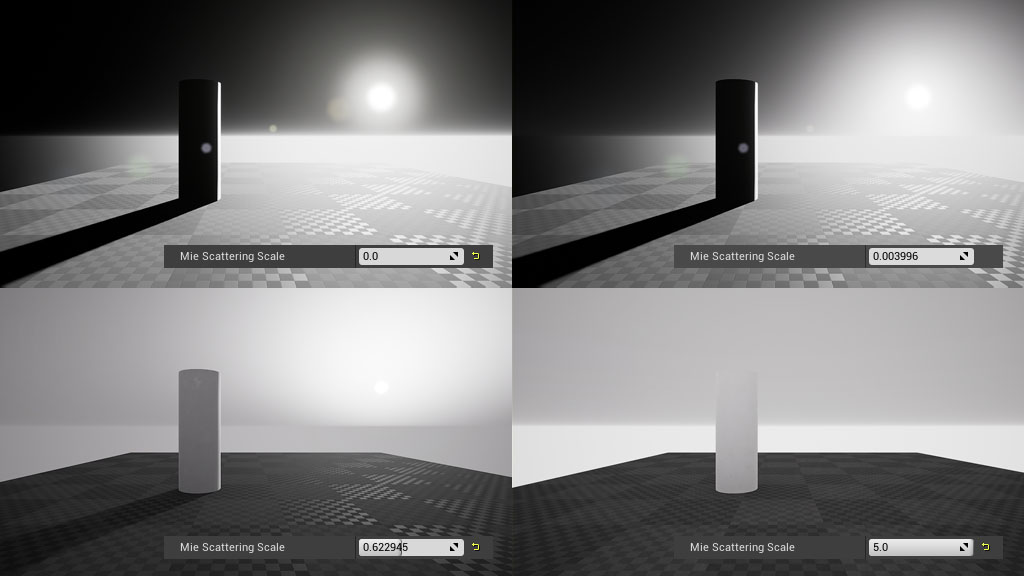
Mie Scattering: It’s the color of the atmosphere because of the Mie scattering.
Mie Absorption Scale: It’s the amount of light absorbed.

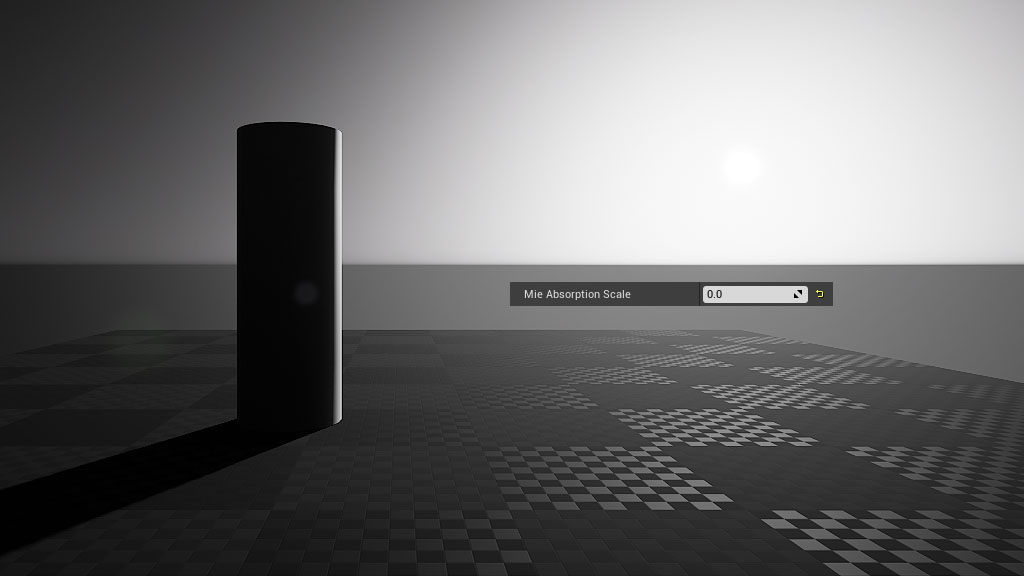
Mie Absorption: It’s the color absorbed by the light. A blue color will produce a red sky and vice versa.
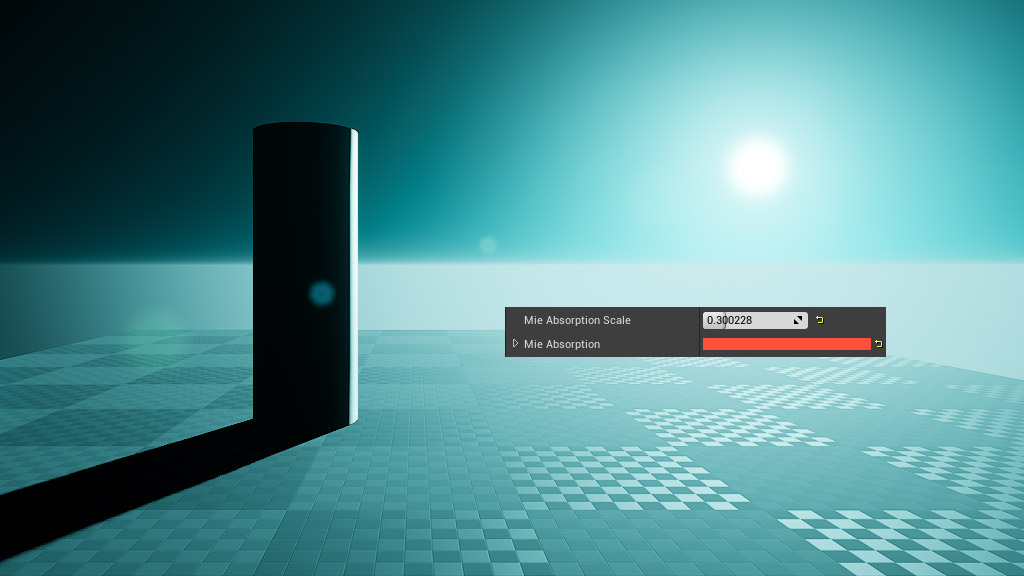
Mie Anisotropy: It’s a way to modify how light is scattered, [0] will produce a wide, uniform effect. [1] will shrink the range and concentrate the light around the sun.

Mie Exponential Distribution: It’s the height of the Mie Scattering effect.
Atmosphere – absorption
These values set up a secondary layer of scattering. The settings are correct if you want to simulate an Earth-like atmosphere. I would not touch this unless you want to change the planet.
Art Direction
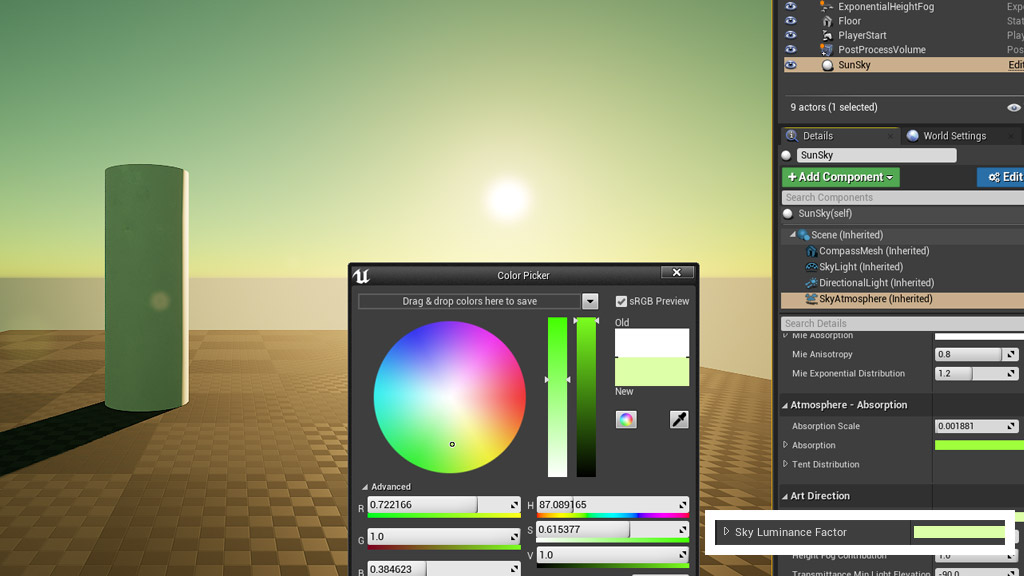
Sky Luminance Factor: I bet this is a sort of quick “colorize” for the sky color. Sometimes it doesn’t update, so you need to close the color picker and try again.
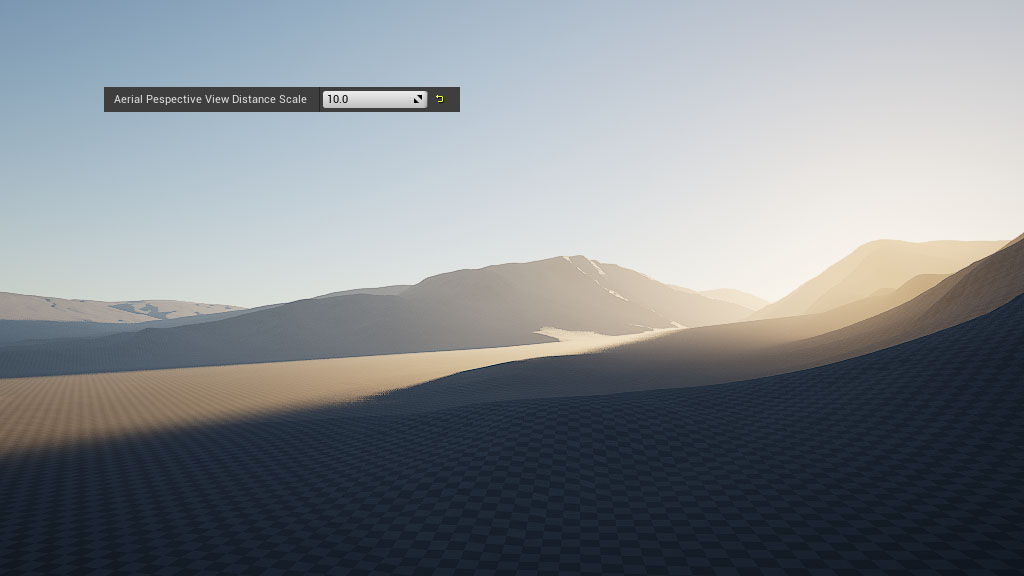
Aerial Perspective View Distance: if an ExponentialHeightFog is placed in the scene, this parameter controls its density due to the distance.

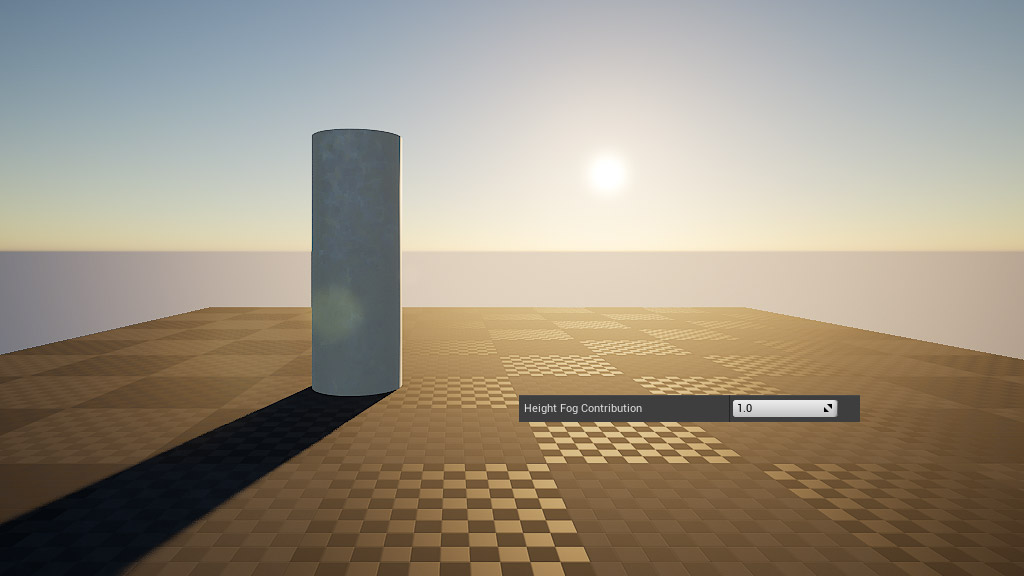
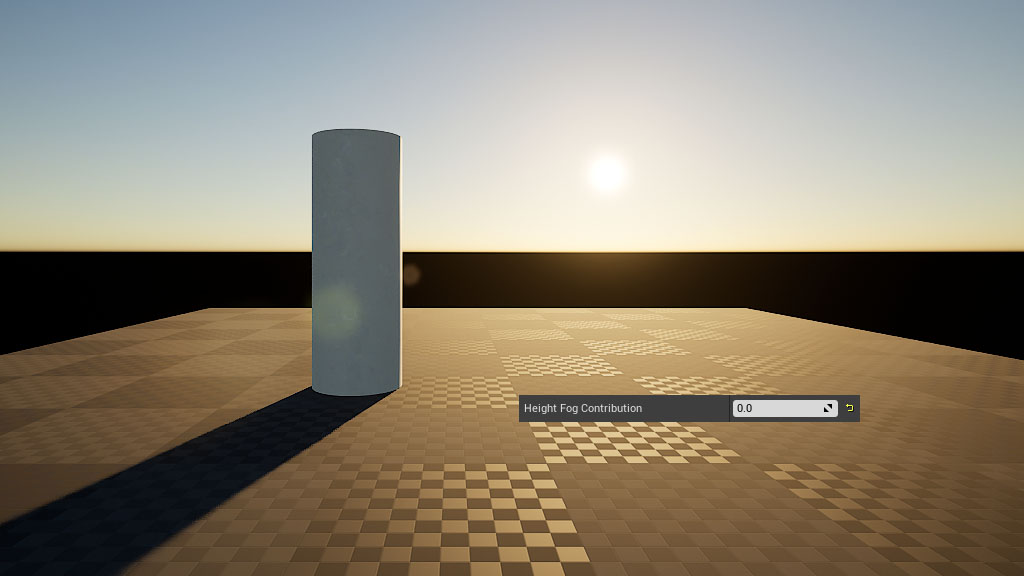
Height Fog Contribution: if an ExponentialHeightFog is placed in the scene, this parameter controls its opacity.
Transmittance Min Light Elevation Angle: it’s the minimum elevation angle of the sun at which it casts rays on the scene. It allows us to get shadows even if the sun is really low. Long story short, if your sun is really low but you still want to see shadows, change this value.
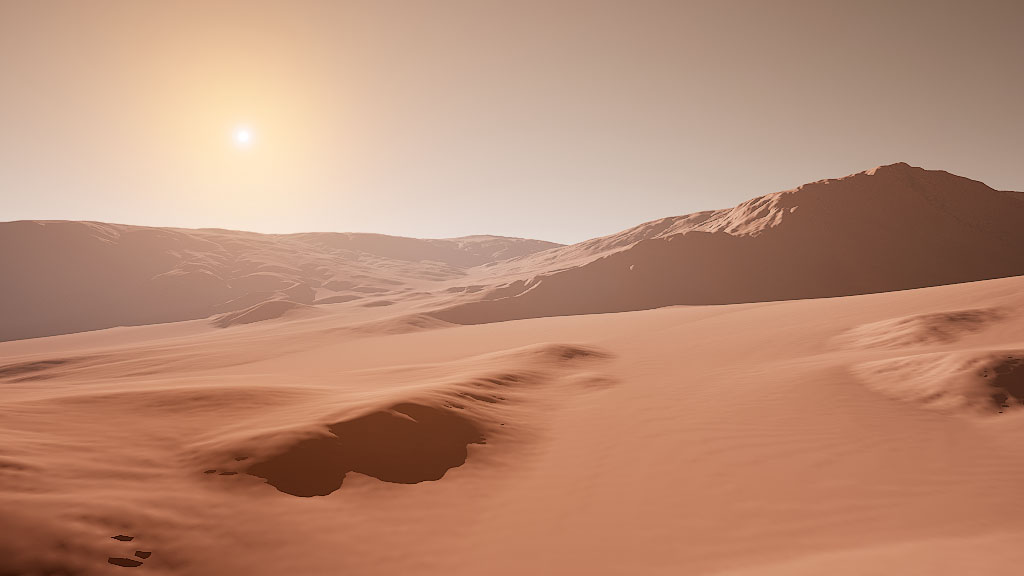
An additional example
Here an example of Martian lighting and the settings to achieve it.

See you next time with more Unreal Engine 4 features!
Rob.
Improve your skills with Unreal Engine in our next course available from June 22 to July 3, 2020.

