Welcome back everyone! In a previous article, we used the new ForestPack 7 to scatter OpenVDB clouds all over the scene, now let’s take a look at the shading of those clouds.
We will focus our attention on a single cloud for now.
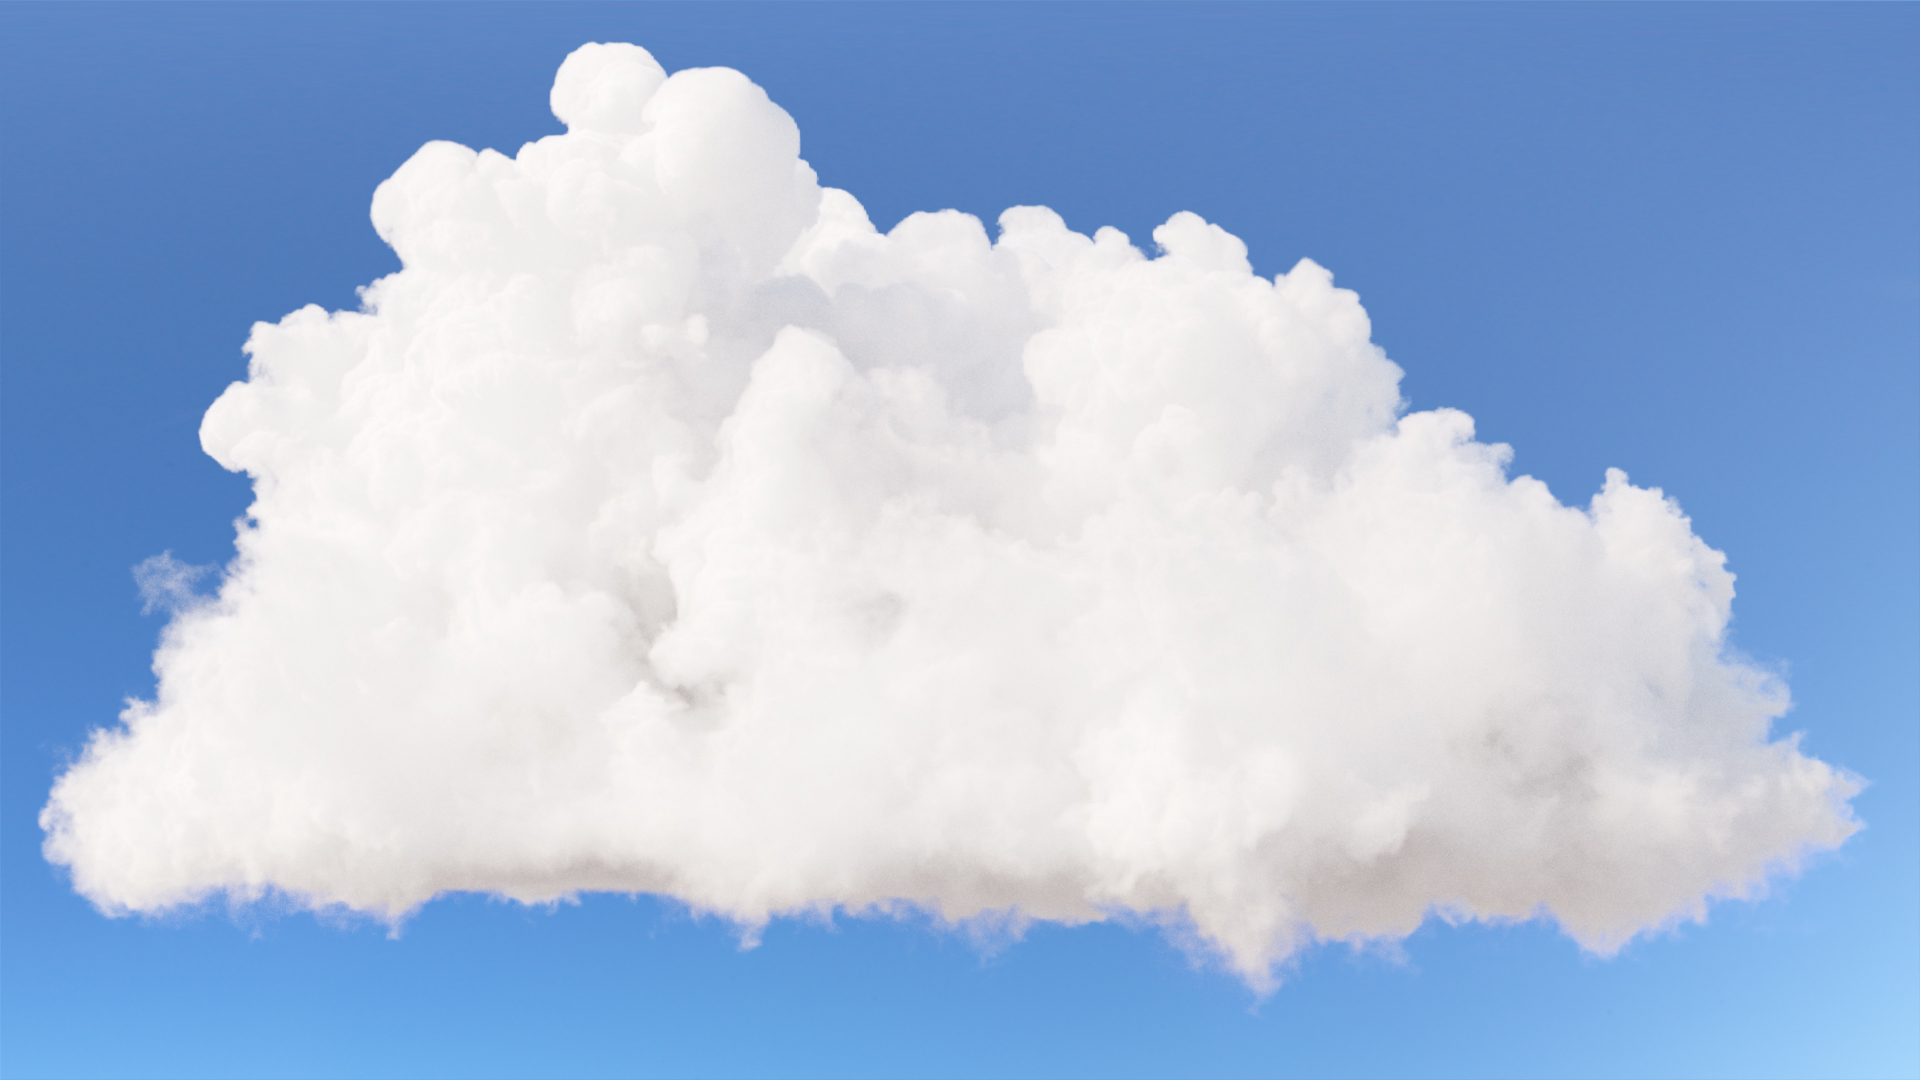
If you search online how to render clouds, you often get the same answer: rendering clouds is extremely difficult. And that’s true, but here, we are not trying to create a render engine capable of rendering super-realistic clouds. We are gonna use the tools we already have, in this case Corona Renderer 6, to understand how we can render a physically plausible cloud, and control the parameters we have available when dealing with volumes.
Let’s dive into it!
Introduction
To understand how to render a cloud we first need to learn a few things about the physics of the clouds. Don’t worry, there won’t be any formula!
Clouds are basically an aggregate of water droplets and ice crystals. Depending on the type of cloud, this will cause the light to bounce multiple times before “exiting” the volume. Below you can see an image that explains the idea
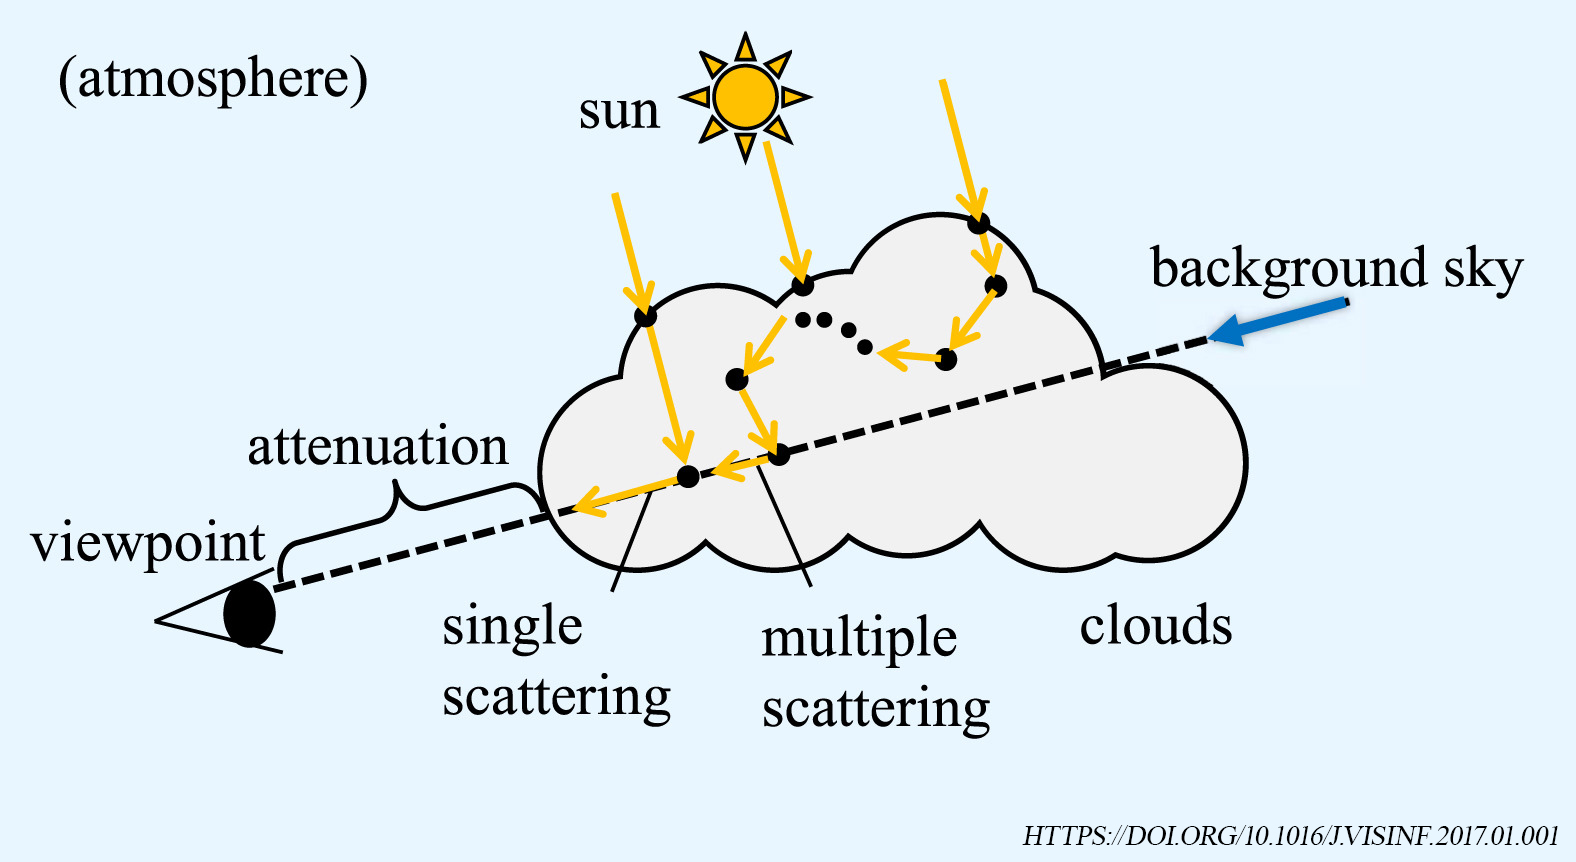
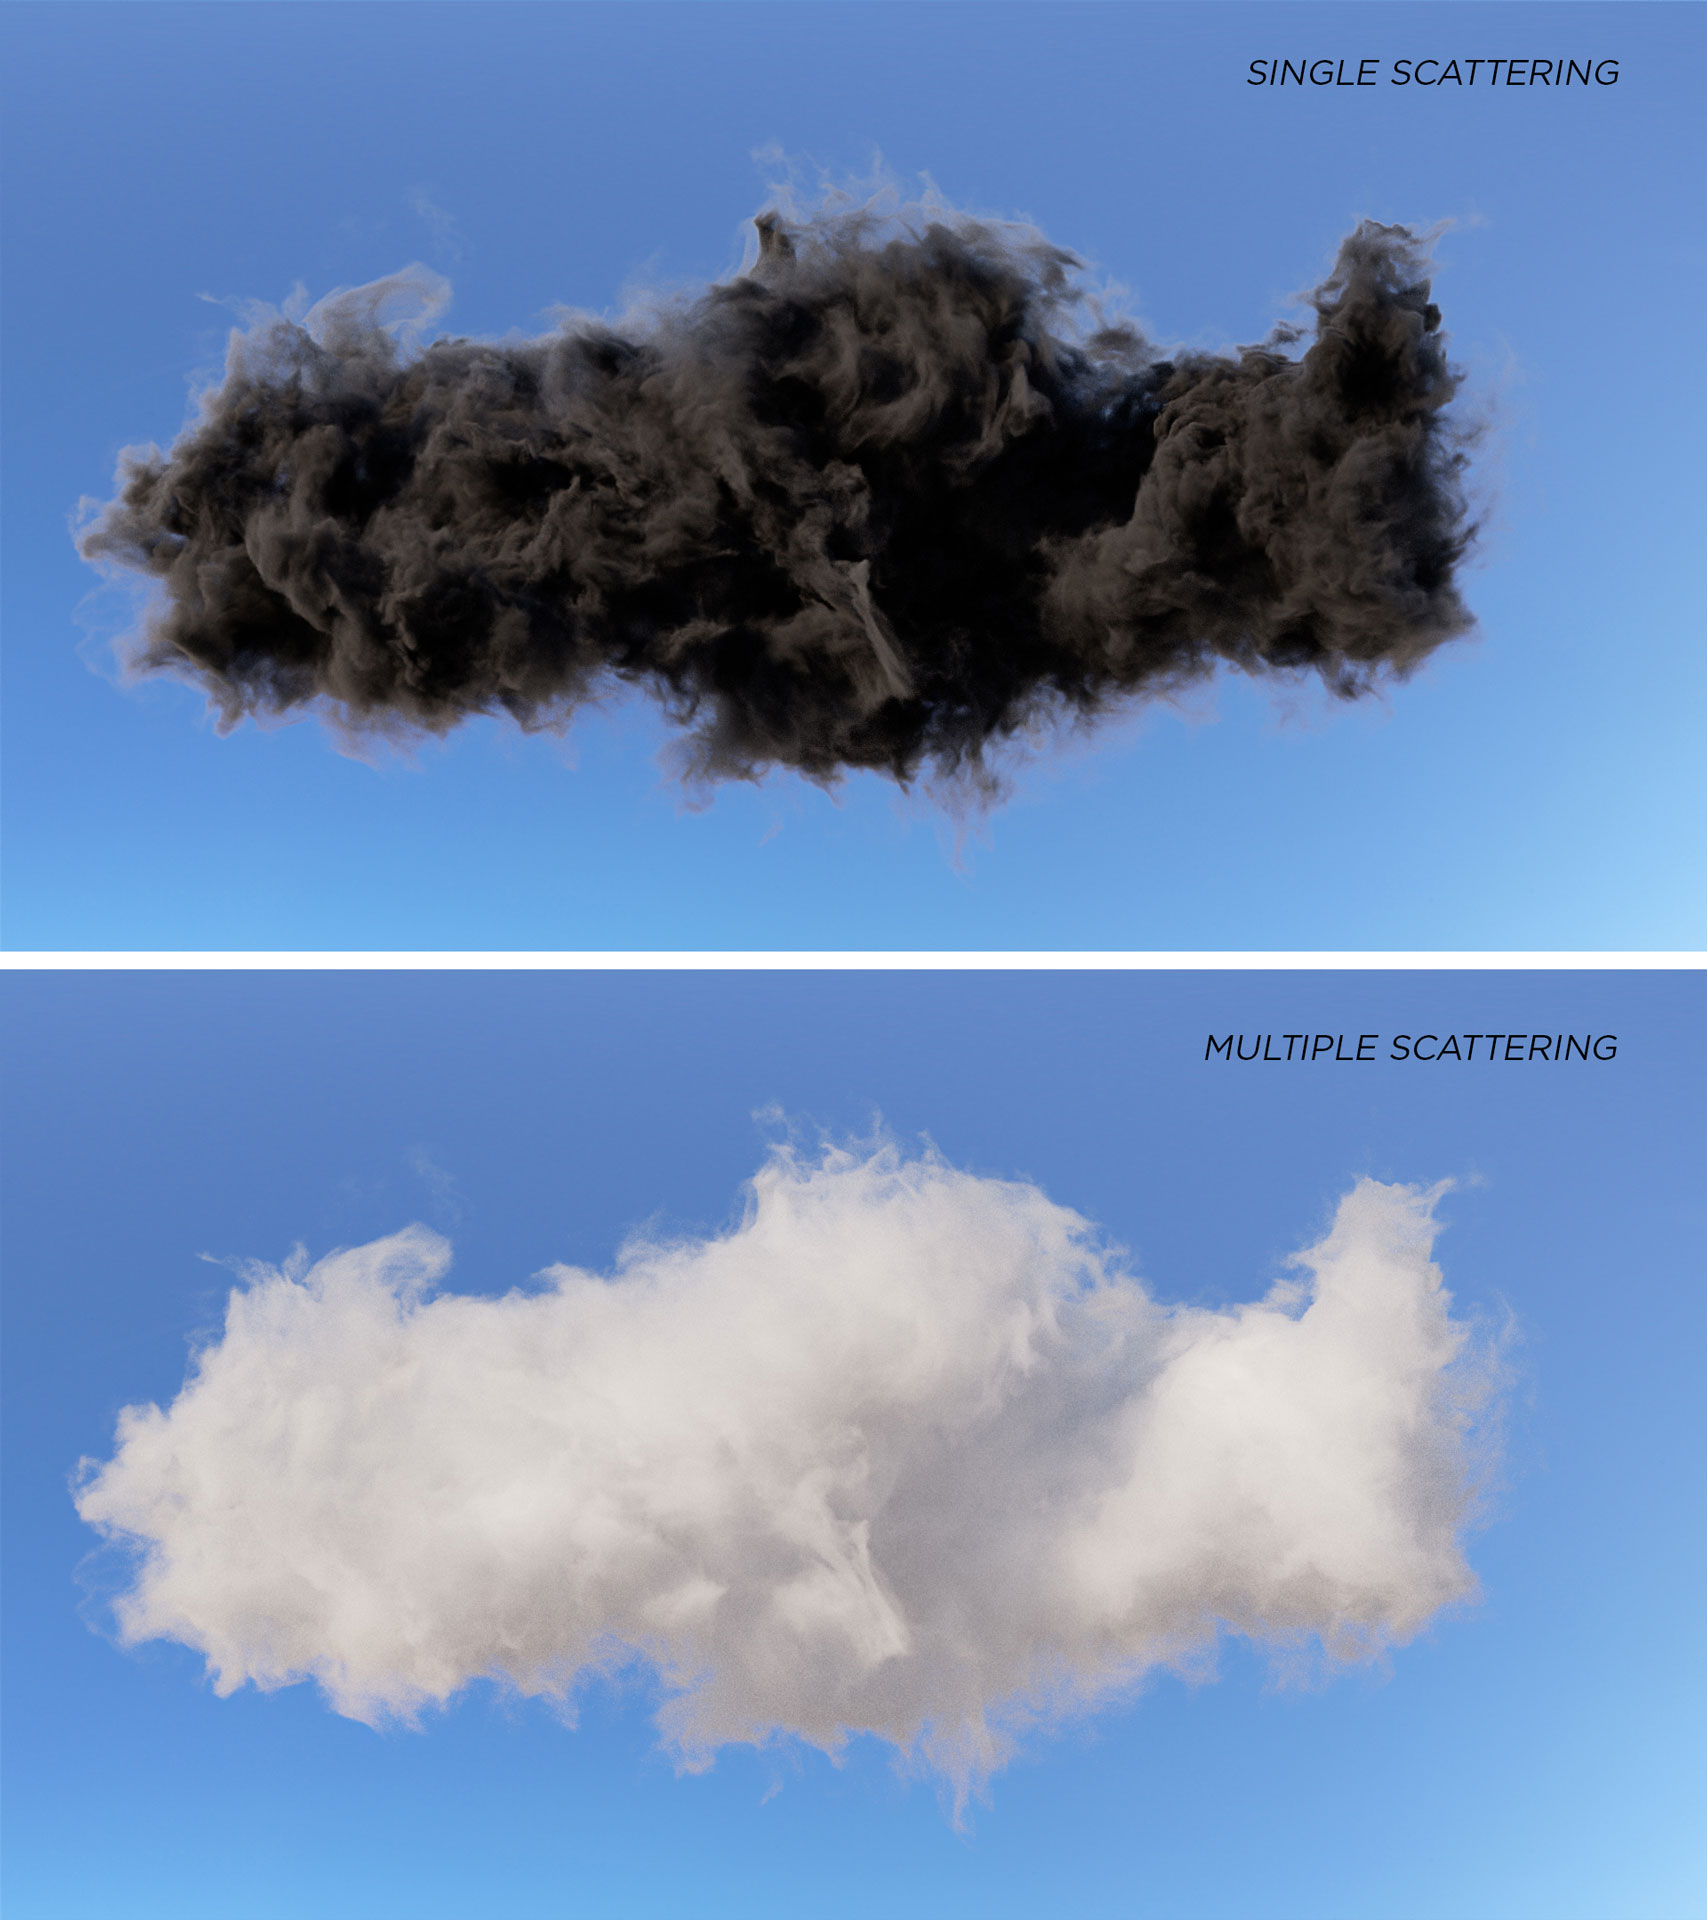
Without Multiple Scattering, the cloud would be rendered as a dark volume, as we’ll see in a moment.
Since we only want to render clouds, and not model them, we don’t need to know about how they form in the sky, depending on weather conditions.
Possibly we may look into that in another article.
Shading and Rendering in Corona Renderer 6
Let’s jump right into 3ds Max!
Create a CoronaVolumeGrid and link the VDB file from disk. If you don’t see anything, under the Viewport display, set the type to Point Clouds. You can also change the amount of points, used to preview the volume, with the Quality parameter.
Under the Statistics tab there are some useful details regarding the vdb file we imported. In particular, the Size of the bounding box containing the volume, and how many cells it contains. The bigger the number of cells, the higher the amount of details of the cloud. Keep in mind that it also affects the size of the vdb file on disk and the render time. The number of cells depends on the source file. It isn’t something you can change here in 3ds Max, unless you make use of a plugin to manipulate vdb data.
I’m gonna focus mostly on the Shading section because it’s where we can control the properties to correctly render the cloud.
The 2 main parameters we need to control are Absorption and Scattering.
First enable both of them and make sure the Channel is set to Density. In both parameters let’s set the Tint to a full white (255,255,255) as clouds reflect almost all light.
If you change the Tint color along the grey scale, it will behave similarly to the Scale parameter. You can use it to change the overall Absorption and Scattering.
Since clouds tend to reflect almost all the light, it is better to keep this value as close as possible to a full white.
In case you need to create exotic renderings, you can change the Tint to something completely different. Also, by using extremely saturated colors during the early stages of look development makes it easier to understand how the shader works. So you’ll see that the color you set in the Absorption Tint is mainly visible on the outer part of the cloud and it gets darker moving inside, where the density is higher. While the Scattering Tint affects the overall color of the volume, as expected.
The Channel Color Mapping works in a similar way. It allows the use of Curves to remap the gradient of the Absorption and Scattering. In this case I’m using the Density channel, so it will remap the density of the volume. It can be useful if the Density that is coming from the OpenVDB isn’t exactly what you want, or if you need to create a few variations of the same cloud with different densities.
The Scale parameter controls the amount of Absorption and Scattering of the volume. As before, you can use this parameter artisitcally to control the look of the cloud. Remember that it’s also linked to the Channel color mapping, and it may create different results depending on whether the checkbox is enabled or disabled.
The Scale parameter has a uniform control on the Absorption and Scattering. In case you need finer control only on specific areas, it’s better to use the Channel Color Mapping.
Below you can take a look at how the Scale value affects the result:
Absorption Scale
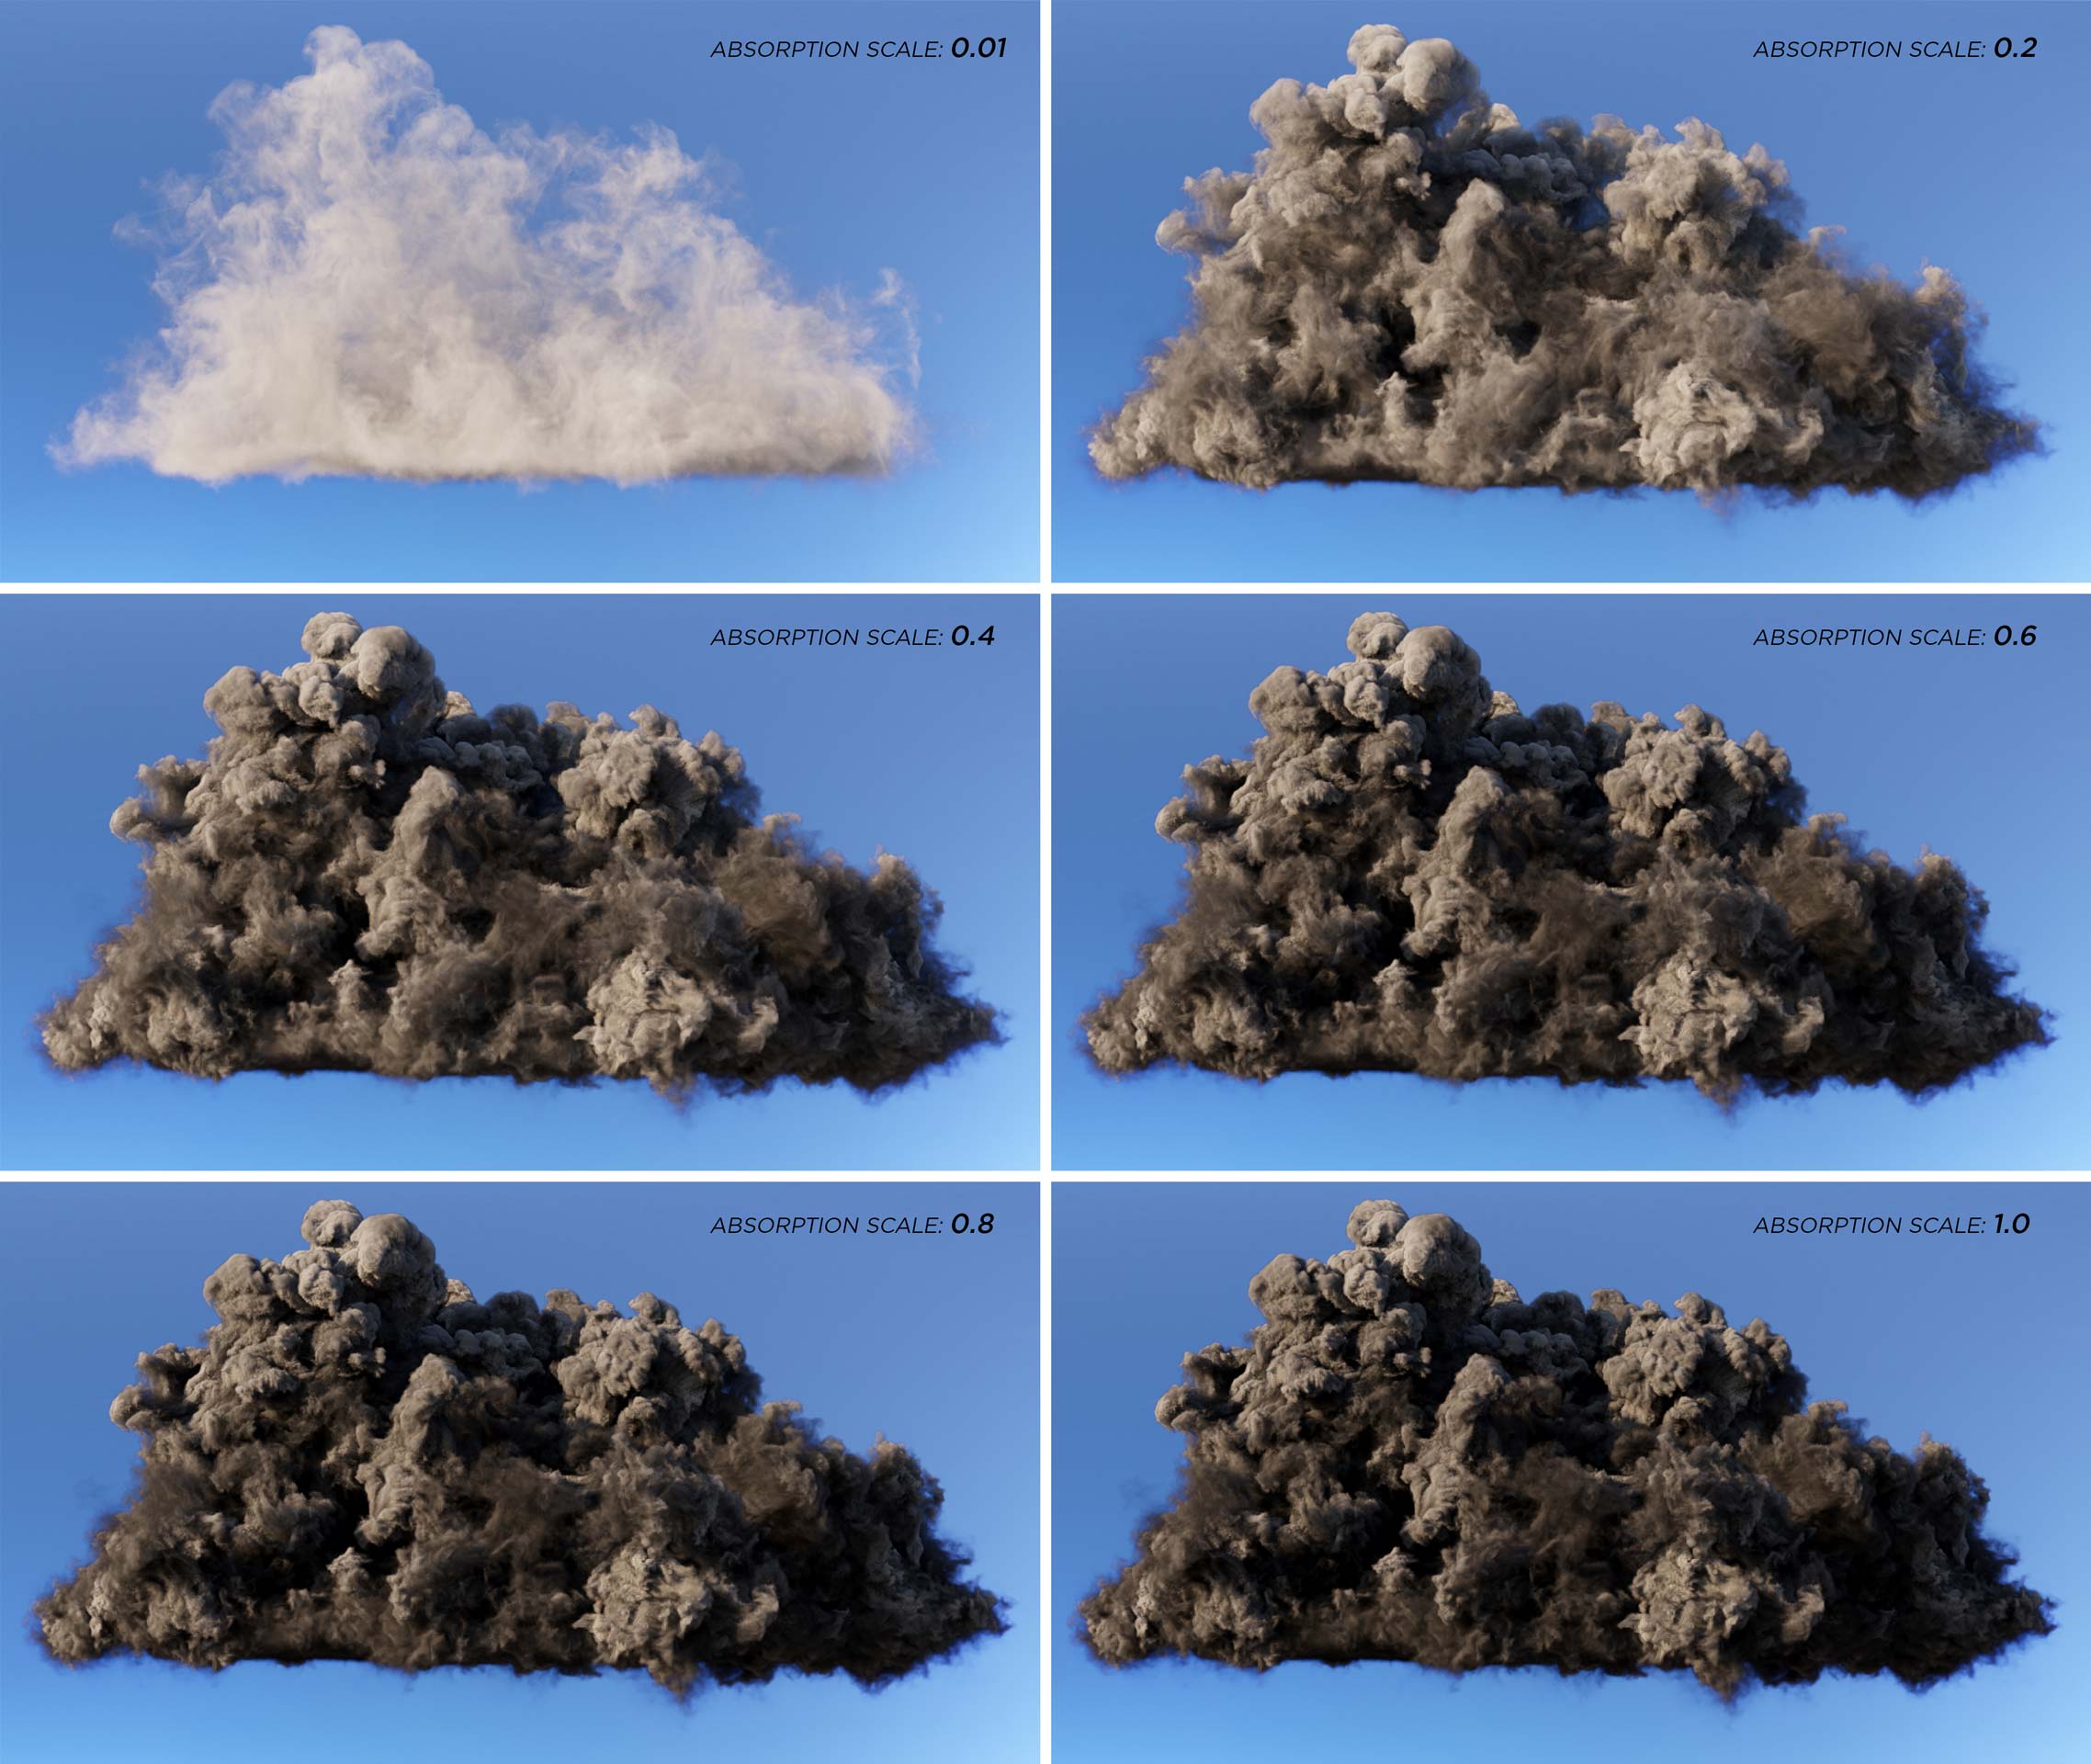
The Absorption Scale is quite useful to control how dense you want your cloud to be.
You can see from the image that a low Scale value will result in a quite sparse volume, whereas a value close to 1 will create a thicker volume.
In terms of rendering time, we noticed that the values from 0.2 to 1.0 took twice as much to render, compared to the value 0.01.
Scattering Scale
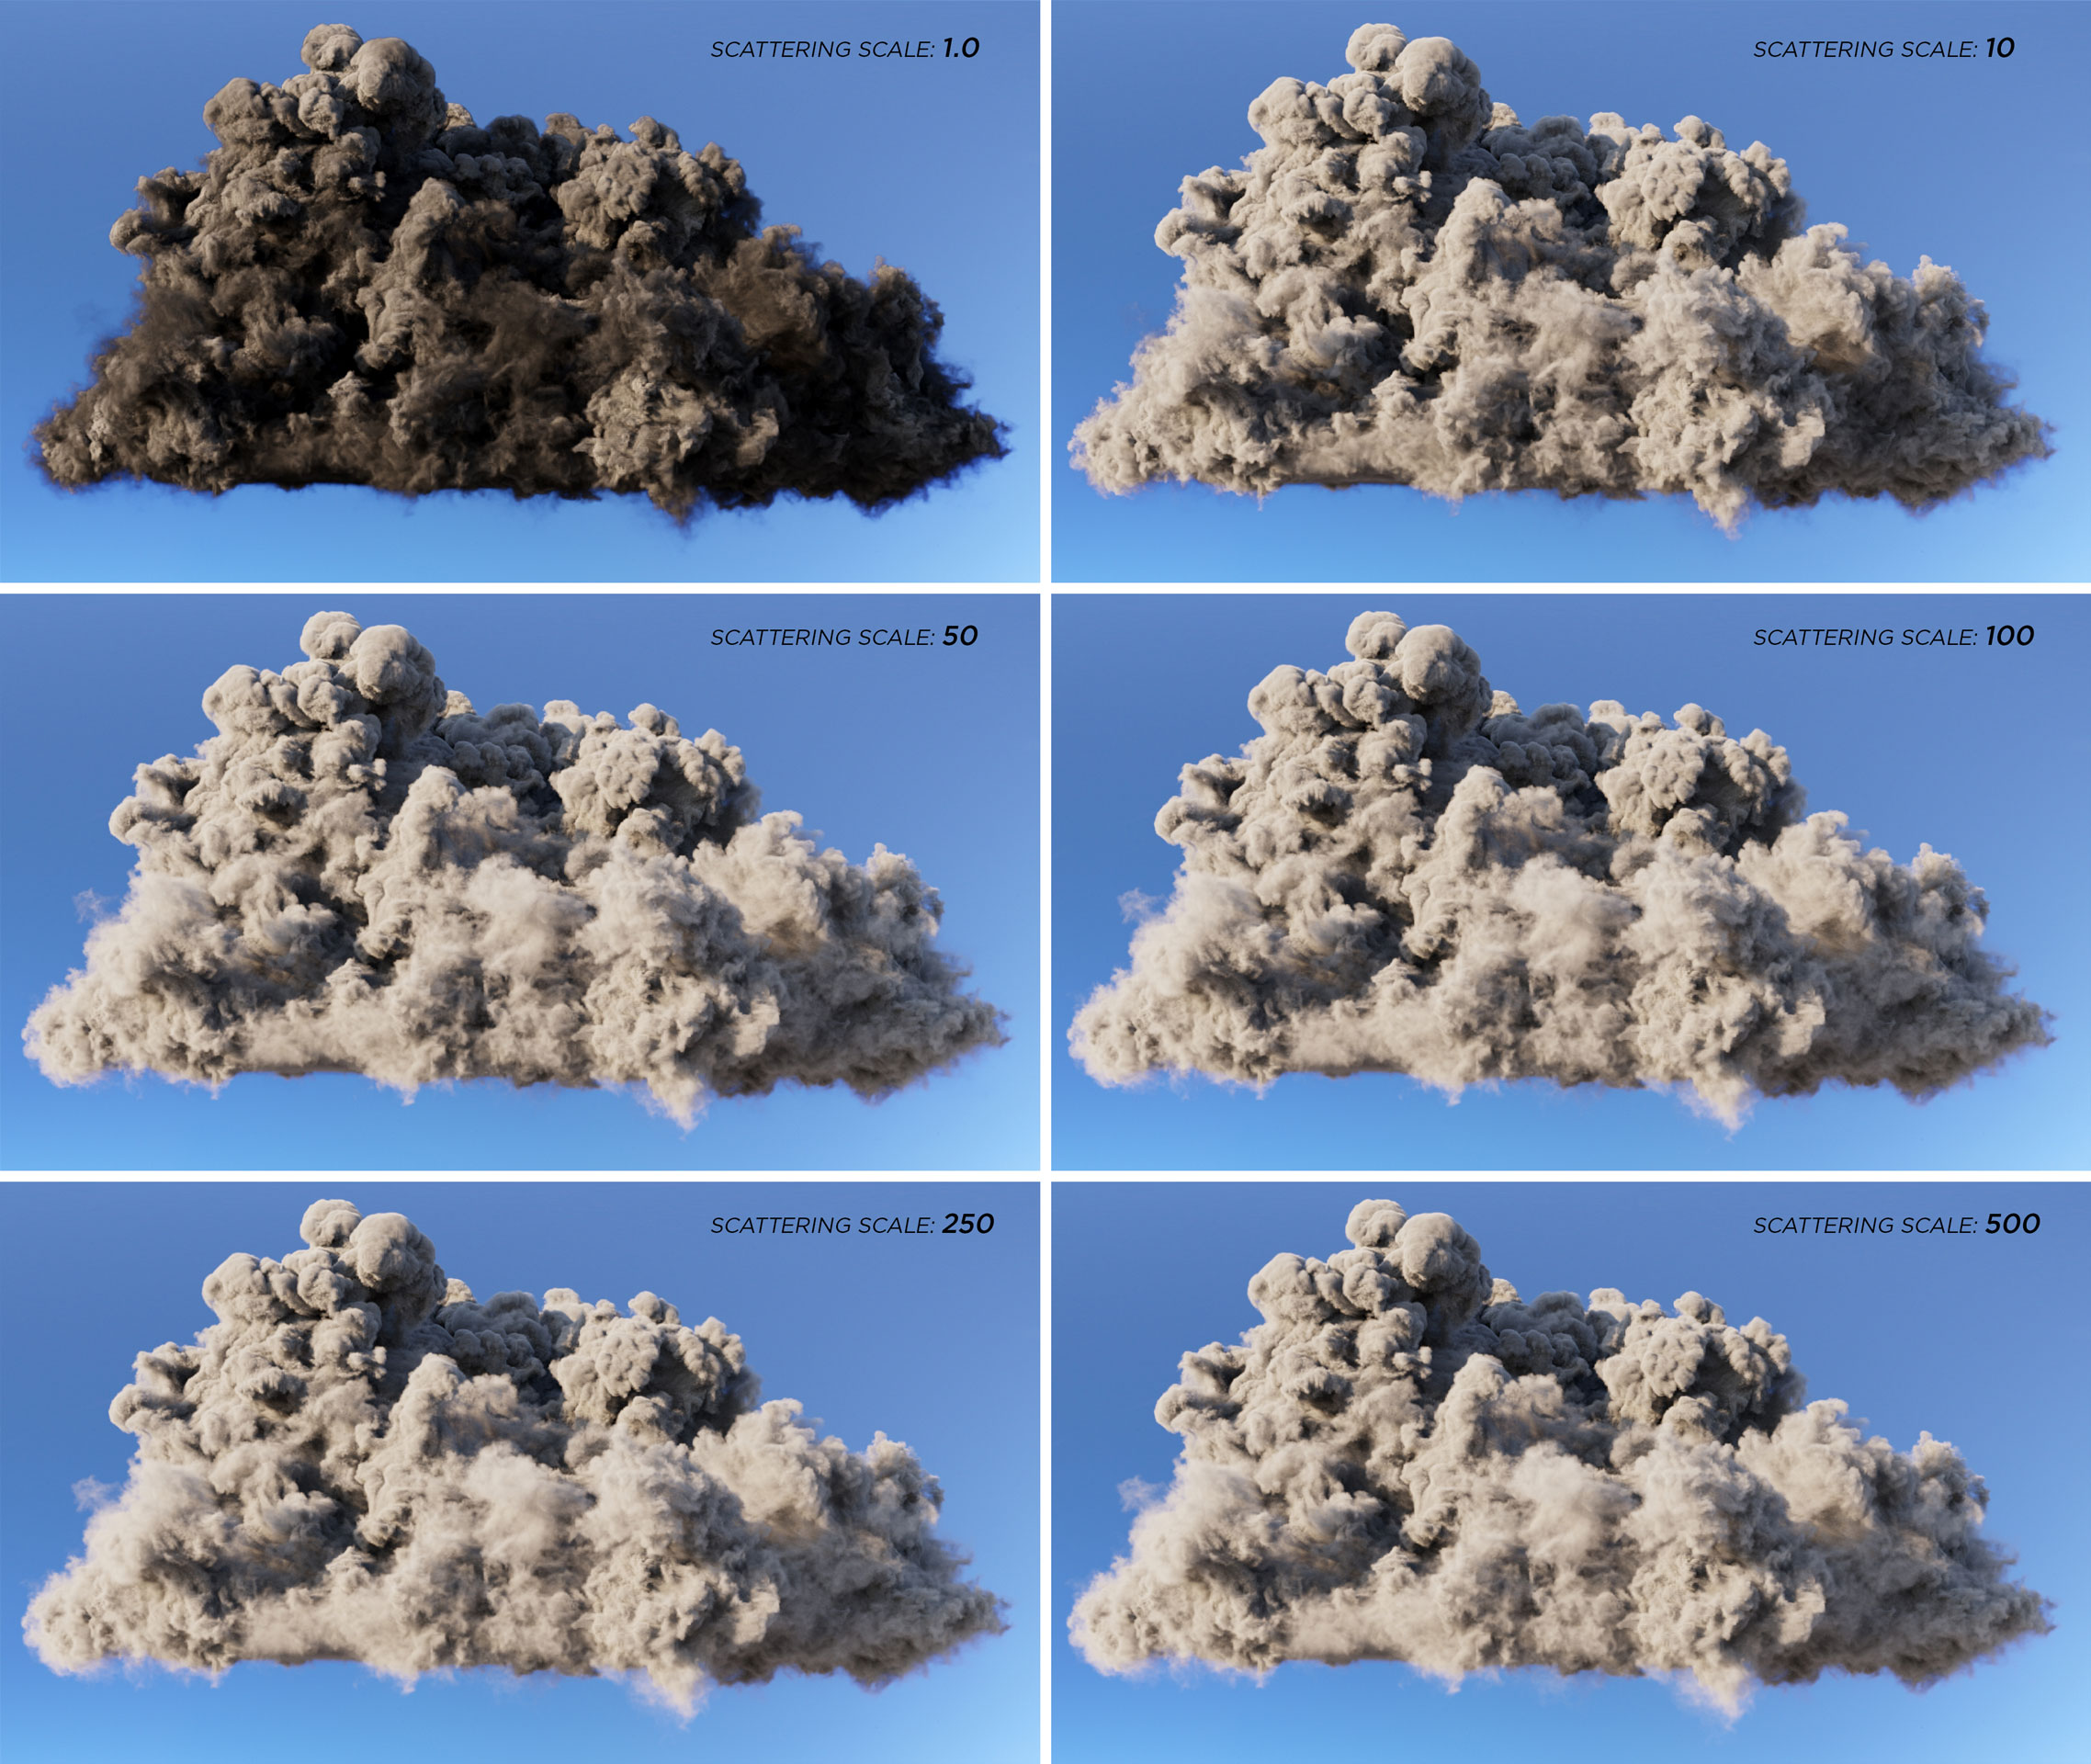
The Scattering Scale is useful to make the cloud look whiter. Notice that values above 50-100 don’t affect the look that much: there are only small variations in areas with low density values. All tests were pretty much around the same rendering time.
The examples above were all rendered with the Single Bounce only option enabled. And remember, the outcome always depends on the original density stored in the vdb file; so if you try with other clouds you may get different results.
Now, let’s focus on a very important behavior of clouds, the Anisotropic Scattering.
Anisotropic Scattering represents the complicated scattering behavior of real clouds, meaning that light will scatter in a lot of different directions, both forward and backward, in a non-uniform way.
For example, smoke has an isotropic scattering behavior, which means that the light inside tends to scatter uniformly in every direction. Clouds, on the other end, don’t behave like this. They are mostly forward scattering, which means that the light tends to scatter in the same direction, so away from the light source. But, as you may have noticed by looking at the clouds in the sky, there is a “silver lining” effect along the borders of the cloud (mostly visible when the sun is behind). That effect is in part generated by backward scattering.
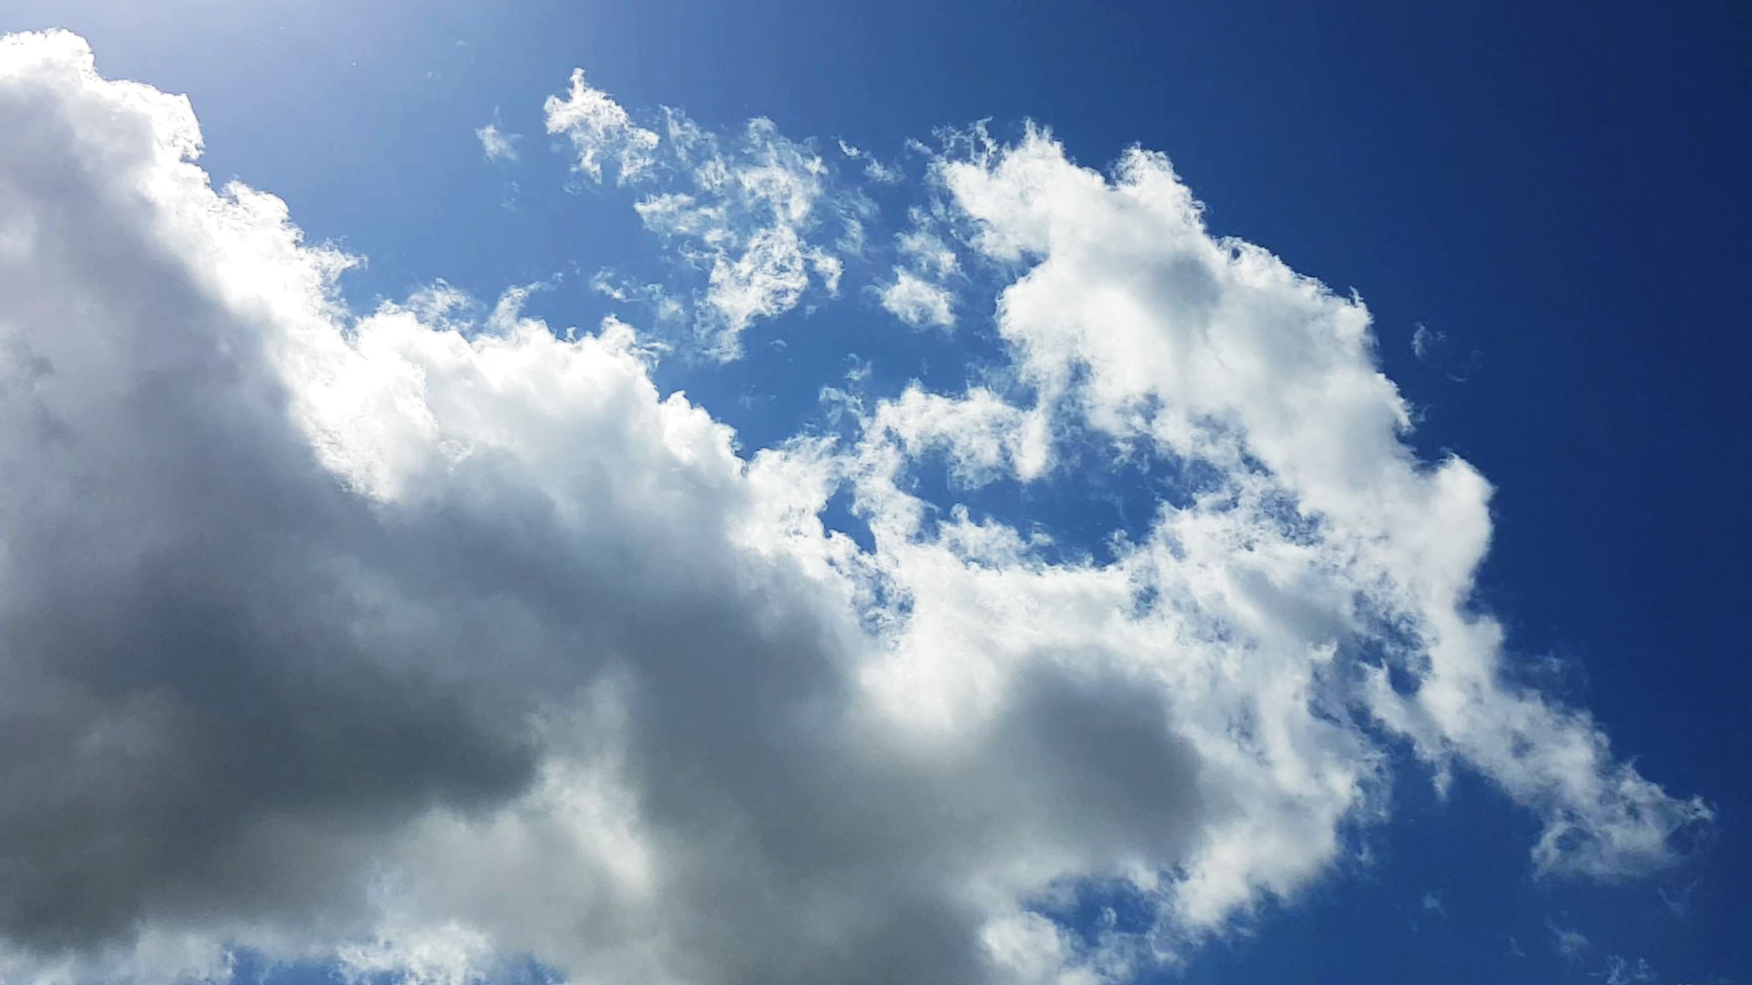
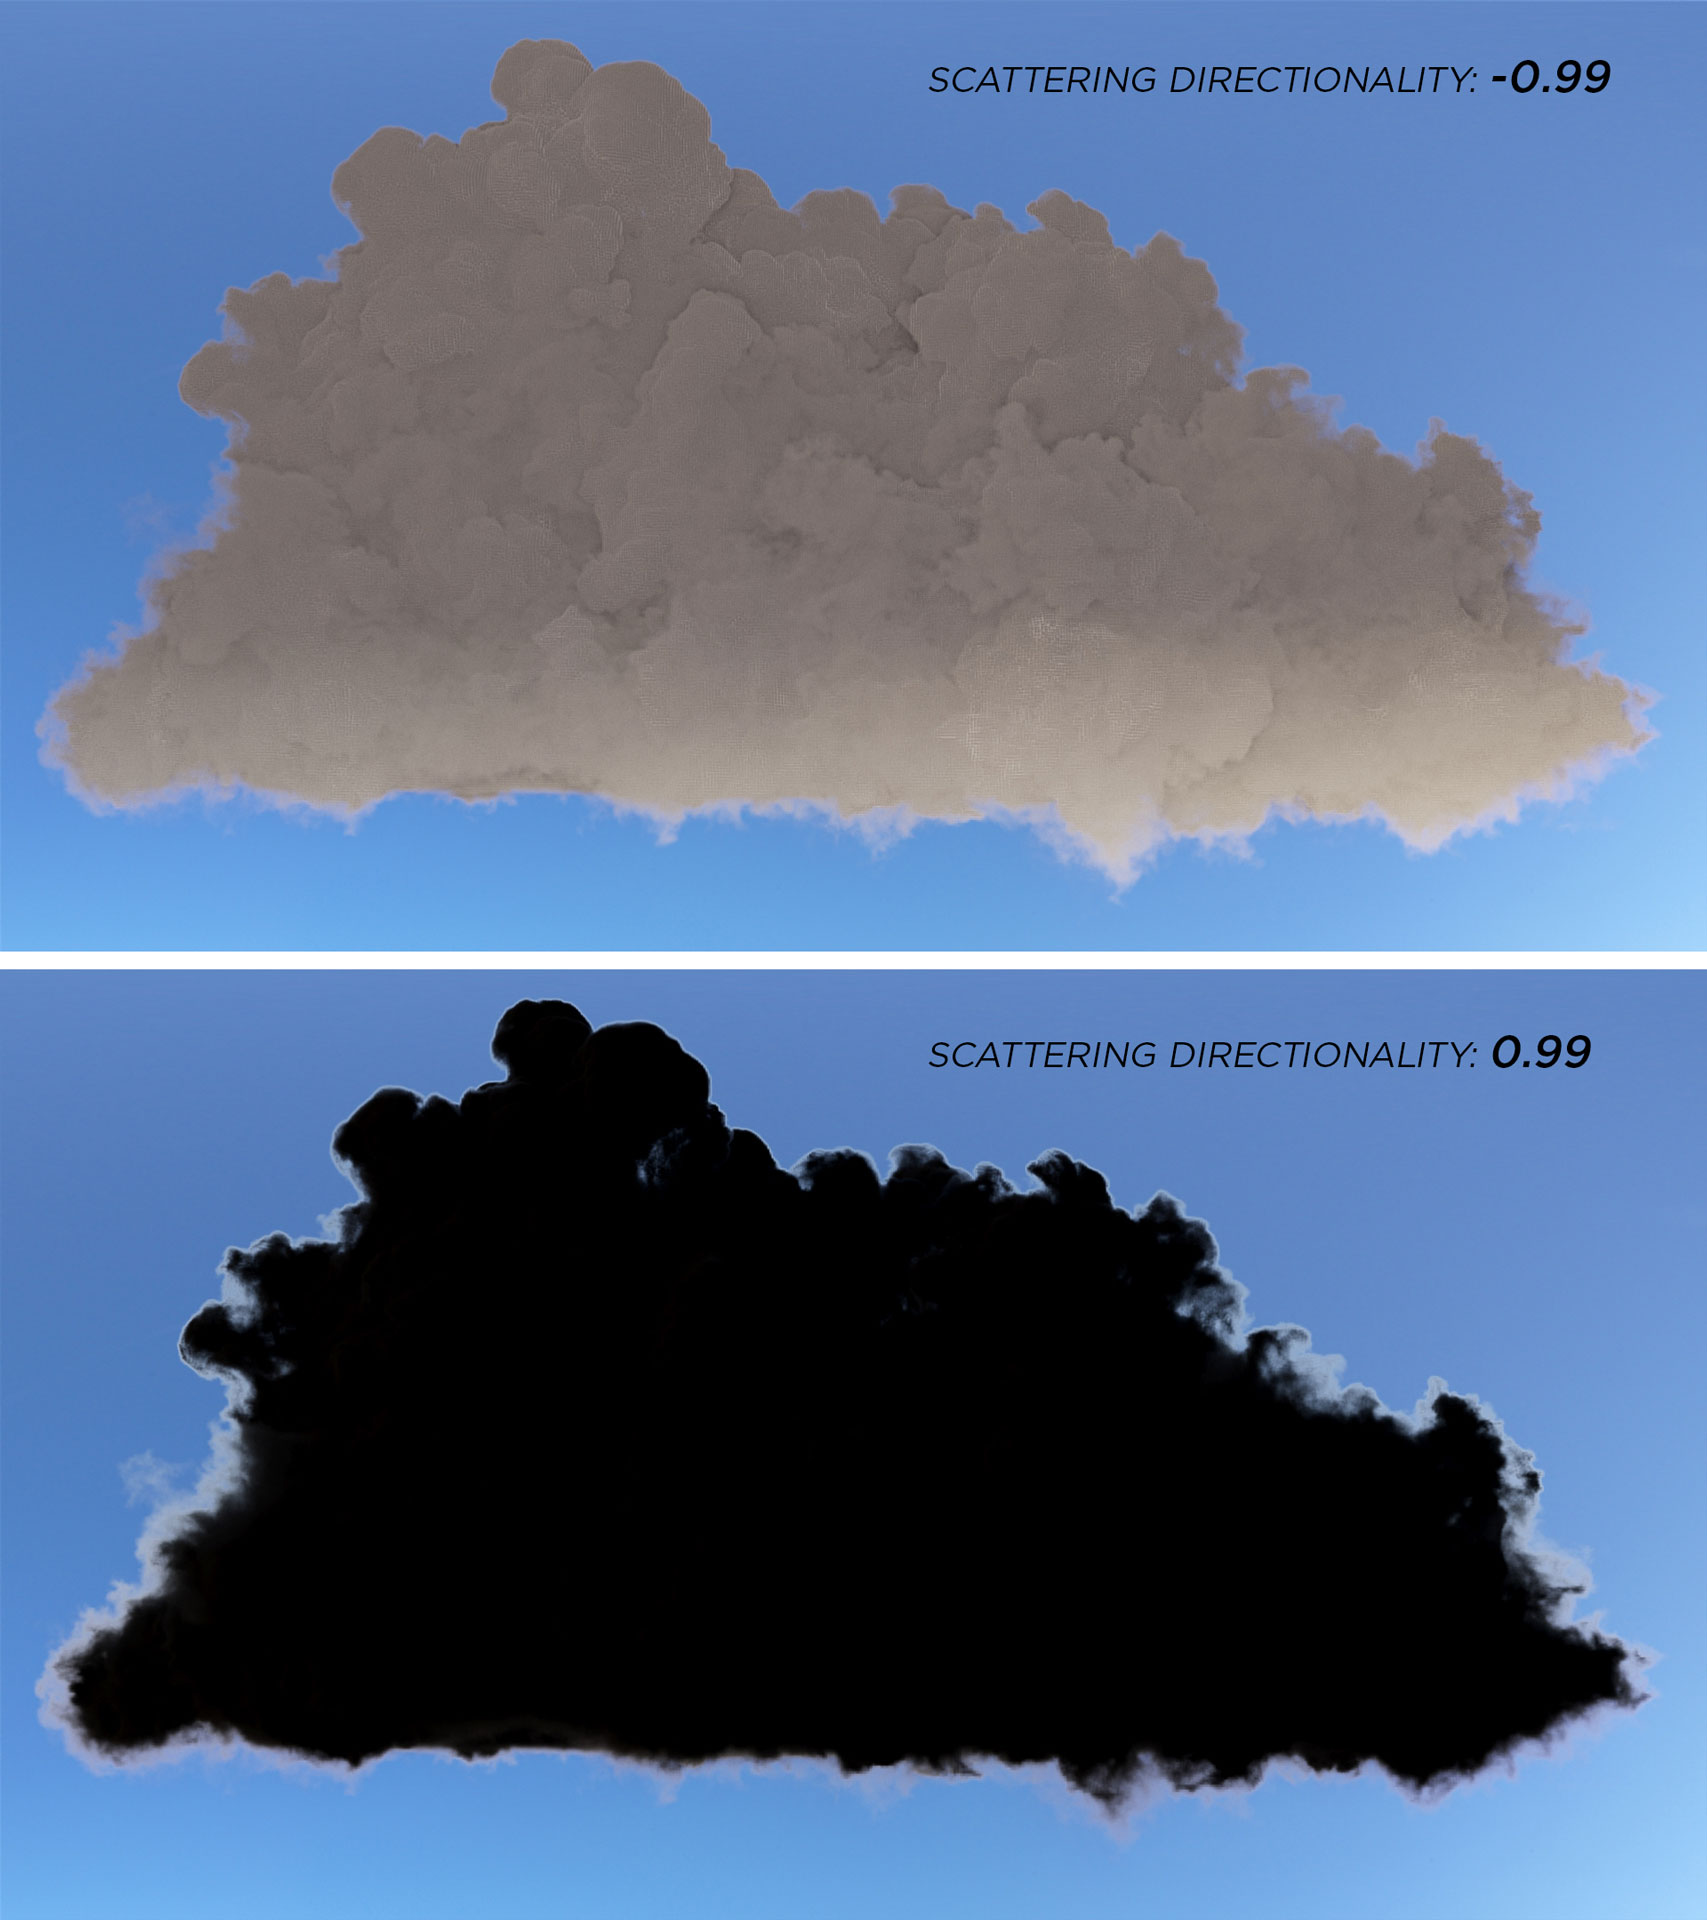
In some render engines, there are multiple parameters to control this Anisotropic Scattering behavior. In Corona Renderer we can use the parameter called Directionality under the Scattering section. The value can have a range from -0.99 to 0.99, and setting it correctly is fundamental to create that “silver lining” effect.
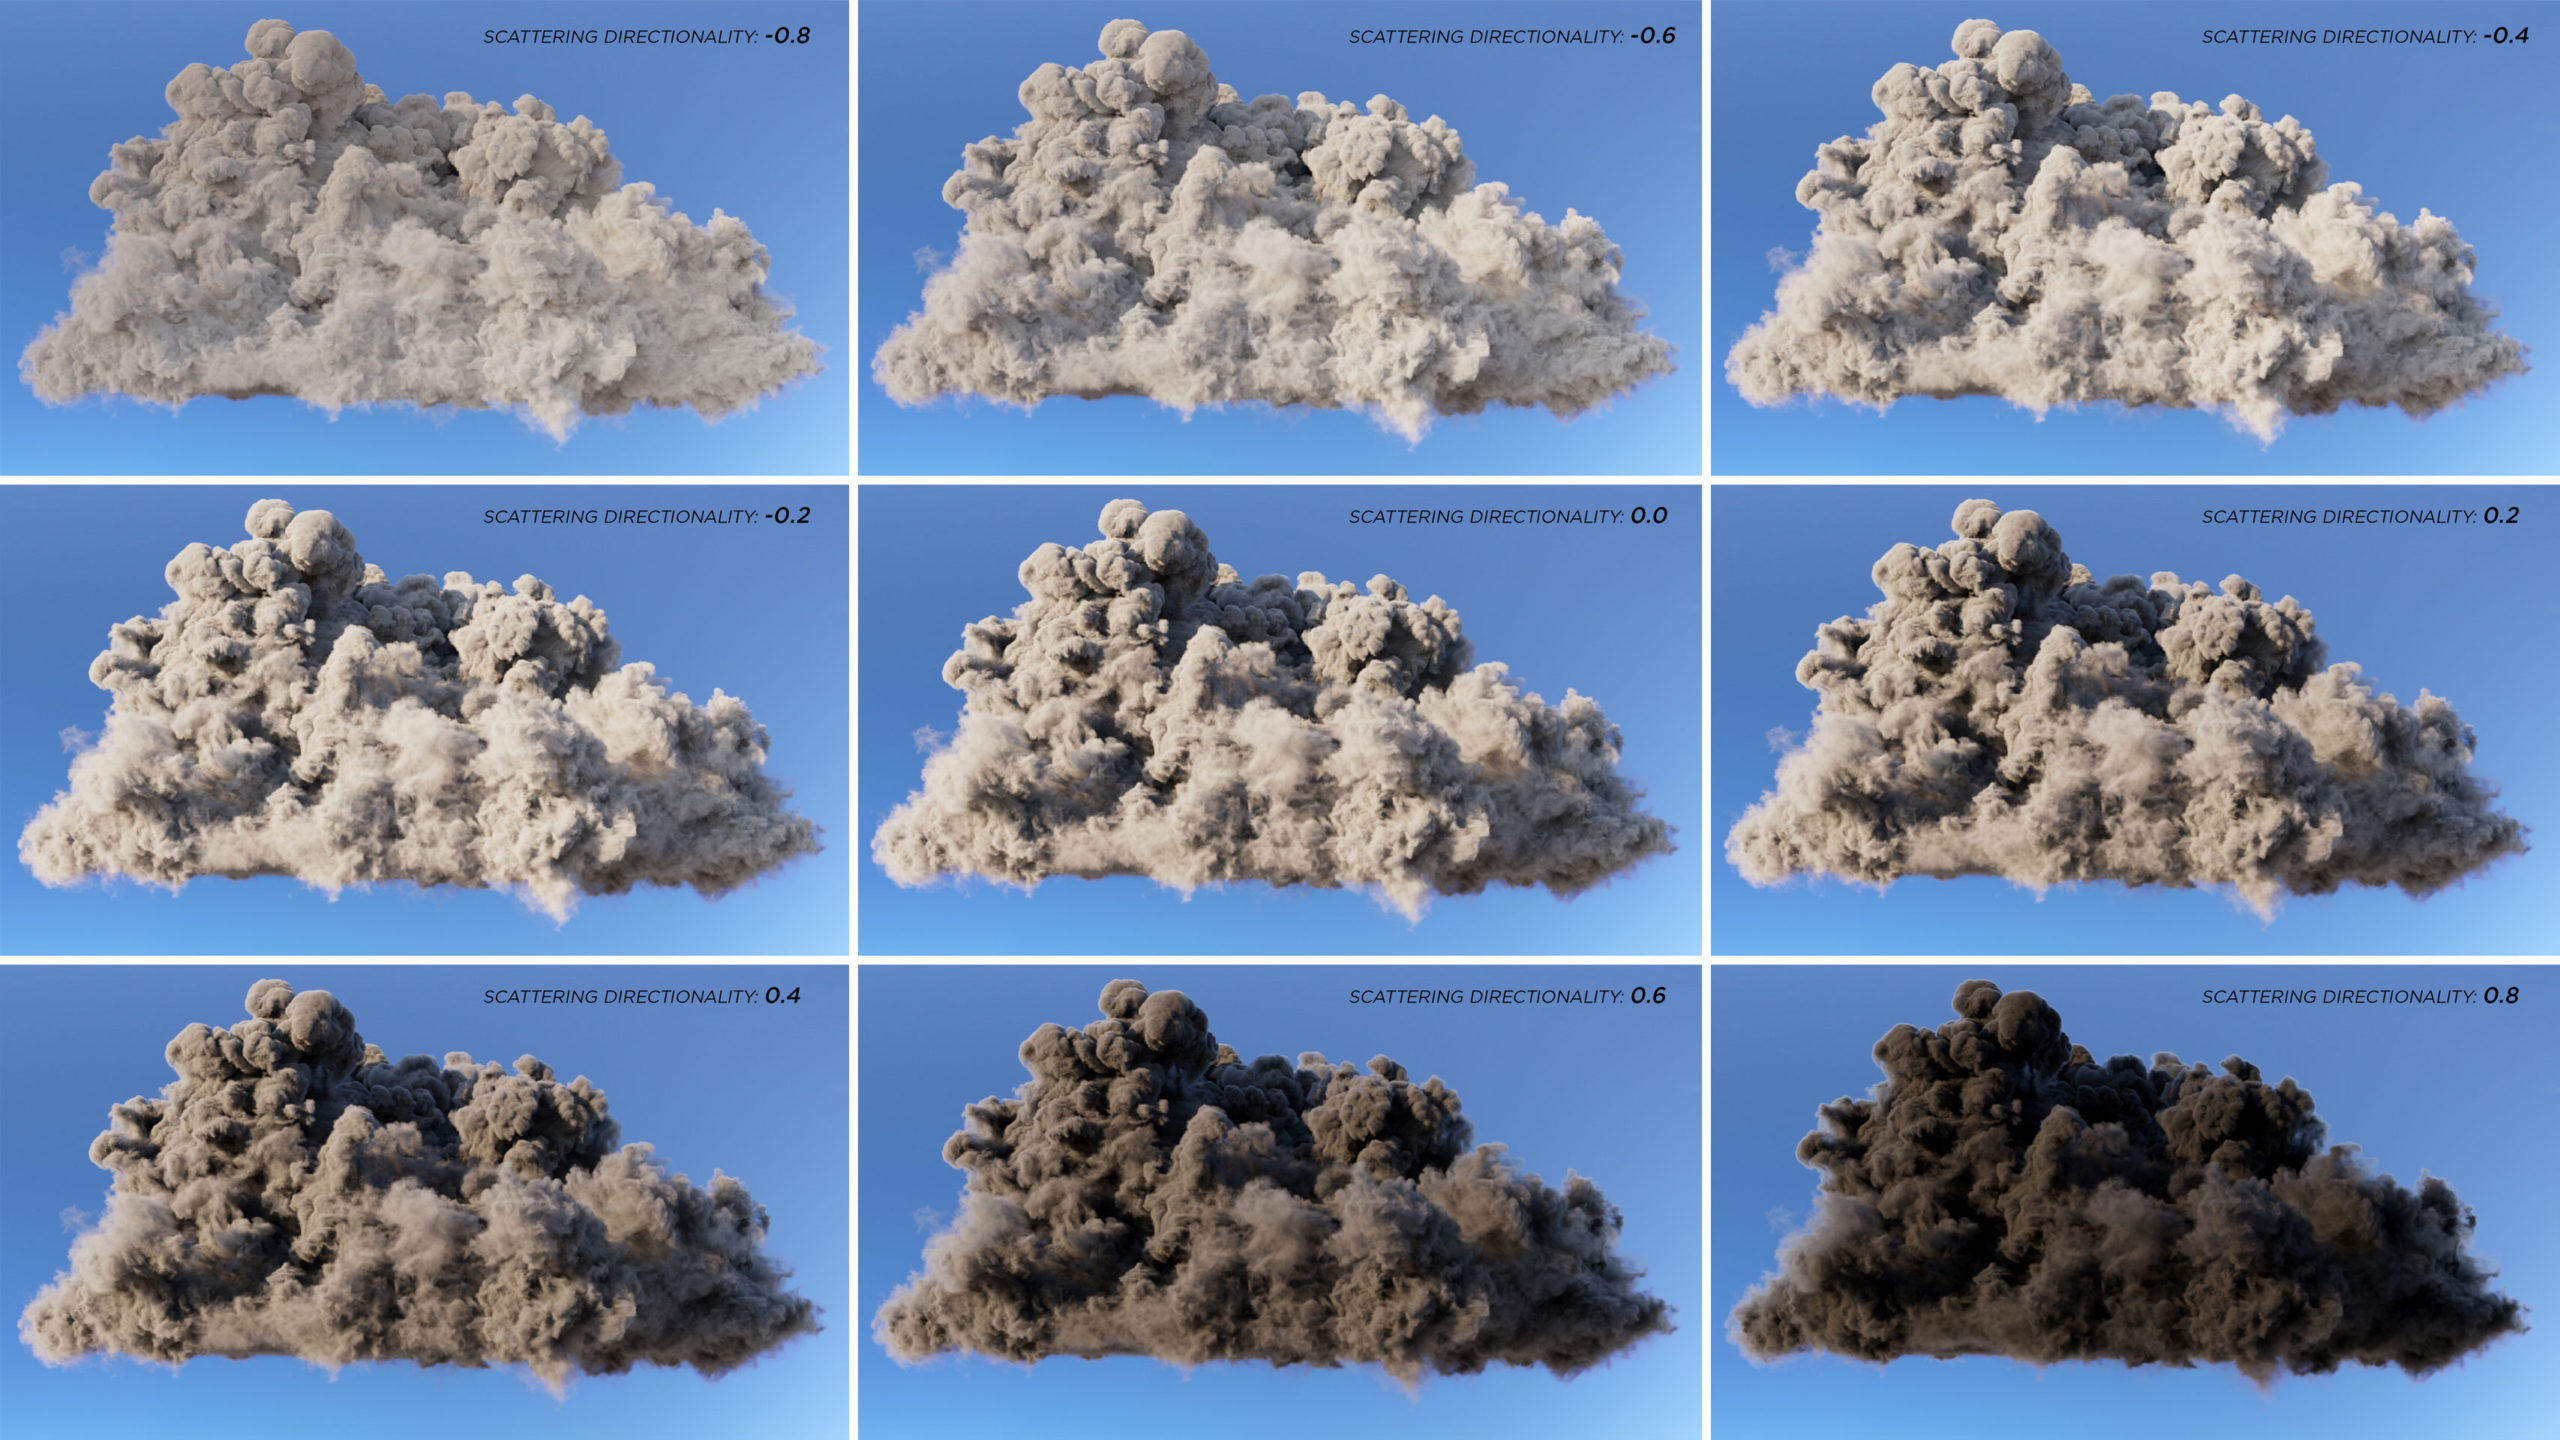
Since clouds are mainly forward scattering, we need to set the Directionality to a positive value, and as soon as you increase it, you’ll see the effect appearing on the borders of the cloud. Be careful not to increase it too much or the effect will disappear.
If you set it to a negative value, the volume will be mostly backward scattering, and it will appear lit from the front.
Take a look at the images below to understand how the Directionality affects the result.
First let’s see the 2 extremes, -0.99 and 0.99: the effect is too strong.
Then here the results for values between -0.8 and 0.8:
Until now, the cloud has been quite dark. The last parameter we need to change is the Single bounce only, and set it to Disabled. This allows the render engine to compute multiple scattering bounces inside the volume. Keep in mind that it also increases the render time.
You may also need to increase the Scattering Scale value to make the cloud whiter.
Here a comparison between Single Scattering and Multiple Scattering:
Now, let’s take a look at a few things in the render settings.
In the Performance tab we need to change the Ray Depth to 100, otherwise the Multiple Scattering cannot be computed to its full extent.
Below is an image that shows how it affects the volume:
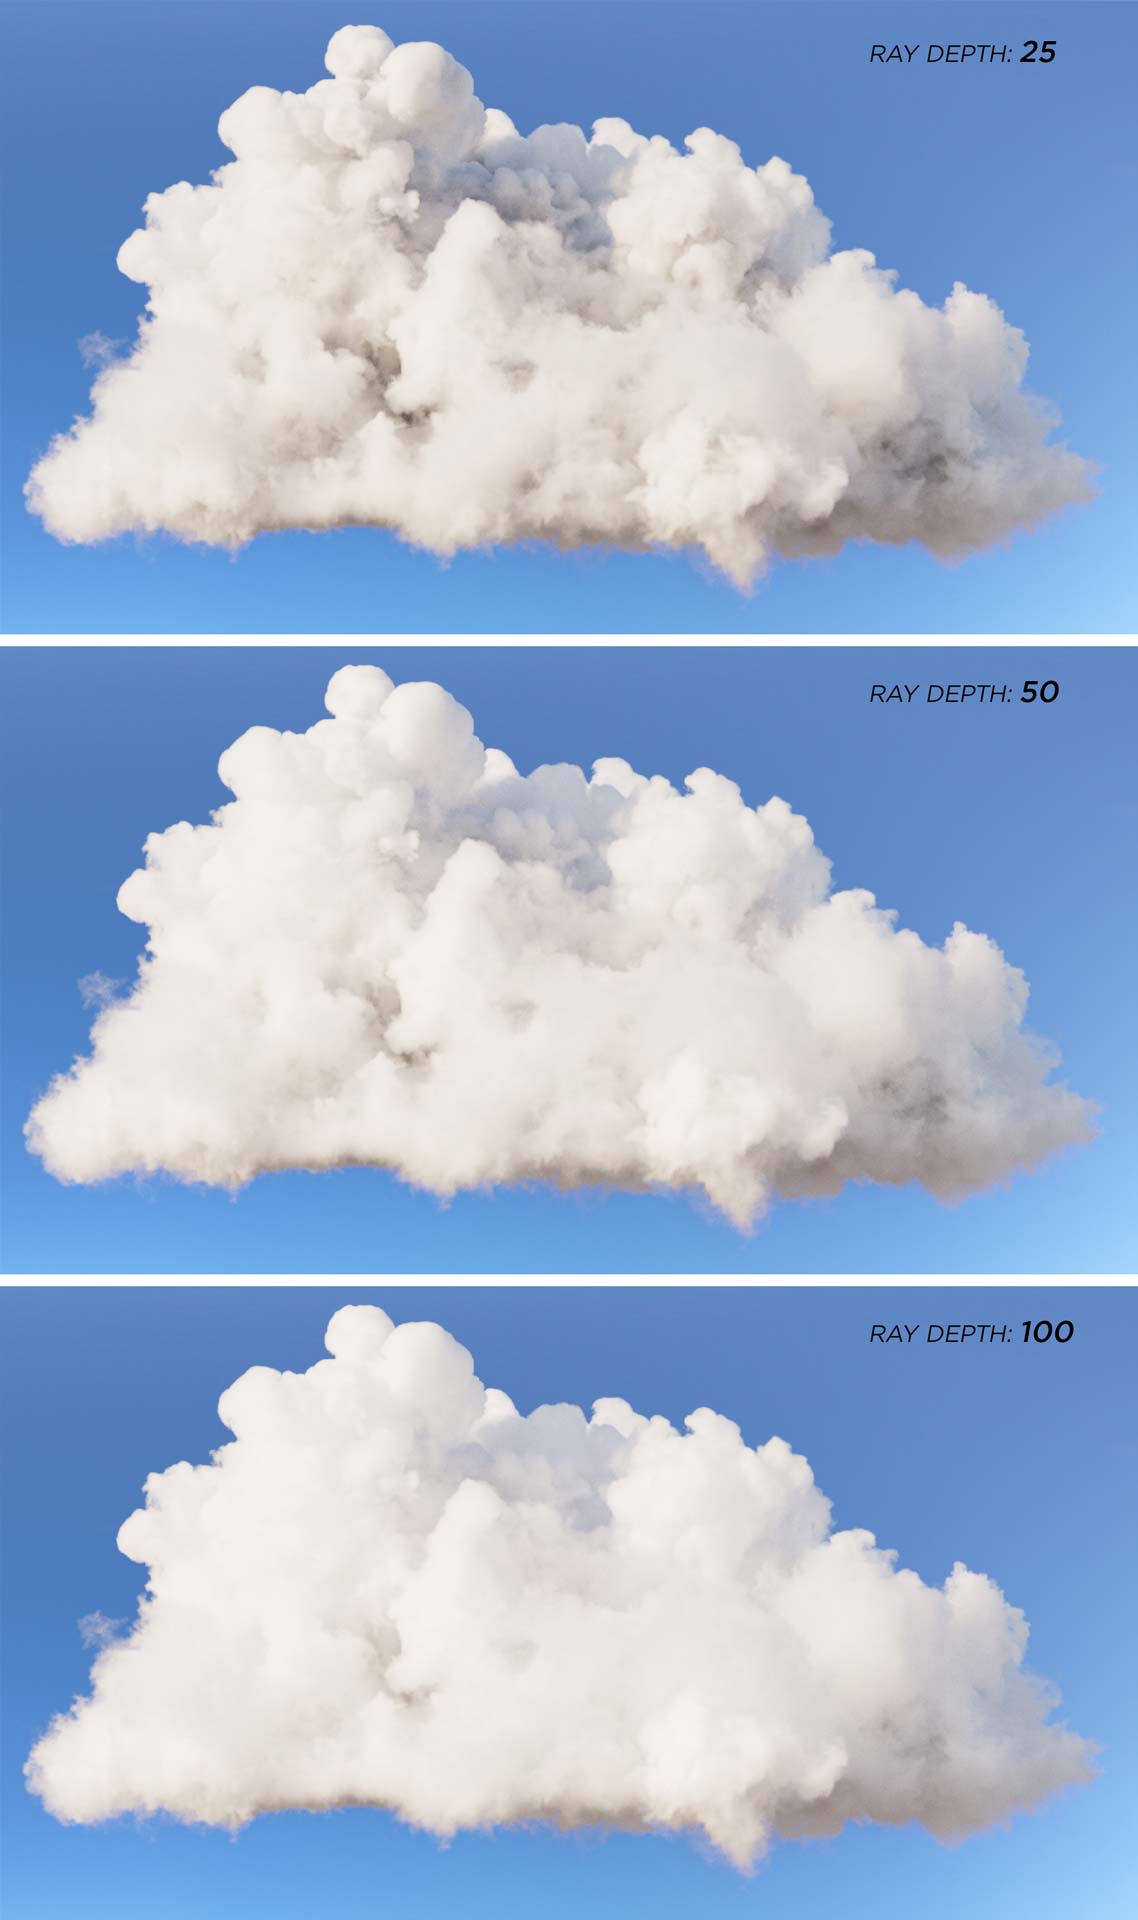
Here a quick comparison of the render times:
- Ray Depth 25 → 1x
- Ray Depth 50 → 1.25x
- Ray Depth 100 → 1.9x
Rendering clouds can take quite some time, depending on the settings and resolution of the vdb file. An option to get less noise, in the same amount of render time, is to change the values under Sampling balance in the Performance tab, specifically, the GI vs. AA balance and Light Samples Multiplier (LSM).
Lowering the first one will result in less noisy images. Although this works in case you need to render a single cloud, it may not be ideal for a full scene with other types of assets.
For example, in the scene of the article on Forest Pack 7, these settings were at their default values. Decreasing the Light Samples Multiplier will lower the noise even more. Below you can see how changing those values affects the Noise Level, by keeping the same render time limit (30 min):
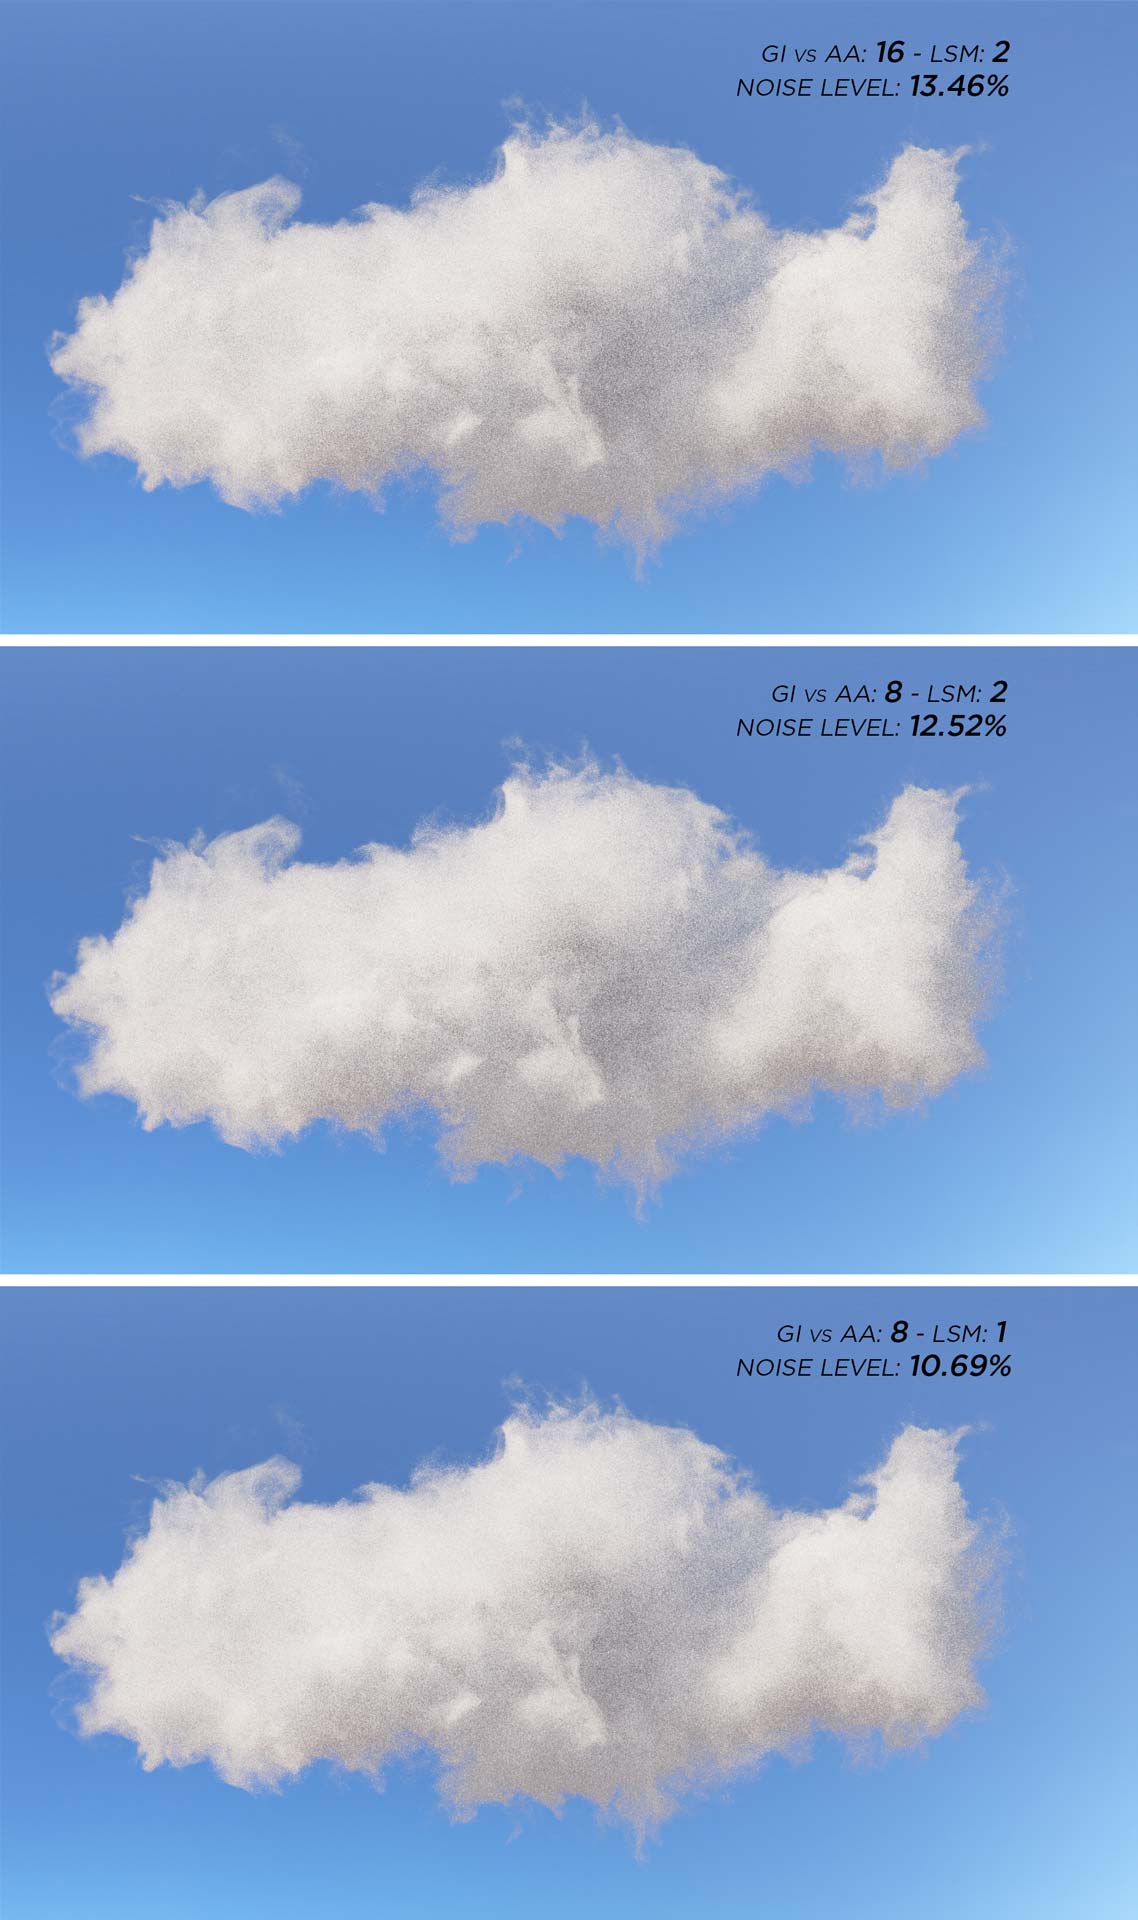
By increasing the two values the render times will jump to the roof, but you may also get a few more details in the cloud.
Here are the final renderings of the cloud in its full glory, with a few different lighting conditions:
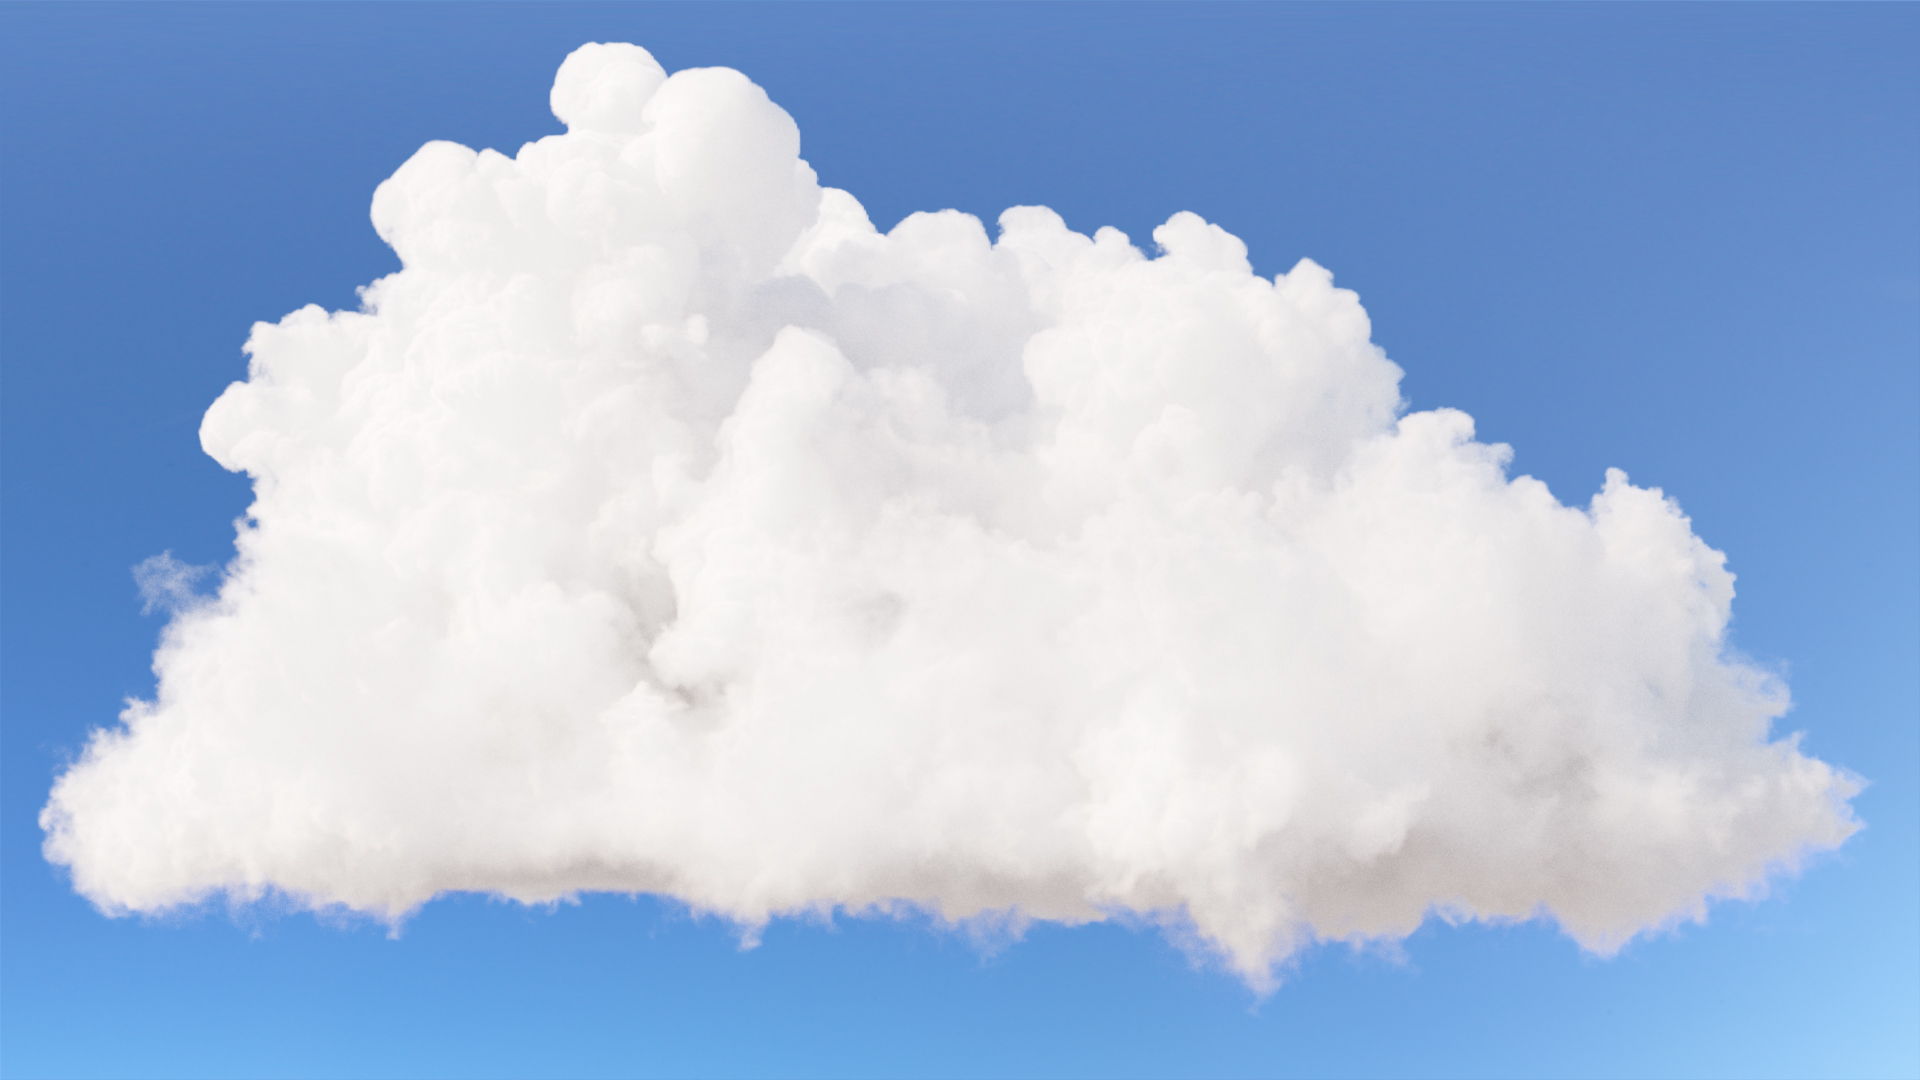

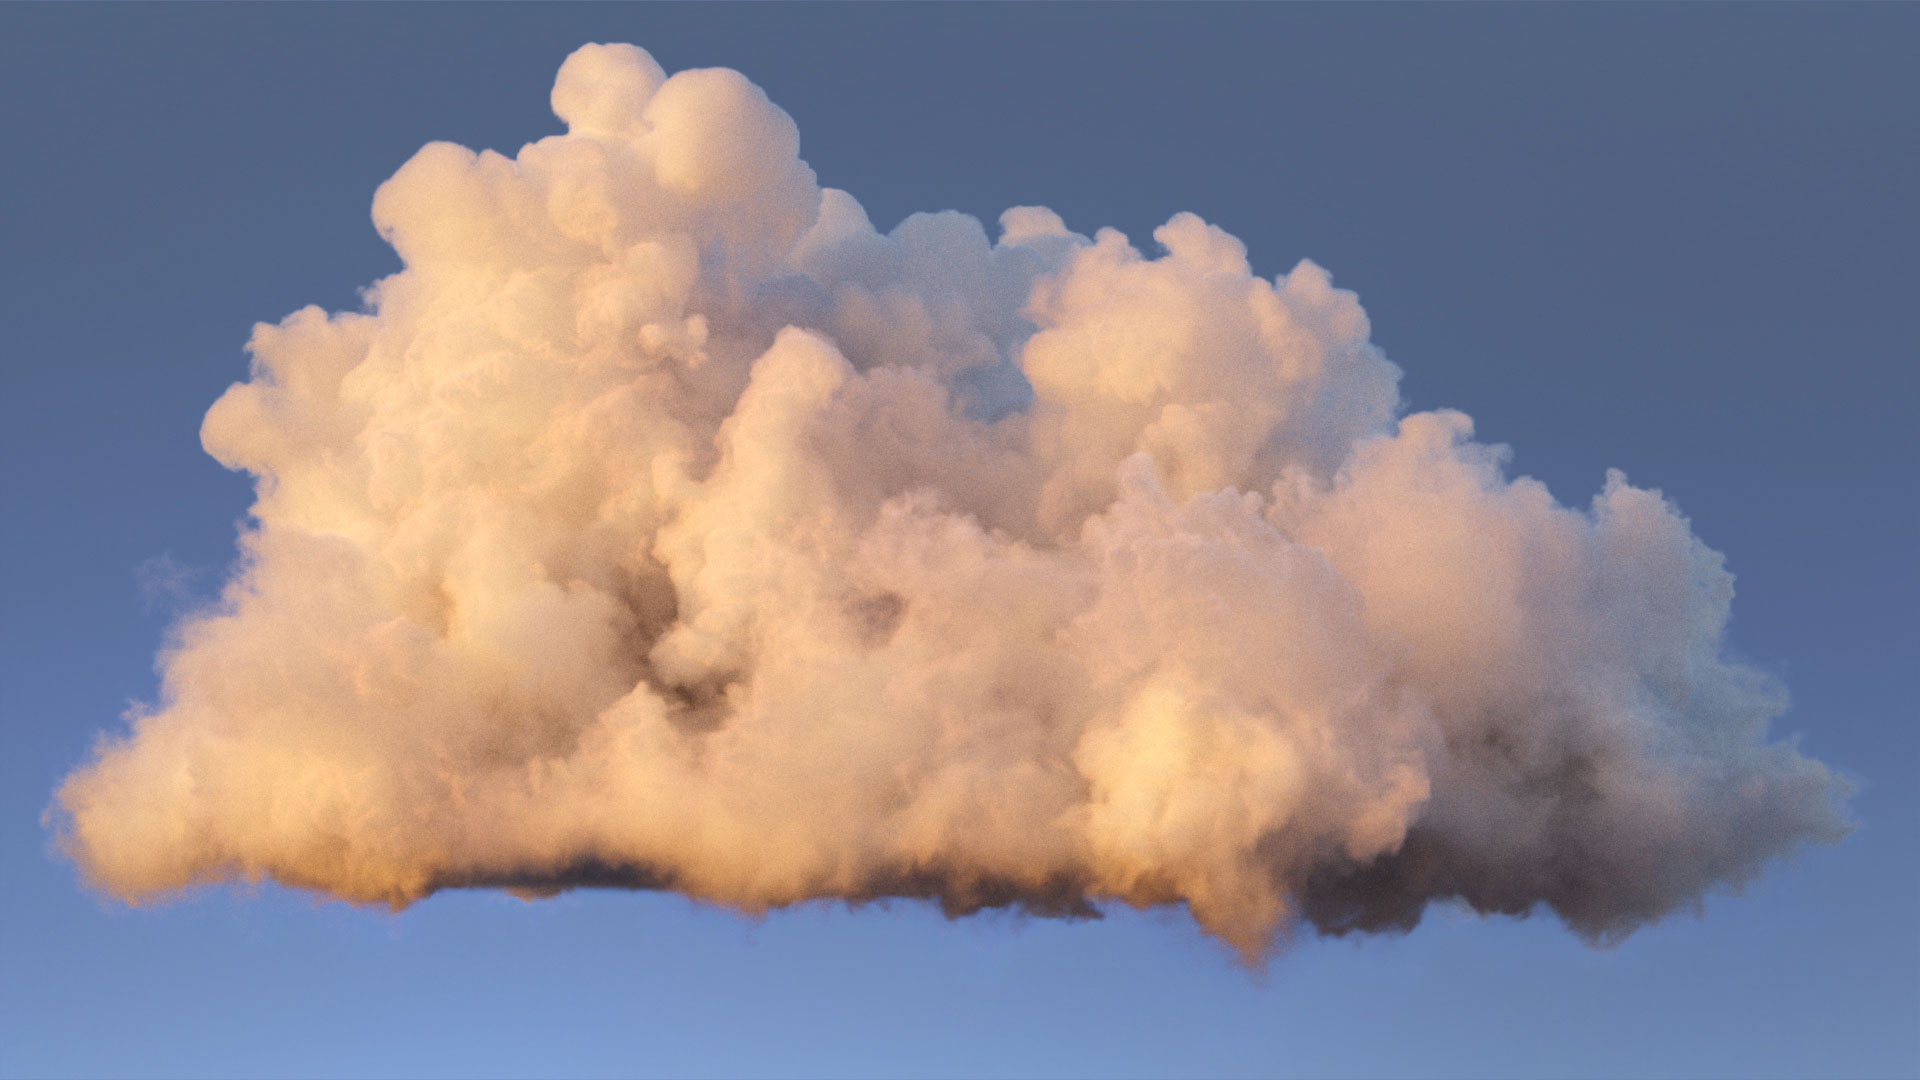
Before rendering I also changed the Step size value to 0.1 to get less noise and possibly more details. Consider that you may not need to change it, if your clouds are quite distant from the camera. In this particular case, we are focusing our attention on a single cloud, and we need to bring out all the details.
Take a look at how the Step Size affects the volume in the image below:

Just a note about render time, the image with Step Size set to 10 was 4 times faster than the one set to 0.1. But of course there is a huge difference in the amount of details, and noise.
So, just to recap, here is full list of settings we used for the rendering:
CoronaVolumeGrid
- Absorption
- Channel → Density
- Tint → White (255, 255, 255)
- Scale → 0.8 (depends on the original density of the vdb file)
- Scattering
- Channel → Density
- Tint → White (255, 255, 255)
- Scale → 100 (depends on the original density of the vdb file)
- Directionality → 0.8
- Single bounce only → disabled
- Rendering
- Step size → 0.1cm
Render Settings
- Secondary solver → Path Tracing
- GI vs. AA balance → 8
- Max ray depth → 100
OpenVDB Clouds creation
There are multiple software packages, or plugins, you can use to create clouds. What is important is that you can convert a geometry to a volume, by applying a density attribute to it. The OpenVDB file format will store the attribute, which is then used by the render engine to render the density of the cloud.
Shaping a cloud can be fairly simple, if you need something quick, with not too many details. Creating a realistic shape, on the other end, is quite complicated, and you may need to tweak a lot of parameters. But, as always, it depends on your needs.
The clouds used in this article, and in the previous one about Forest Pack 7, were all generated with Houdini, by simulating the formation of the cloud with the Pyro Solver, starting from a simple primitive. There are different ways to shape clouds, let us know if you’re interested! We’ll try to make a tutorial about it!
Wanna have some fun? Login or create a free account and use the link below to download the OpenVDB files of two clouds. Try them in your project!
Feel free to share the images you render with these clouds on our Discord Server or on our socials!
Enrico
Below a recap of this tutorial.
Are you interested in learning more about Corona Renderer? Have a look at our Online Course!
Resources for the article:
https://rdcu.be/ci2AF
http://www-evasion.imag.fr/Publications/2008/BNMBC08/clouds.pdf
https://www.weather.gov/source/zhu/ZHU_Training_Page/clouds/cloud_development/clouds.htm
https://www.researchgate.net/figure/CHEMICAL-COMPOSITION-OF-WOOD-SMOKE_tbl3_5226126
https://acp.copernicus.org/articles/20/391/2020/
https://whatsthiscloud.com/
https://cloudatlas.wmo.int/en/home.html
https://learn.bom.gov.au/mod/book/view.php?id=5580&chapterid=4112

