We spent a few hours playing around with
Substance Stager, and this is what we found out.
Hello, everyone! My name is Francesca, and I’m a junior 3D artist at SOA.
As you may already know, we enjoy experimenting with new software. A few days ago, I played with Midjourney to get some references. I decided to use one of the results to improve my craft, simulating materials, lights, and cameras using Substance Stager.
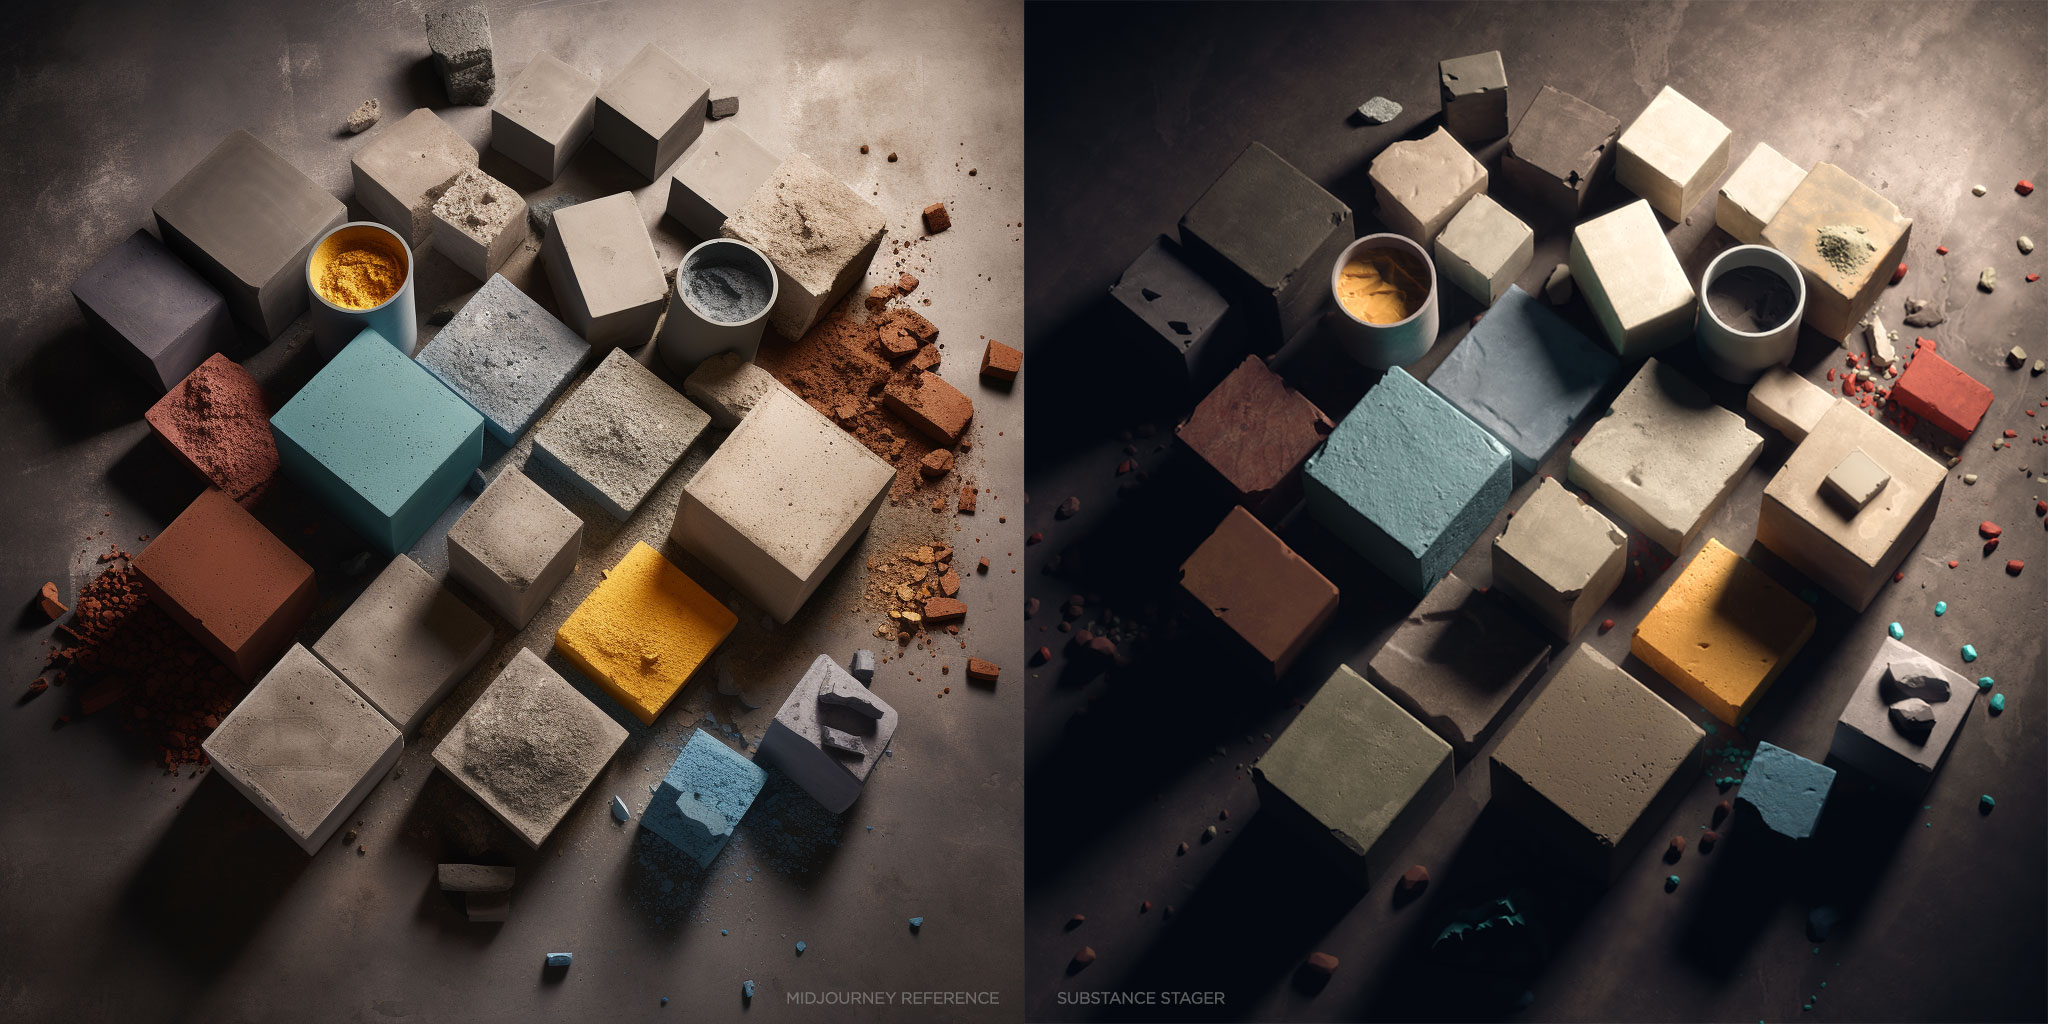
On the left, the AI version we used as reference. On the right, the final result, using Substance Stager, Modeler and a drop of Photoshop!
Substance Stager?
Substance Stager is an intuitive staging tool created by Adobe that lets you build a scene, populate it with 3D meshes, add materials and lights, and render it.
It’s integrated with the other Substance tools, so bringing your creations together and generating a final artwork is super easy. For example, I imported a few broken boxes I sculpted in Substance Modeler and materials from the Substance3D Asset website.
Substance Stager uses Adobe’s Mercury Render engine, which is a hybrid CPU and GPU renderer. You can get very fast previews to assemble your scene, and by turning on raytracing, you can get a real-time preview that is very close to the final render.
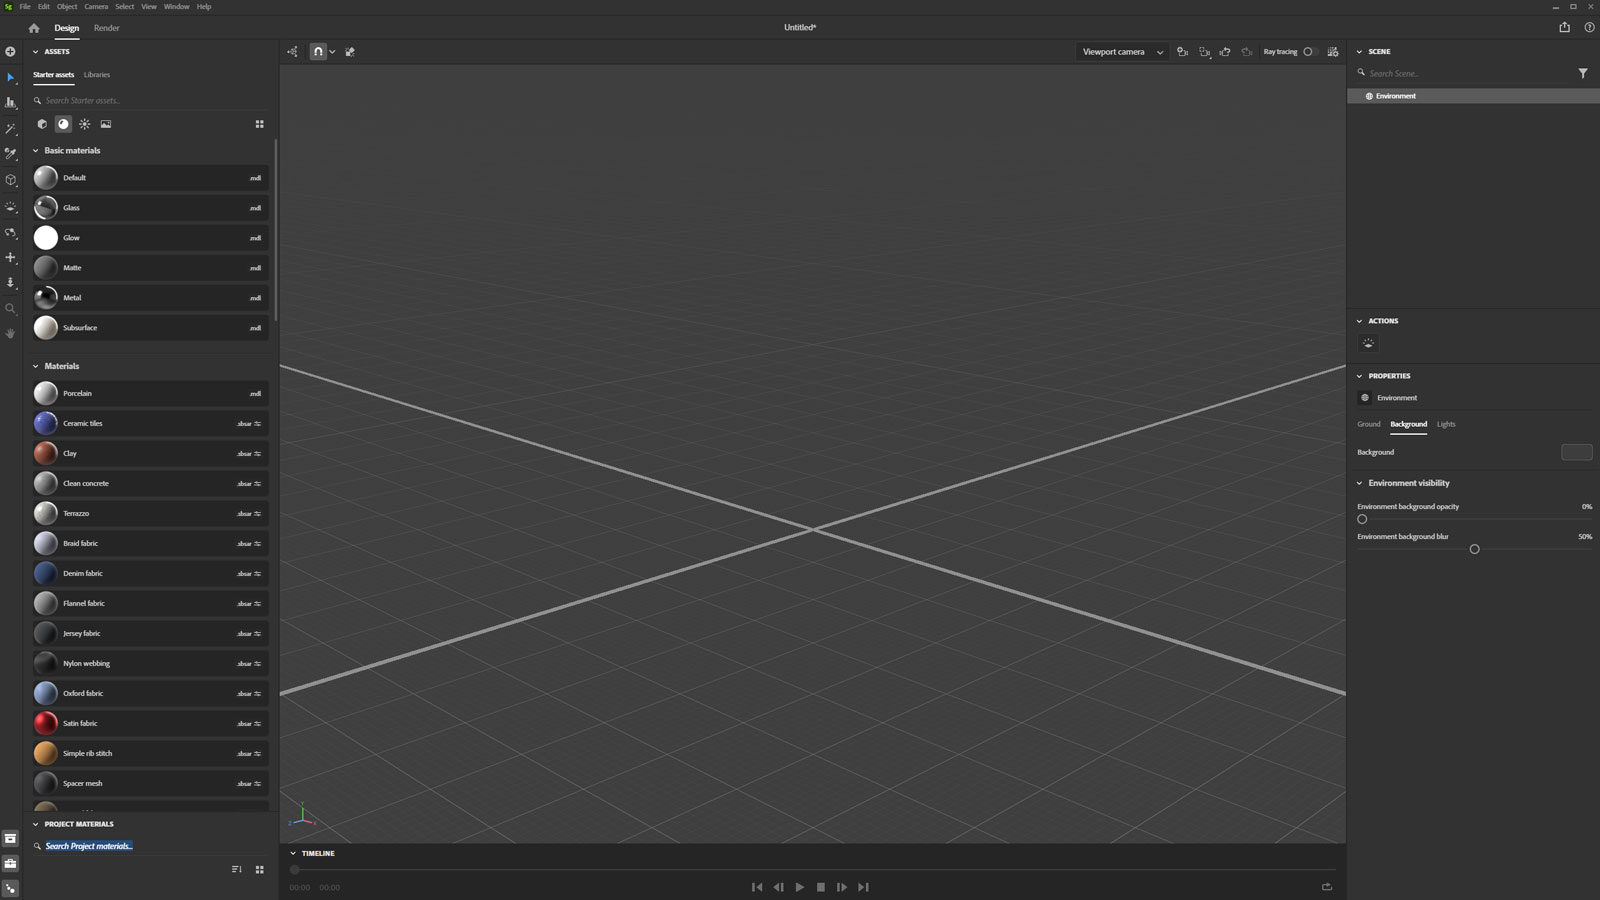
Substance Stager viewport.
Part #1: Blocking the scene
Before diving into advanced modeling and lighting, we had to get the right camera match. Even if the starting reference is AI generated, it looks like the perspective was solid and worked out well.
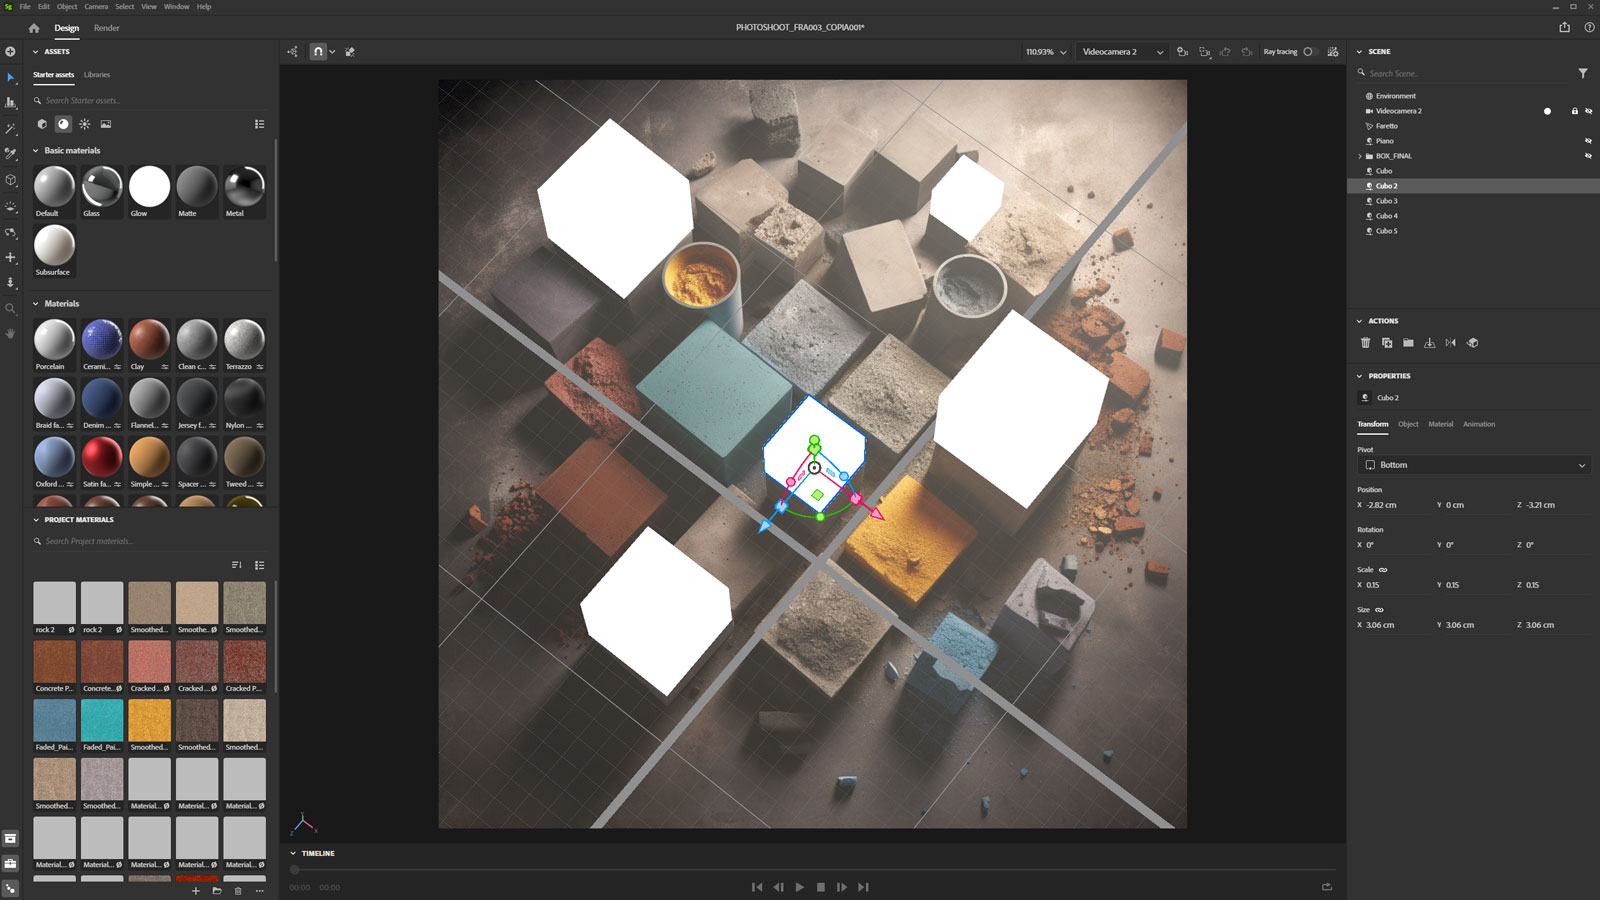
Substance Stager allows you to add an image as a background, so this part was pretty easy. We added a few boxes to understand the focal length and the camera position. It took a few tries, but I was pretty happy with the match.
TIP: If you want to be sure about your camera placement, add more boxes and cylinders (or any shape that suits your scene). If you have done it right, everything should align with the background image, regardless of position.
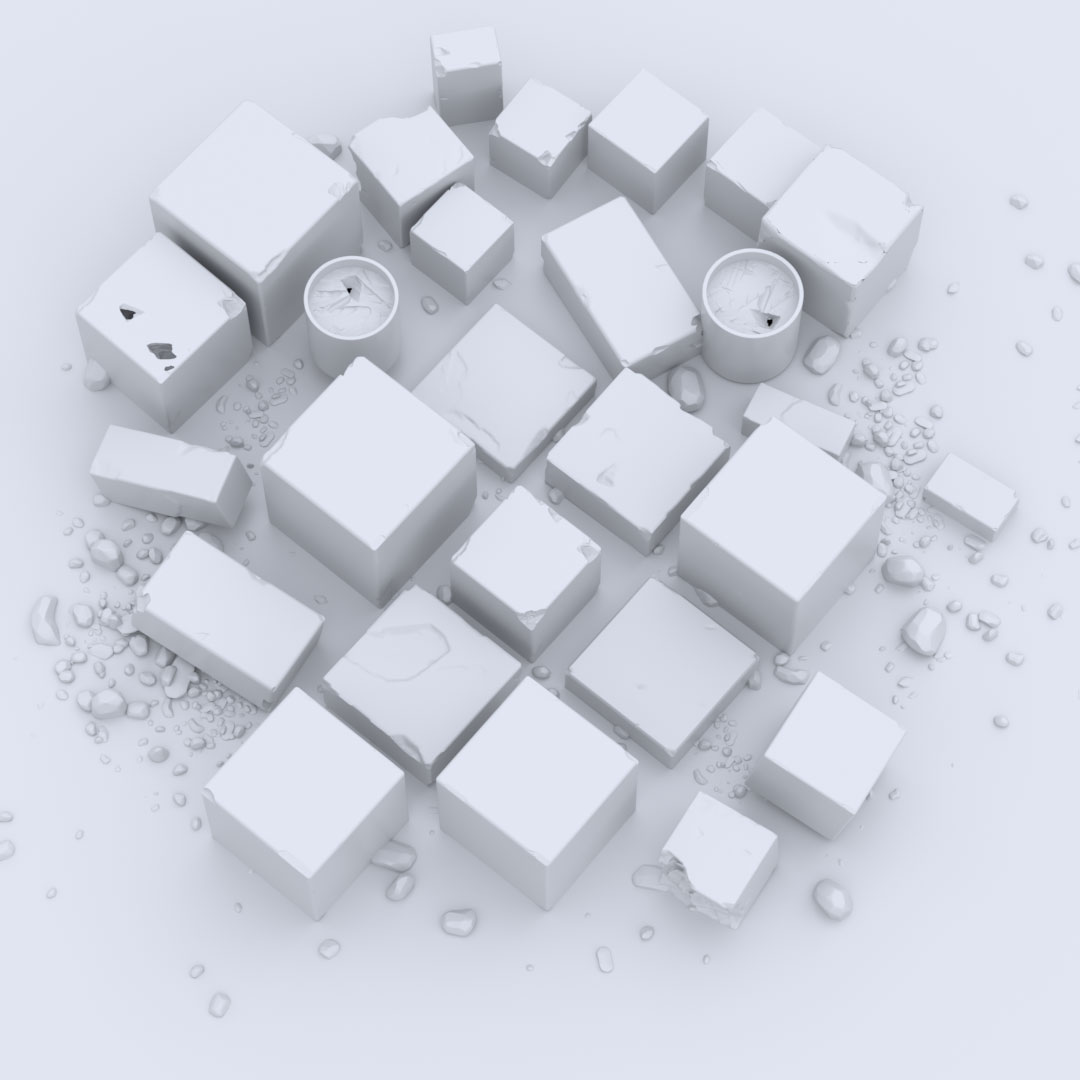
Initial blocking to match the camera perspective
Part #2: Modeling cubes
As you may imagine modeling mainly cubes was not that difficult, but I had a lot of fun!
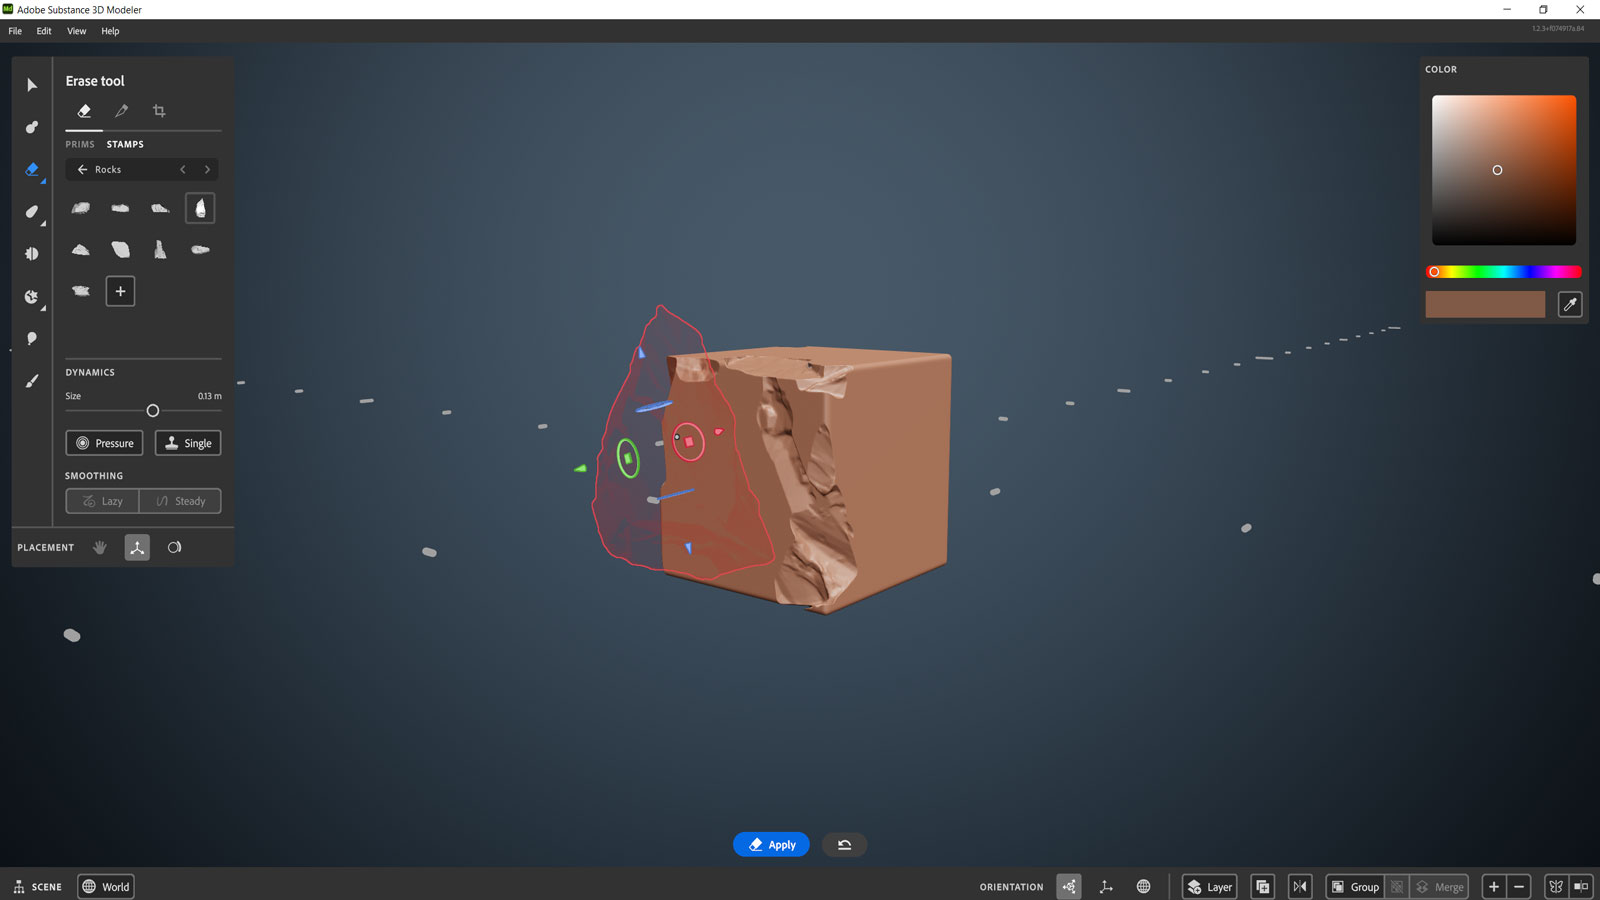
With Substance Modeler, we’re working with voxels, so I started by increasing the density to get better details. After making a simple box with the Clay tool, I used the Erase tool to carve into the surface. Instead of working with a simple round brush, I switched to Stamp mode, where you can find a folder full of rocks. I rotated the brush and changed its size to randomize the result.
TIP: If you add different types of details for each face of your object, you can reuse it many times just by rotating it in the scene. From the camera’s point of view, it will look like a different mesh, even if it’s the same one.
Carving into some boxes with the Erase tool on Substance Modeler.
After exporting a few broken cubes, I decided to do the same with a few rocks from the Stamp library. Substance Modeler gives you the option to unwrap your meshes automatically. It works well, but if you want some custom mapping coordinates, you can also import it in 3dsmax, use or not the retopology tool and then unwrap it manually. Just remember, if your mesh has many details, you can easily lose them if the retopology modifier has the wrong settings.
Part #3: Final blocking and scattering
Now that I have boxes, rocks, and cylinders, I can finally replace the old meshes with the new ones. I suggest you be organized by renaming and grouping your objects. Finding them will be much easier when you have to fix mistakes.
A great feature of Substance Stager is that you can enable collisions for any object you want to move. I created a plane for the base and then dragged down every mesh. Everything sits on the floor realistically without problems. That was awesome!
TIP: If you want collisions to work perfectly, just be sure that every object is over the floor when you move them down! If collisions are not working, move everything up in the sky first and then try again!
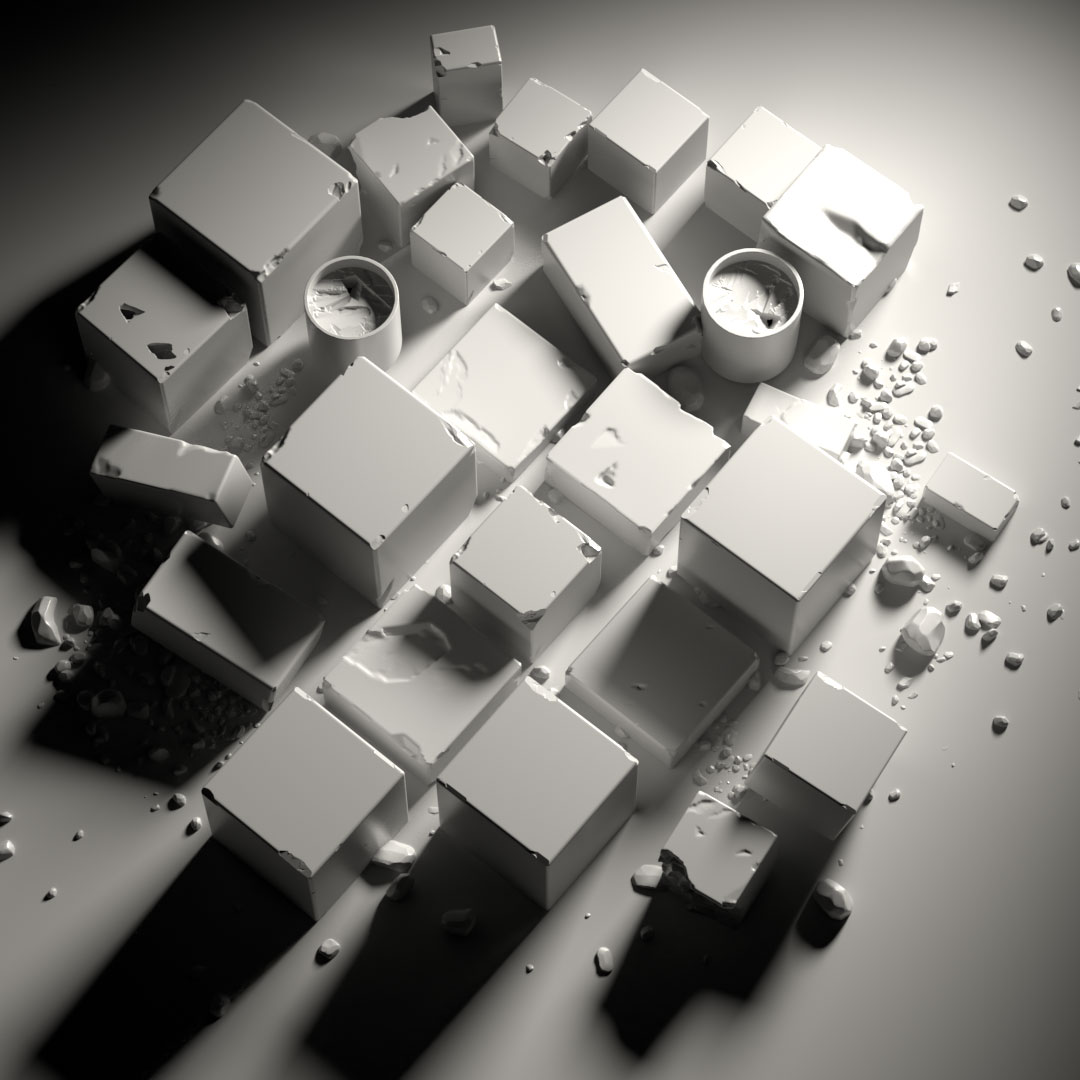
One of the many test for the final object placement. As light source, just a flat, white, ambient light.
Part #4: Lighting
I roughly positioned a spotlight on the top-right to create the desired lighting scenario and replicate the reference image. Then I modified the basic parameters, such as the exposure, color, intensity, and radius.
To understand the distance between the spotlight and my scene, I used a straightforward trick: looking at the reference shadows, I noticed they were parallel. It means the light is far away, just like it happens with our Sun. I also turned off the ambient light to get a dramatic shadow at the very left side of each box.
TIP: Remember that shadow will blur faster if you increase the size of your light and if you move it lower.
The lighting phase took probably less then 5 minutes. I turned on the raytracing option (top-right in the viewport) to get this preview.
Part #5: Materials
The next step was applying materials. I decided to test the Adobe Substance 3D Assets website since thousands of premade smart shaders are ready for download. I didn’t pay too much attention to colors, but only to the type of finish (mainly concrete and stones).
I then changed the colors by picking the RGB value from the background photo. Pretty easy and fast. Avoiding too bright values is important since render engines don’t work well with close-to-white diffuse colors.
TIP: Check their size when downloading shaders from the Substance 3D library. If you work with fully procedural materials, no problems – but if you go for the ones with bitmaps/photogrammetry, be aware because the final file size can be huge!
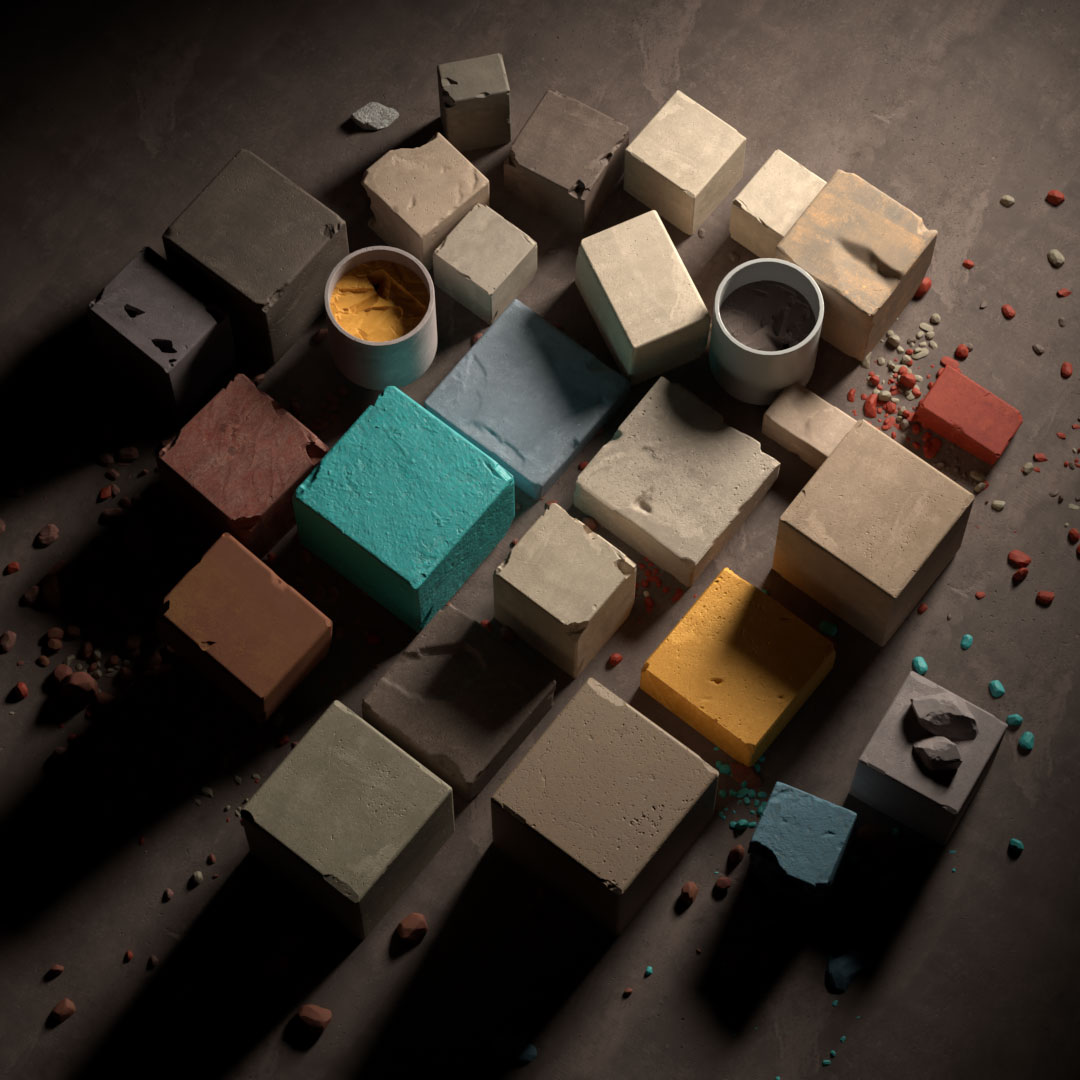
I applied different types of concrete and stones materials, duplicating them and changine the diffuse color.
Part #6: Rendering & Post
Rendering the final scene is trivial; you set up a file size, a path, and a file type and hit the render button! A 1024px took a few seconds. Then I opened it in the new Adobe Photoshop Beta, eager to test the new Generative-fill functionality.
I’ve made many tries, some of them I keep, some not.
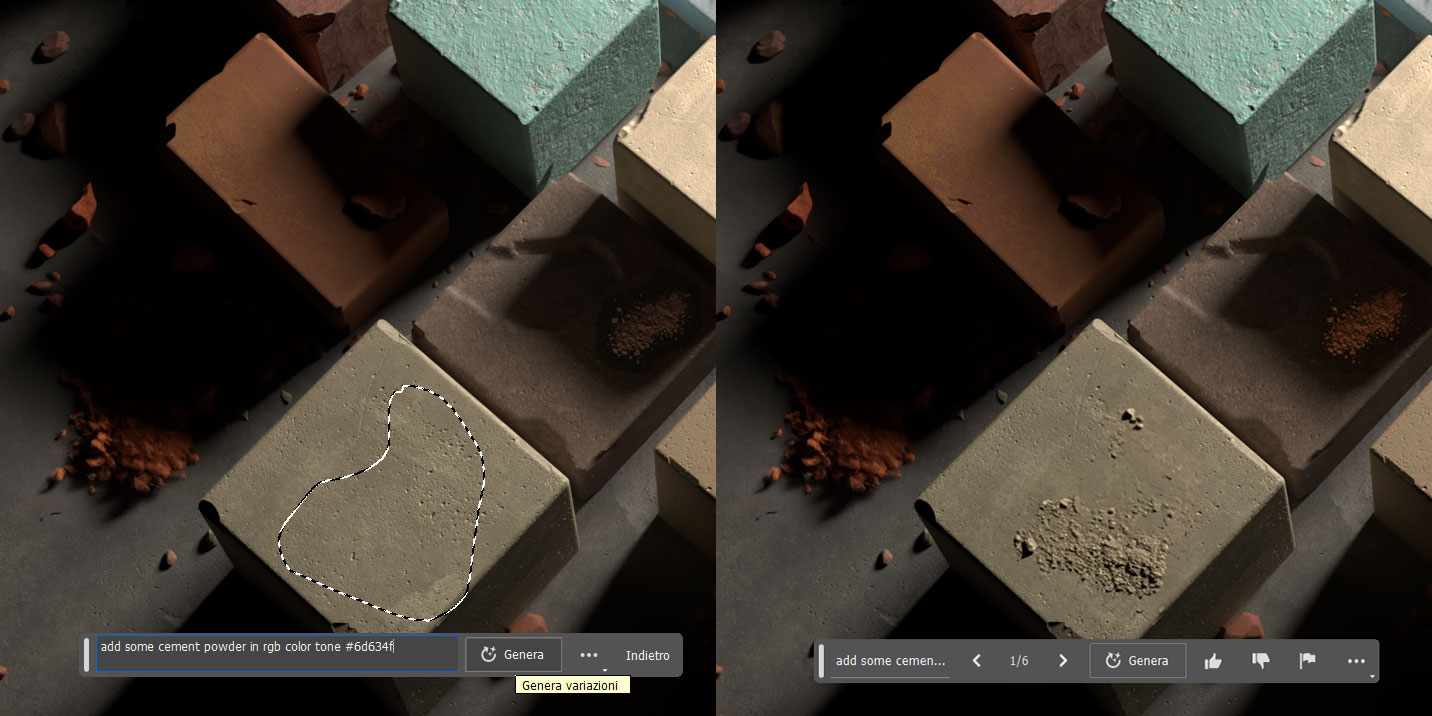
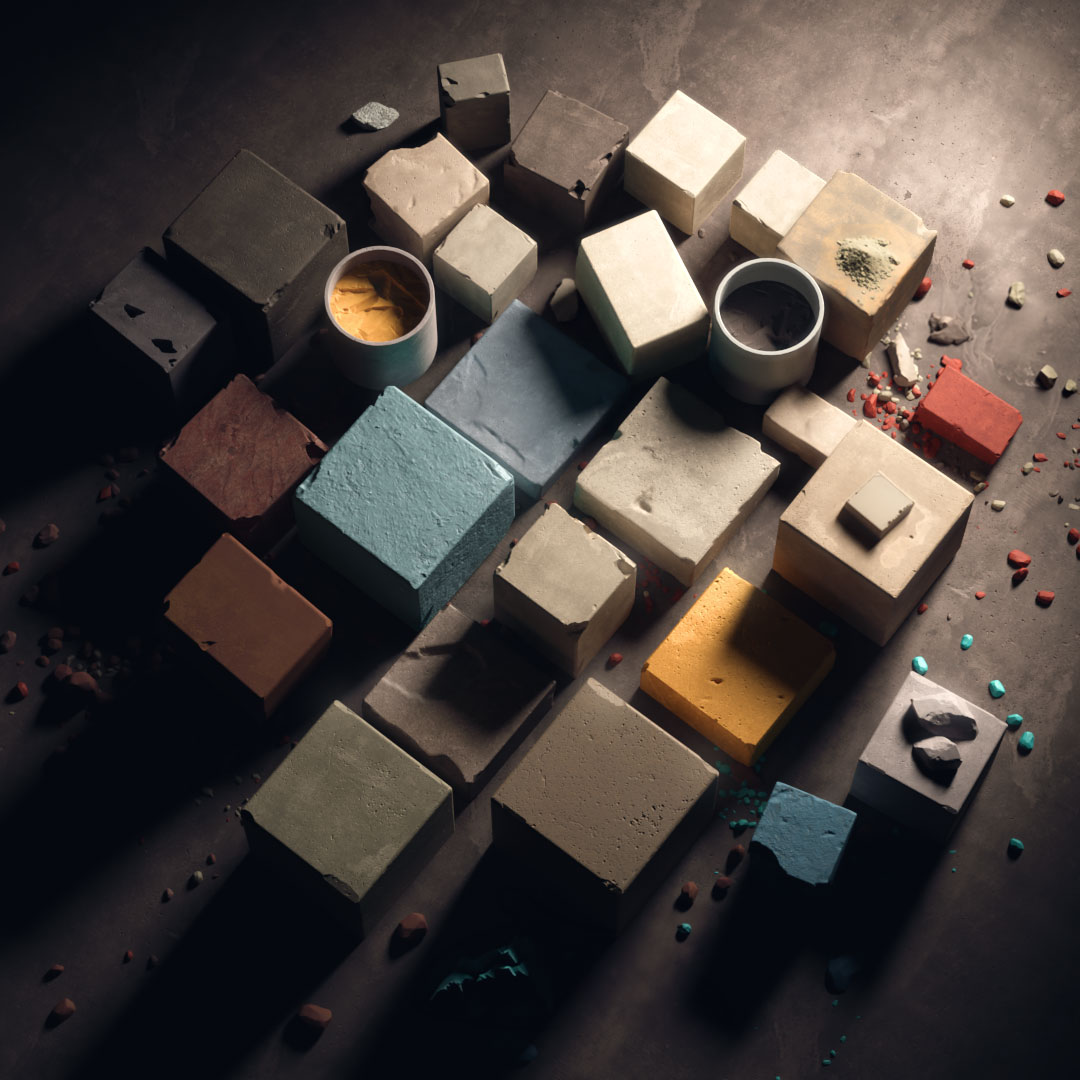
Adding powder and dust was a little bit too much for my first experience with Substance Stager, so I used the new Generative Fill option in Photoshop. This is mind-blowing!
As usual, I’ve done some color corrections and some glow on the brightest areas, and I painted a big, soft specular on the floor to mimic the original image.
I can call this one done; I’m pretty satisfied with the result, even if it lacks small details. I had fun with Substance Stager, an excellent tool in my personal inventory. I hope you liked this quick look at this software; now it’s your time to try it!